Consider how many times a car door opens and shuts over the years. Metal fatigue sets in, and worn car and truck door hinges can cause the door to sag, making it difficult to open and close properly. Rusted hinges can squeak, and if left unattended, break. Hinges are composed of four parts: the body-side hinge frame, the door-side hinge frame, the hinge pins, and hinge pin bushings. All four of these are wear points.
To fix a sagging door, you can either replace the whole hinge or just the pin and bushings. Usually all you'll need to do is replace the pin and bushings in one or both hinges. Extreme wear, however, can cause the hinge itself to wear and allow movement. We'll show you how to replace the whole hinge and just the pin and bushings in most vehicles.
This is a good project for new DIYers
-
Open the door and support the middle with the jack and a block of wood. Do not lift the door; simply support it. If the door sags quite a bit, lift it some and support it with the jack stands at or near the proper height. If possible, open the window and help support the door with a rope tied to a tree, rafter beam, or the like. This helps prevent the door from flopping around as you work on it.
-
Use the hammer and a long punch to drive the old hinge pins out. One will go up and one will go down. OEM pins will have a clip that secures them in the hinge. You can pry it off either with a small screwdriver or pliers, or simply drive it off as the pin is driven out of the hinge. A little penetrating fluid will help here.
-
Carefully pull the door away from the body. Use the old hinge pin to drive the old bushings out of the hinge. Keep an eye on any wiring harnesses for the door.
-
Slide a washer onto the bolt, followed by a new bushing with the flange (wider) side toward the washer. Insert this assembly into the hinge, paying attention to the direction of insertion/which side the flange is on. Place the other washer and the nut onto the end of the bolt. Pay attention here because one opening is wider than the other and requires the larger bushing.
-
Draw the new bushing into the hinge by tightening the nut. Stop tightening when the gap between the flange and the hinge is about 1/8 inch. Watch the bushing closely as you do this to make sure it goes in straight.
-
Lightly tap the bolt head with the hammer to continue driving the bushing into the hinge. Remove the nut and bolt and finish driving the bushing with the hammer until the flange contacts the hinge.
-
Repeat this process with the other bushing. Remember that one bushing will face up while the other faces down.
-
Lightly lubricate the hinge pins and drive them into the bushings/hinge all the way with the hammer. If the new door hinge pin kit came with retaining C-clips, use a socket slightly larger than the pins to drive them on. C-clips can simply be pushed onto the hinge pins, while cotter pins are pushed through the hole in the pin and the legs are spread to lock them in place.
-
Check your work by opening and closing the door.
-
Open and support the door as above. Use a pencil to outline the hinge as much as you can on the body and door. Spray the hinge bolts on the door and body with penetrating oil.
-
Using a wrench or ratchet and socket (or both depending on actual space constraints), remove the bolts securing the hinge to the door.
-
Remove the bolts securing the door hinge to the body. You will need a socket and ratchet with an extension. A swivel or universal socket with a rubber band or piece of tape wrapped around the pivot is ideal for this. The rubber band or tape stiffens the pivot and allows you to place the socket on the bolt head more easily. Remove the defective hinge.
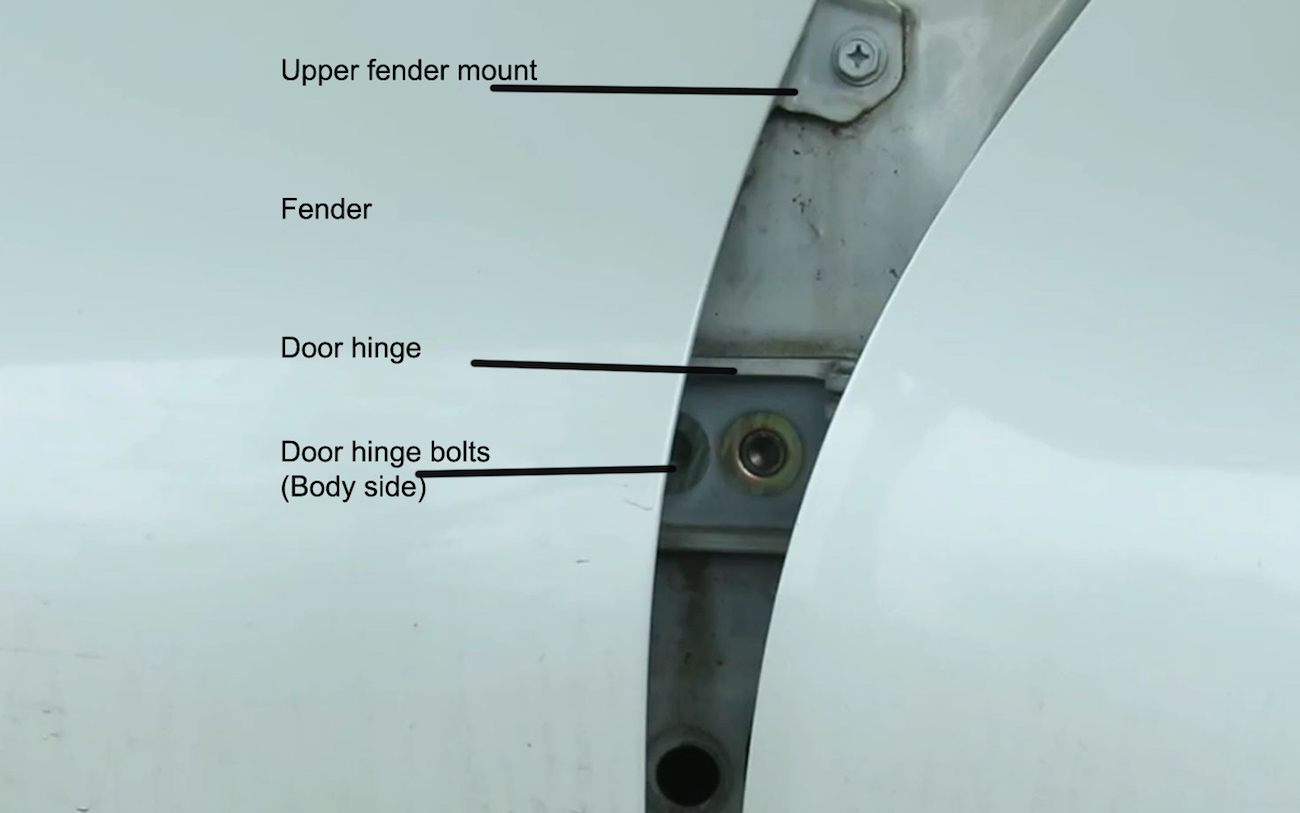
Source | Mike Aguilar
-
Install the new hinge, leaving the bolts snug. Make sure to color within the lines you drew. Leave the bolts loose enough that you can move the door up and down and in and out during adjustment but tight enough that it doesn't shift by itself.
-
Remove the jack and stands and open and close the door, checking alignment and fitment all around.
-
Adjust the door as necessary. Although this can be time consuming and often frustrating for the uninitiated, it is a straightforward task. The latch end of the door can be lifted or lowered to straighten the vertical and horizontal gaps between the body and door. The door can also be “twisted" (pushed or pulled at the top and/or bottom) to align it flush with the body.
-
Once the door is properly aligned, tighten the hinge bolts on the body and door. The frustrating part comes when you get one alignment parameter adjusted properly but the other falls out when you open the door to tighten the bolts. Getting the hinge bolts snugged just right helps with this. So does a helper to hold the door for you.
Open the door and wiggle it up and down while closely observing the hinges and pins. If the pin moves inside the bushing, or you can see that it's cracked/broken, the bushings need to be replaced. We normally replace the pin and the bushings at the same time to ensure proper fit. If the bushing moves inside the hinge instead of the pin moving inside the bushing, the holes in the hinge are worn and the hinge needs to be replaced. Additionally, the presence of cracks, missing pieces of the hinge, and excessive rust are also signs that the whole door hinge needs to be replaced. This is a pretty common problem on a big two-door like a second- or third-generation Camaro, where the doors might weigh 80 pounds each.
You may need to remove the “door helper" or spring for this step.
ATTENTION: GM OWNERS
Owners of most GM products, especially trucks, will need to use the Dorman-Help Door Hinge Spring Tool to collapse the door hinge spring, at least for installation (it pops out with a screwdriver easily) of the door hinge spring.
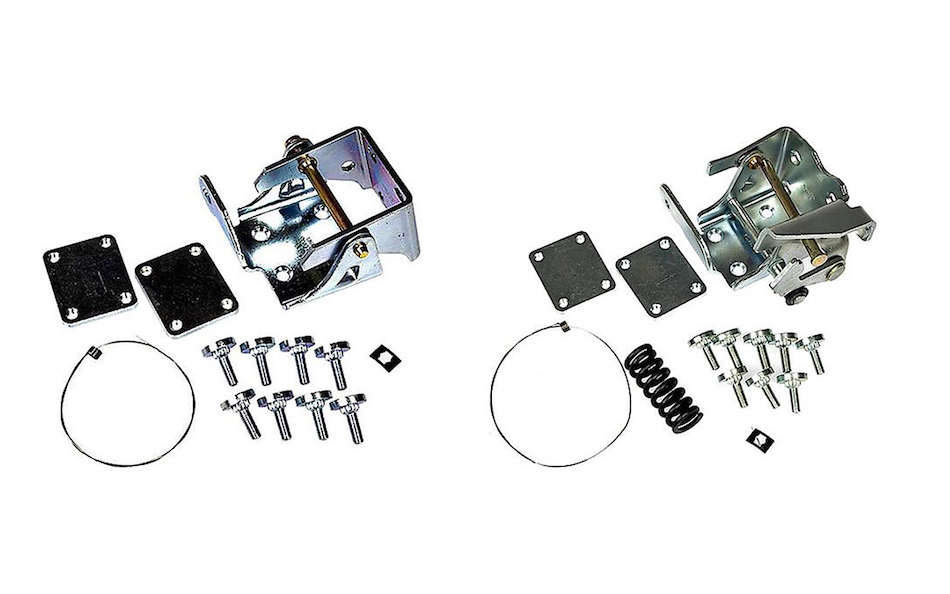
Source | Advance Auto Parts
In rare cases, the whole door hinge will have to be replaced, either because of excessive wear or weakening of the hinge.
For bolts that are especially hard to reach, remove the wheel well liner by popping any clips and removing any screws securing it to the fender. Just be sure to replace it when you're done. This is also a great way to get at these bolts to tighten them during adjustment.

