It can be intimidating to think about taking your vehicle's suspension apart. When you get right down to it, however, it’s probably less complicated than assembling an Ikea bookcase. Doing your own suspension work can also save you many hundreds of dollars. But it's important to understand a few things before you dive into this project. Here's what to know next time your suspension needs a shot in the arm.
Note: This project isn't intended for the newbie DIYer. Try starting with a few basics like these or changing your own oil to get comfortable under the hood before tackling suspension jobs.

Source I Mason Jones
Why replace shocks and struts?
Struts are an integral component of your vehicle’s suspension system, and kind of important if things like handling, stopping, and riding in comfort matter to you. A way to visualize struts is simply to picture a shock absorber and coil spring combination, working together to smooth out bumps in the road. Improved handling, shorter stopping distances, and a smoother ride are the benefits you realize from changing struts. Air shock absorbers improve ride quality by limiting suspension movement. They also have a direct effect on handling and braking. Worn shocks can make for an uncomfortable ride, but, more importantly, they can compromise your ability to control the vehicle. So, it's important to keep shocks ship-shape.
How often should I change my shocks?
In general, you should inspect your air shock absorbers every 12,000 miles. Signs that your shocks may need attention include:
- Diving during heavy braking
- Wandering on the highway
- Hitting bumps hard
- Leaking shock fluid
Struts are wear items that absorb countless bumps in the road, which is why replacing struts on a car is recommended every 50,000 miles.
What's the difference between shocks and struts?
The words "shocks" and "struts" are often used interchangeably, but they aren't the same thing. Each wheel on your car has either a shock or a strut, never both; although, a vehicle may have struts in the front and shocks in the rear. Consult your owner's manual or speak to an Advance Team Member to be sure.

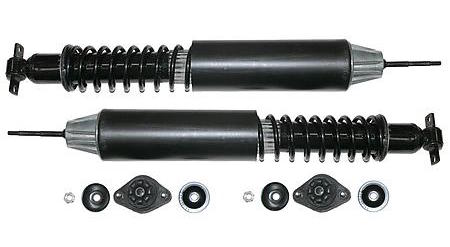
Vehicle shocks

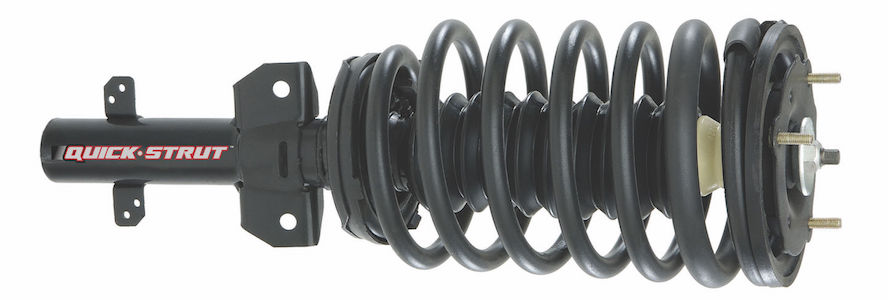
Vehicle strut
How to replace shocks and struts
We'll take you through the basics below. If you want a full parts list and more detailed steps, check out these how-to's on replacing shocks and replacing struts.
1. Check whether you need a spring compressor
On many cars, the struts/shocks and springs are interrelated or integrated, which means you may need a spring compressor to remove the springs. This is serious business: if you don’t remove the springs properly, they can pop off and damage anything in their path, including yourself. You can rent a spring compressor, but make sure you understand how to use it before you do. If there’s one part of the job that could come back to bite you, this is it.
2. Securely raise one side of the car
If you’ve got access to an actual lift, great. Driveway DIYers everywhere are jealous! Otherwise, you’ll want to jack up one side of the car at a time, just high enough to get a jackstand under the jack point behind the front wheel.
3. Remove the wheel and extract the old shock/strut
The wheel is easy, of course, but getting the absorber out of there may take some elbow grease. If a spring compressor is required for your job, this is where you’d use it. There should be three bolts holding the bottom of the strut in place, which you can loosen with a socket wrench. Up top, the strut extends inside a strut tower with a serious bolt inside the engine compartment. You may need to use an impact wrench with a socket extension to get it loose.
Pro Tip: You may have to hold up the lower control arm if it starts to drop once you undo the lower bolts. Keep an eye on it as you go, and be ready to slide your jack underneath for support.
4. Install the new shock/strut
With any luck, this will be as simple as reversing what you’ve done so far. You can use a torque wrench to tighten all bolts to OEM specifications or take the “good and tight” approach. DIYers swear by both methods, so we leave it to your judgment. Once the new absorber is mounted and tightened, put the wheel back on, lower the car, and simply repeat steps 2-4 for the other side.
5. Don’t forget the test drive!
When you do work on a vital suspension system, you’ll definitely want to take the car for a slow diagnostic drive afterward. Don’t go careening along a winding road just yet. Take a nice slow spin through the neighborhood, perhaps wiggling the steering wheel now and then to test transient response. If everything seems good to go, consider the procedure a success! Remember that this article is intended as a very broad project overview. Our how-tos on replacing shocks and replacing struts go into more detail.
Did you complete this project? Share your tips in the comments.


