
Source | Advance Auto Parts
This step-by-step guide will help you change your brake rotors in no time.
How will you know if your brake rotors show signs that it's time to replace them? Have you felt a pulsing brake pedal or heard squealing and scraping noises? More often than not, you'll replace your brake rotors when changing your brake pads. You can get your rotors refinished at a shop if they aren't warped or worn too thin, but either way, you'll have to take the wheels off and you may as well kill two projects with one wrench if you get our drift.
Note: Do you need to replace your brake pads and rotors? If so, head over to our more detailed guide that also includes how to replace brake pads.
We've included a few tricks that make this and future brake rotor jobs much easier. In general, removing worn and rusted rotors is a pretty straightforward process, and your car will be stopping on a dime again before you know it. Read on for the tools, time, and steps needed to replace brake rotors.
This is a project that needs some know-how
-
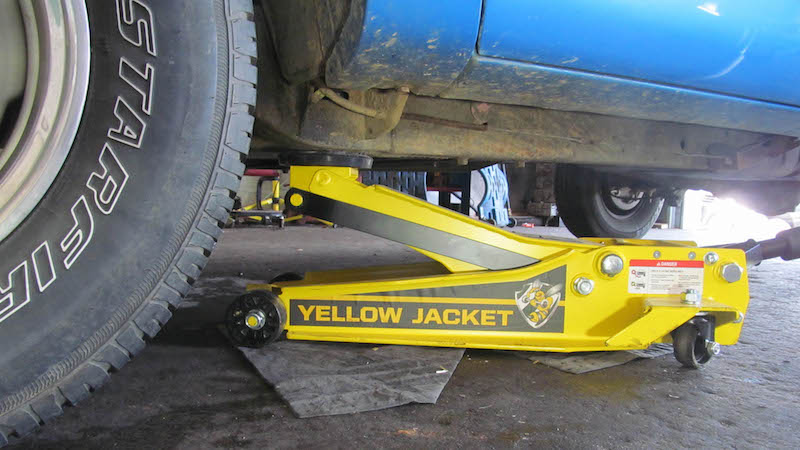
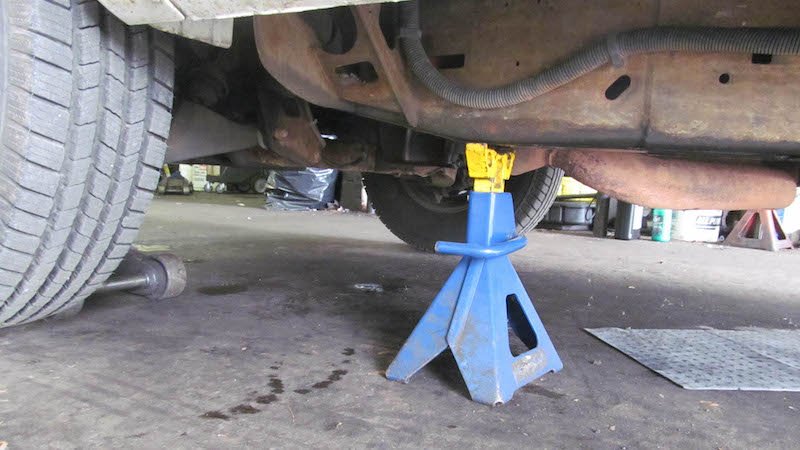
Slightly loosen the wheel lug nuts. Then jack up the vehicle and secure with jack stands and wheel stops.

Source | Advance Auto Parts
-
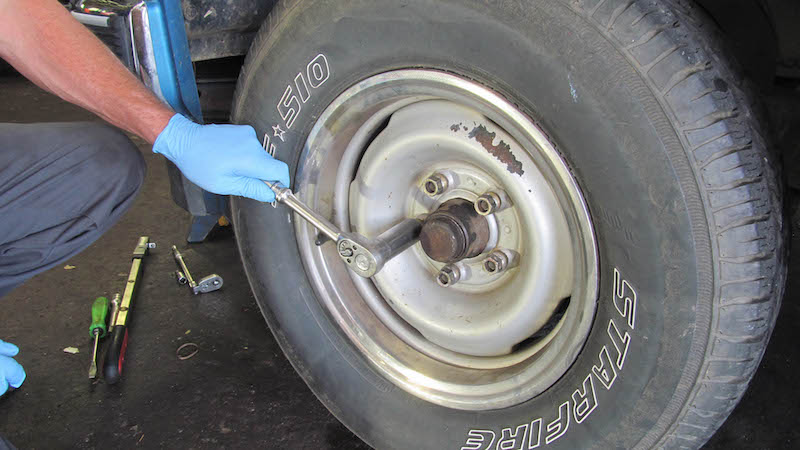
Depress the brake pedal 20 times to release residual pressure. Then remove the lug nuts and take off the wheel.
Source | Advance Auto Parts
-
Unbolt the two brake caliper fasteners, located on the rear of the caliper. Start with the bottom fastener to make removing the brake pads easier, since the caliper will open upwards. Take out the brake pads and then unbolt the top caliper fastener. Remember to use WD-40 or PB B'laster spray if the bolts are rusted on the caliper. You can use a hammer to impact around the stuck bolt to loosen it as well.
Note: Some caliper fasteners require special tools when removing, such as star wrenches or Allen wrenches. You can quickly tell when you look behind the caliper and see the two bolts.
Source | Advance Auto Parts
-
Next, unbolt the caliper from the two bracket bolts on the steering knuckle. These bolts are larger and you might need a breaker bar or long wrench to get the leverage to loosen them. Remember your sprays if the bolts are rusted or corroded.

Source | Advance Auto Parts
-
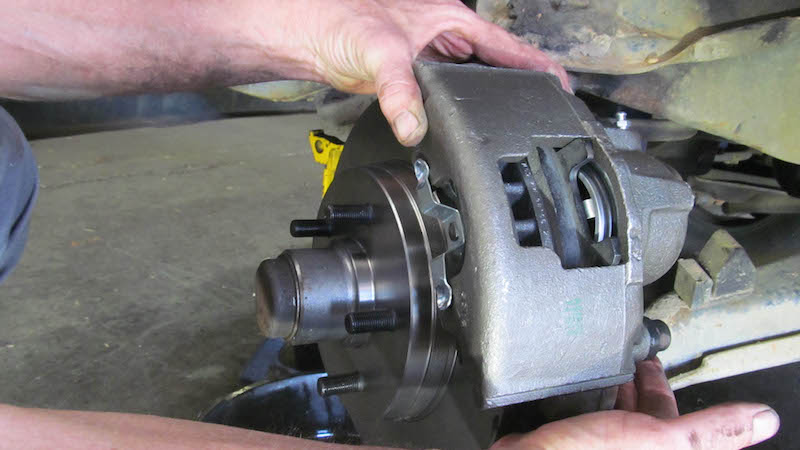
Remove the caliper from the rotor and hang it from the vehicle—you can usually hang it from the strut—using heavy wire or a bungee cord. Never allow the caliper to hang by the brake line because this can damage the brake line and then you'll have another repair on your hands.

Source | Advance Auto Parts
-
Now it's time to take off the brake rotor from the wheel studs. If it won't budge because of our friend rust, then take your hammer and impact the top and bottom of the face of the rotor, back and forth, a few times to loosen it. After you remove the rotor, put anti-seize lubricant on the axle hub between the wheel studs. This will make your next brake job a breeze.

Source | Advance Auto Parts
-
Match up your new rotor with your old one to check that the diameters are the same. Then clean both sides of the new rotor surface with brake cleaner spray to take off any oil or residue. (Oily brakes do not stop well).
If you're changing brake pads as well, now's the time where you install new brake pads.

Source | Advance Auto Parts
-
You may need to compress the caliper piston in order for the caliper to slide back on the rotor. Use a c-clamp or caliper spreading tool—borrow one for free at your local Advance Auto Parts. If you use a c-clamp, position the clamp on an old brake pad and the back of the caliper's piston, then tighten. This will ensure that the piston recesses into its cylinder evenly.
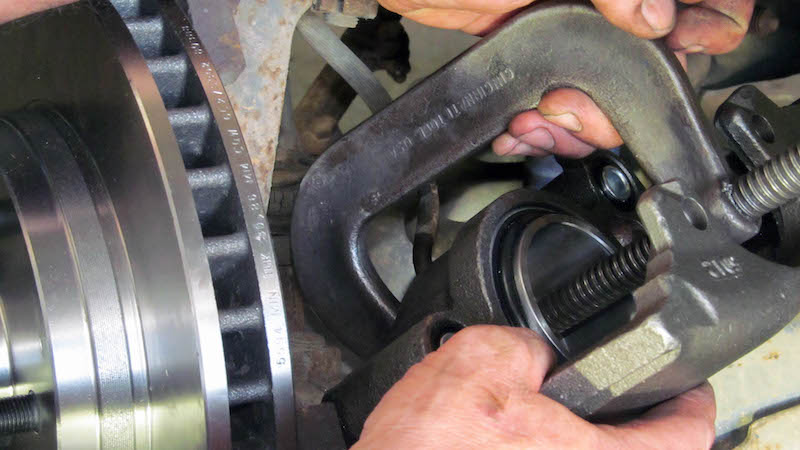
Source | Advance Auto Parts
-
Slide the caliper back on the rotor. Put a little removable threadlocker on the steering knuckle bolts. This will make sure the bolts stay locked even with vibration and you will still be able to remove the bolts next time. Refer to your vehicle guide to torque the bolts correctly.
Source | Advance Auto Parts
-
Clean the caliper guide pins and then grease them with new caliper lubricant before you slide them in. This will allow the caliper and brakes to function properly, even under high temperatures. Refer to your vehicle guide for the correct torque—don't over-tighten!
Source | Advance Auto Parts
-
Add brake fluid to your reservoir and check the brake pedal and bleed system if necessary (i.e., if you changed brake pads or opened the brake bleed valve). For only changing rotors, you can skip this step if you haven't opened the bleed valve or reservoir.
-
Reinstall the wheel and test your brakes before hitting the road.
If your old rotors show signs of bluing, glazing, or cracking, or if you've noticed a pulsation or shimmy while braking, it's time for new rotors.
When removing worn and rusted rotors, some WD-40 or PB B'laster spray and a hammer will make your life much easier.
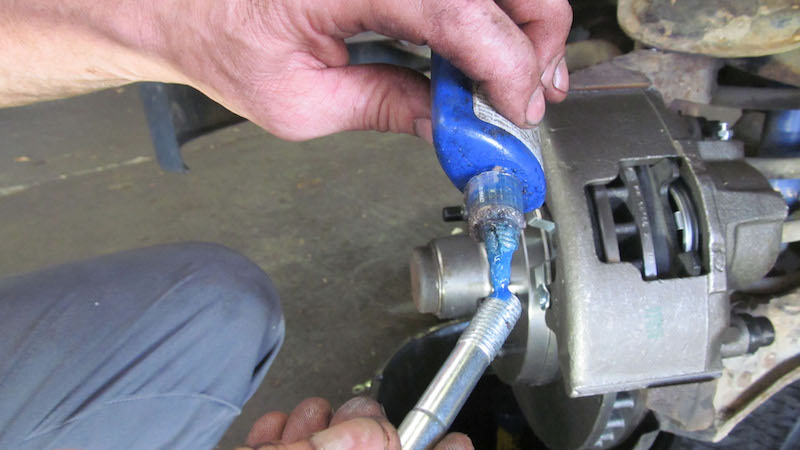
Not all greases are created equal. If you are using caliper lubricant, make sure you use a high-temperature grease that's approved and rated for this particular job.


