Let's say you just picked up a classic project, barn find, or auction car. Unfortunately, it's a basket case and the brake system needs an overhaul before it can be driven. If all the maintenance you've ever performed is just oil changes, this can look like a daunting task.
The same goes if you're looking to take on some of the maintenance tasks on your daily driver. Working with a brake system can seem like a big job but it doesn't have to be as complex as you might think. After all, especially on an older ride, the brake system is pretty straightforward and only has so many individual systems, components and parts to concern yourself with.
To upgrade your wrenching skills as you upgrade or maintain your ride, refresh your memory with the basics, and then have a look at everything else you need to know about working on your entire brake system. In this article, we'll cover:
- Commonly used tools
- Brake pads
- Brake rotors
- Brake calipers
- Brake fluid
- Brake drums
- Brake hoses
- Brake master cylinder

Gather Some Tools
To perform any brake maintenance tasks, there are a few tools you'll need before getting started. First up is a jack and stands, as you can't really do much without getting the wheels off the vehicle in a safe manner. They're really simple tools, but read the instructions if you're unsure. It's also a good idea to get a creeper and a rollaround seat, because they really beat lying under your car on a sheet of cardboard in the driveway.
Then there's the lug wrench, the single most affordable way to remove wheels, outside of a hard landing in rally racing. Shop towels, gloves and eye protection are a great idea, because brake cleaner is super effective at cleaning brakes, but it's nasty stuff that you don't want accidentally getting in your eyes. Pro tip: don't breathe it either.
Then it's just a few more of the basics, like a good set of wrenches and maybe a torque wrench. Line wrenches are also a good idea—they're designed with more contact points for a positive grip that won't damage and round off soft brass or aluminum flare nuts and fittings. After you've collected your tools, gather some friends and hopefully we're not being redundant there, right?

How to Change Your Brake Pads
Changing out brake pads is one of the easiest maintenance tasks you can perform, behind only swapping out an air filter or performing a DIY oil change. When you press on the brake pedal, hydraulic pressure pushes a piston in the caliper, forcing the brake pad against the brake rotor. That friction contact is what slows the vehicle, but this action causes wear on the brake pad and they eventually need replaced. Generally, expect 40,000 to 60,000 miles out of a set of pads, or longer for hybrid vehicles. You can swap both sets of front pads in under an hour if you're quick, or two if you take your time. If this is your first time, we'll walk you through it.
You'll need the basic hand tools above, and maybe a caliper tool and brake bleeder kit to make it quicker and easier. Steps vary slightly by the vehicle, but generally consist of removing the wheel, removing the caliper, and pulling out the pads. Remember that you'll also need to fully recess the pistons back into the calipers before installing the new pads. You can do this with a large C-clamp, leaving the old pad in its cradle with one jaw of the clamp on the back of the caliper bracket and tightening down the movable jaw on the pad. It's worth noting that some rear calipers require a special tool to push the piston in. These caliper pistons have notches in them for the tool to grab onto.
Remember to remove the lid from the master cylinder, as this will also push fluid back up the brake line.
It's really that simple. Check out our how-to for a more detailed walk-through. Protective equipment is important even for this simple task, using gloves and eye protection, and you'll want a water hose nearby as brake fluid is hazardous stuff to humans and vehicle paint. Check out the different kinds of pad compounds, and go with the manufacturer-recommended option, or feel free to upgrade to a better pad.
Detailed guide: Replace your brake pads.

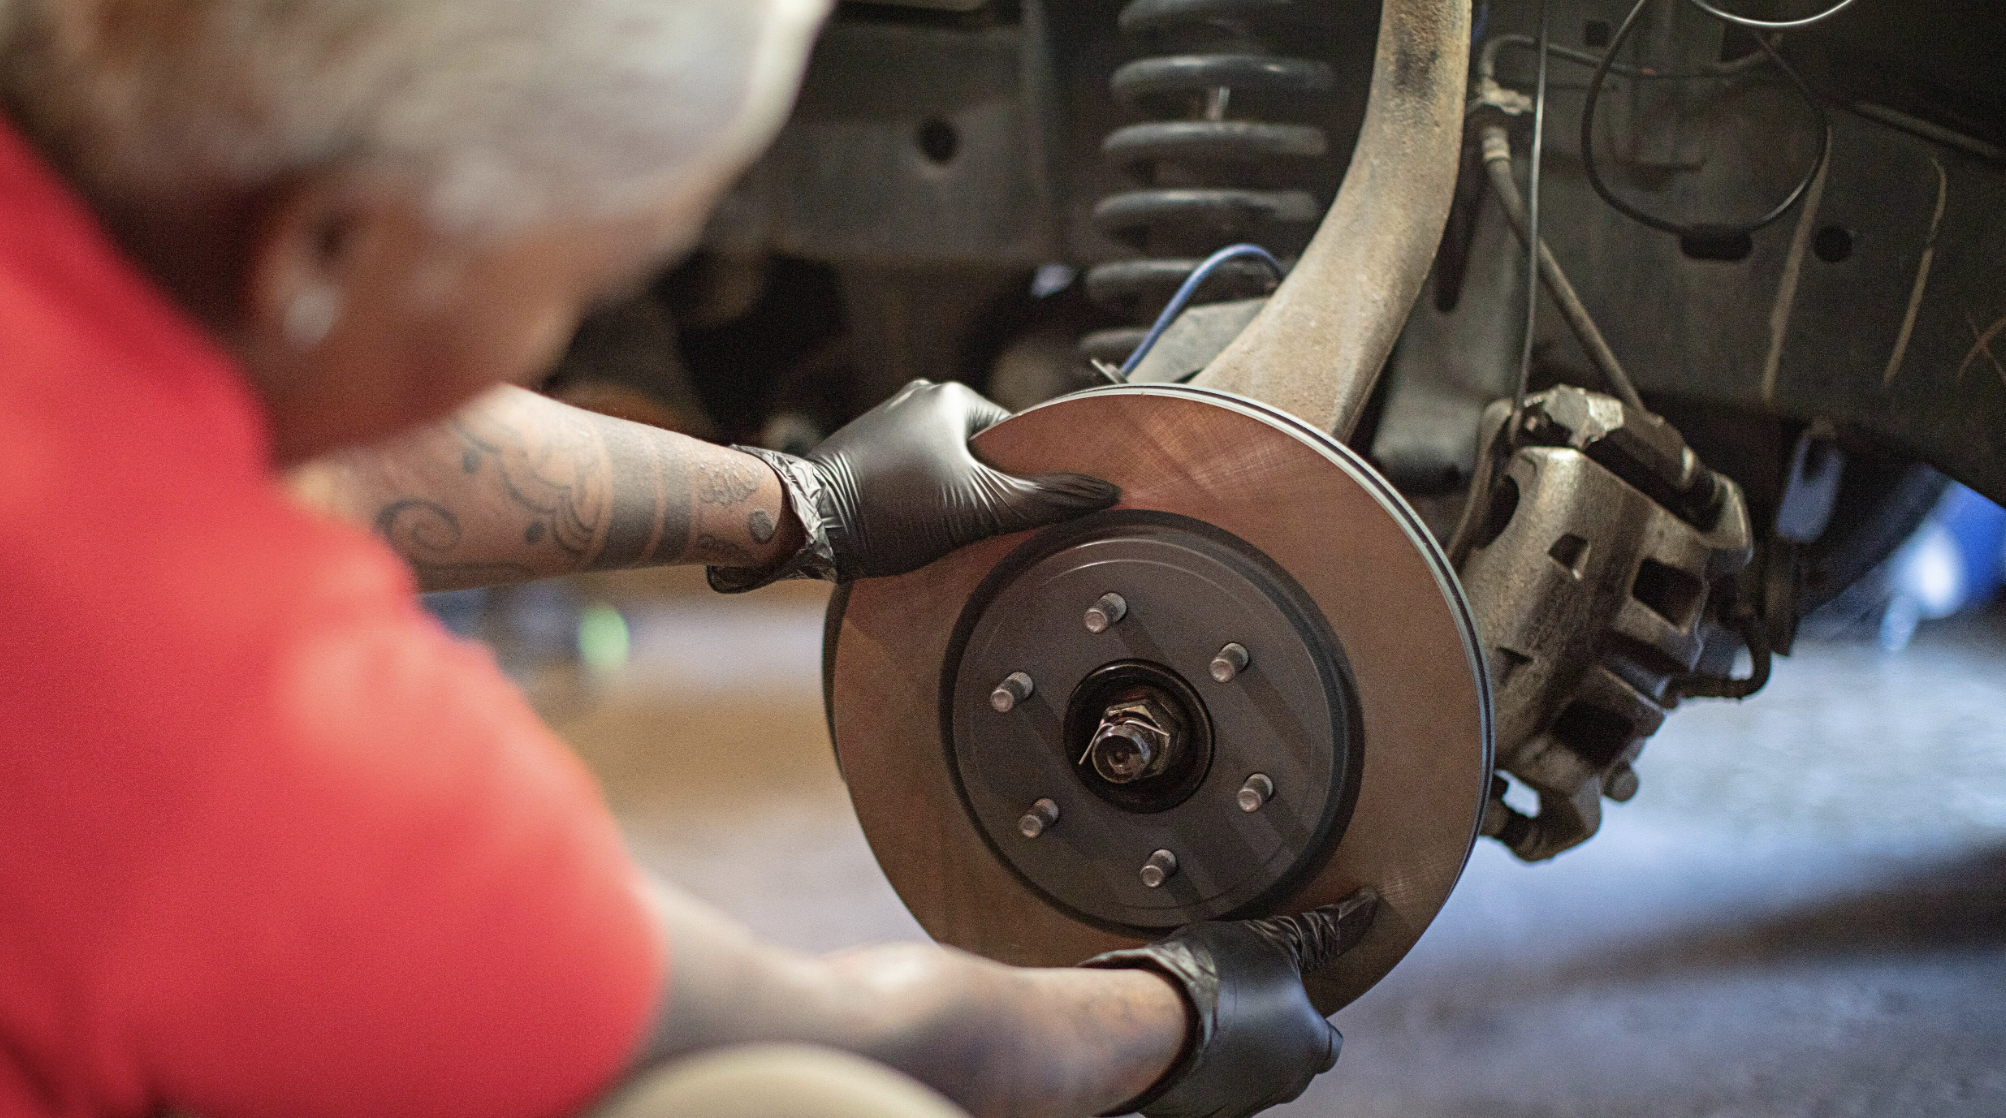
How to Change Your Rotors
Brake rotors are simple devices, made of anything from cast iron, to various types of steel, aluminum or ceramic. They're bolted to the spinning wheel hub, and as the pads contact the rotor surface, the vehicle slows down, not unlike the handbrakes on a bicycle. Like the pads, rotors are wear items that don't last forever. Since you've got those brake pads off in the step above, you might as well change the brake rotors too. This needs only a few additional tools, like a breaker bar or a rubber mallet for encouragement, and an extra few minutes to pull the caliper off after pulling the brake pads.
Why take this extra step when it seems like just the pads are worn? There are numerous benefits of replacing pads and rotors at the same time. First, this prevents premature wear on your new pads, coming into contact with beat up and worn out rotors. Second, new rotors mean you won't have shakes or pulses in the brake pedal when slowing, caused by rotors that aren't 100% flat anymore. Finally, you won't have to tear apart the brake system again for quite a while if you do it all at once, which is a better option than doing pads now and having to replace rotors in six months.
If you regularly expose your brakes to high heat, like when descending long mountain grades or taking to the track, look for two-piece iron rotors with an aluminum “hat" that will prevent rotor cracking during heavy use. Another affordable upgrade is drilled and/or slotted rotors that quickly dissipate heat. Otherwise, for a daily driver, factory replacement rotors and pads will restore your braking performance to factory new.
Detailed guide: Replace your brake rotors.

Replace Brake Calipers
Brake calipers are essentially just heavy duty clamps, traditionally made out of cast iron, or aluminum since around the turn of the millennium. Calipers and their pistons are what translates the hydraulic brake fluid pressure into movement. Step on the brake pedal, and fluid pressure forces a wide piston against the pads, pushing them into contact with the rotating rotor. Unlike the pad or rotor, the caliper has a few internal parts, meaning it, too, can wear out with use and need replacement. Maybe it's leaking brake fluid or is frozen in place due to corrosion, but replacing calipers should only add a few minutes to your task of replacing brake pads.
When you're already working on your brakes, removing the caliper is a matter of one more bolt removed with a ratchet. Replacing calipers does allow air to enter the system, though, so bleeding your brakes will be necessary.
Pro Tip: Don't use locking pliers to block off a hose in an effort to dodge a brake bleed job. Crimping hoses can cause internal damage that you won't be able to visually detect and can lead to more repairs down the road—including that brake bleed you were hoping to avoid.
Understanding and Changing Brake Fluid
The entire brake system works because of hydraulic brake fluid. Brake fluid is a non-compressible substance, which is why the more you step on the brake pedal, the faster the vehicle stops. The liquid doesn't compress, so pressures increase as the pedal travels, applying more and more force on the calipers, pads, and rotors. Brake fluid is the amplifying connection between your foot and the brakes, instead of having to overwork your feet on the brakes, like Fred Flintstone.
Like any part of the brake system, the fluid can wear out too. Change out the brake fluid anytime the brake pedal feel is “spongy," you've overheated the brakes, opened up a brake line for any reason, or if the fluid had any kind of exposure to air. If you're wondering about the condition of your brake fluid, pop the top off of the master cylinder reservoir and scrape a flat-blade screwdriver along the bottom of the reservoir. If it comes back with any kind of gunk on the screwdriver blade, your fluid is nasty enough to warrant changing it.
Before buying brake fluid, there are two things you want to pay attention to. First, note the type, if you have glycol- or silicon-based brake fluid. Silicone-based fluids are mainly for classics, without ABS. For a more modern ride with ABS, get the glycol-based fluid.
Second, you might have seen Advance sells DOT 3, 4, and 5 fluids. Which do you need? The simple answer is: consult your owner's manual. The too-long answer is: in general, the higher the number, the higher the brake fluid's boiling point. Boiling brake fluid causes it to turn to a gas, which is very compressible. If you've ever overheated the brakes and had the pedal shoot to the floor with no effect, it's because the hydraulic pressure is attempting to squeeze a gas, which is about as effective as an airplane trying to land on a cloud.
If your manual says DOT 3, you can go with 3 or 4, but if it says your system requires 4, you can't downgrade to 3. Similarly, if your specs call for DOT 5, use that fluid exclusively and don't mix it with DOT 3 or 4. The modern glycol equivalent is the oddly named DOT 5.1. No, it's not a tenth better than DOT 5, just a different name so owners don't mix fluids.
Detailed guide: How to do a brake fluid change.

How to Change or Upgrade Brake Drums
Interestingly, it's still rather common to see a brand new car with brake drums. This is mainly due to the lower cost of producing the design, and because it often doubles as the parking brake, further reducing costs over having to assemble rear rotors. Also, the vehicle's weight distribution, and simply the inertia of traveling forward at speed, means the front brakes will need more braking power and heat-shedding ability than the rear. Manufacturers do care about safety, so front brakes are the more fade-resistant rotors.
Just look at the Nissan Versa, currently the cheapest new car sold in the USA, and you'll notice it takes a lot of engineering to make it that affordable. Drum brakes work by using hydraulic pressure to expand the brake shoe, putting the lining into frictional contact with the rotating brake drum, which slows the vehicle. The bonus here for owners with drums is longevity. While you're burning through pads every other year or so, your drum brakes could easily last over 100,000 miles.
Maybe you've got drum brakes in back, or your classic is nearing retirement age (60+ years old) and has drums up front. Servicing drum brakes is almost as easy as replacing pads, but the components look very different. Maybe they need an adjustment, or it's time to replace the brake shoes or wheel cylinders. If you've got a classic you love to actually use out on the road, you'll enjoy it even more after swapping the front or rear drums for rotors.
Here's something to remember about drums, though: all the components in the drum brake setup are subject to extreme heat and metal fatigue. If you need to change the shoes, it's a good idea to get an entire drum brake kit and change the springs, hold-downs and all other parts associated with the job. Just changing the shoes themselves is false economy.
Detailed guide: How to swap brake drums for rotors.
How to Replace Brake Hoses
The brake system transfers fluid from the master cylinder to each wheel's brake via steel or flexible copper-nickel tubing called brake hoses. Flexible hoses are necessary near the wheels where the most movement occurs. In '70s action movies, the bad guys always cut the good guy’s brake hose using one slice of a $2 pocket knife. Brake hoses are generally tougher than that, but they do wear out over time.
In fact, they’re more likely to fail from an internal restriction or a crack or leak before the steel brake lines. Regular inspection of the brake hoses is a good idea when you already have your wheels off. If you do find a crack or a leak, replacing that hose – and probably the other three for good measure – should be done before driving anywhere else.
It’s also worth noting that symptoms of a bad brake hose can mimic other brake system problems. If you experience a mushy brake pedal or abnormal braking, always do a careful inspection before assuming one component, like the caliper, is at fault.
Fortunately, once you’ve established the hose needs to be replaced, it’s not a difficult task, and you only need a couple of wrenches. You’ll need a box-end wrench or ratchet to separate the hose from the caliper, and line wrench to detach the hose from the end of the steel brake line. Using a line wrench is recommended because it’s designed to prevent soft metal bolts from rounding off. Tighten the new hose to spec and bleed the brakes.

How to Diagnose and Replace a Master Cylinder
A master cylinder is a major braking component, but it is possible to diagnose and replace one yourself. Despite the impressive name, all the master cylinder does is convert the downward movement of the brake pedal into hydraulic pressure in the brake system.
The pedals are essentially levers that force a piston into the master cylinder, forcing fluid under pressure through the lines. When your brake pedal goes to the floor and the brakes are cold (not the overheating symptoms above), then odds are you're looking at a master cylinder issue. This one is a bit more time-intensive to replace, due to other components that might be in the way, such as the vehicle's air conditioning or exhaust manifold.
Grab a flare nut wrench, ratchet and sockets, a few extensions, and a master cylinder specific bleeder kit. It's mostly as simple as removing the brake lines, and unbolting from the firewall, but a repair manual will have the detailed breakdown.
Detailed guide: How to replace a bad master cylinder.
After each task, be sure to properly bleed the brake system to get any air out. Also look into performance aftermarket brake parts if you regularly tow, drive in hilly/mountainous regions, or have an inkling to hit the drag strip or autocross event.
Let us know in the comments below if you have any questions about maintaining your brake system.