Spring hasn't sprung in many parts of the U.S., but it has started its slow and steady ascent from the south. That means sunnier days, warmer weather, and, more importantly, that it's time to pull those toys out of winter storage and get them ready for action again. This guide will cover the steps you should take to ensure your motorcycles, ATVs, side-by-sides, jet skis and other powersports equipment will be operating in tip-top shape when you head back out this spring.
First and foremost, the key to easy de-winterizing is good winterizing. If you put your toys away properly, they're much easier to get back in good shape when warmer temperatures arrive. But even if you didn't do everything you should have to pack your toys away last winter, this guide will help get your gear into proper running order.

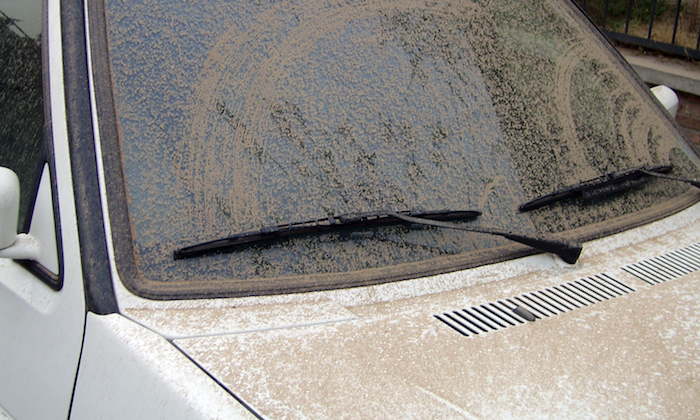
Source | Allar Tammik/Flickr
1. Perform a thorough visual inspection
Don't just glance at the oily bits and assume all is well. Rodents love to crawl into tight spaces and tear up wires and other materials to make nests. Grab a flashlight and take a serious look around your equipment to ensure there have been no critter incursions that might compromise your vehicle's function. Check behind any body panels, inside luggage or storage areas, inside fenders, and inside mufflers and air inlets.
Also have a close look for leaks, both under the machine and around seals and plugs on the drivetrain equipment, and at the suspension dampers. Also check the brake-fluid reservoir, the brake levers or pedals, and the brake calipers or drums themselves.
If you winterized well, you may have covered all of the potential problem areas with plastic bags or other covers. Good for you! You can move on to the next step once you've inspected for all other mechanical points of failure.
2. Change the oil
Even if you put new oil in before winterizing your machines, you'll want to swap the engine oil and, where applicable, transmission fluid before you get down and dirty this summer. Why? Because even when sitting unused, the oils and fluids in your engine and gearbox can separate or become waxy, especially in extreme temperatures, which can dramatically reduce their effectiveness in protecting your machine from wear. This is definitely a case where a few quarts of prevention are worth an entire barrel of cure.
3. Check and/or change the battery
If you put your battery on a float charger over the winter, you'll still want to check its health with a good battery tester to ensure the battery has enough life left to get you through the fun season. If you didn't keep your battery charged over the winter, chances are good that it has gone completely flat and may need replacement.
You'll also want to check the battery for any visual signs of malfunction, like fluid leaking out and corrosion on nearby parts and the battery terminals. With wet cell batteries, you'll want to make sure electrolyte levels are properly topped up with distilled water.
When dealing with batteries, it's important to remember that battery acid is corrosive and toxic, so you should always wear gloves and safety glasses.
Once you've determined the health of your battery, go ahead and charge it if it isn't already fully charged.
4. Check all other fluid levels
Engine and transmission lubrication are important, but coolant and brake fluid are, too. Be sure all fluids are at their proper levels, and if any are especially low, go back over your inspection list to see if a leak is responsible. Consider draining and replacing the fluid entirely, especially if it shows signs of wear or if you haven't replaced it in the past few seasons. This is especially true of brake fluid, which absorbs moisture from the air and loses effectiveness over time.
While you're at it, double-check the oil level, even though you just replaced the oil in Step 2. It never hurts to be sure.
5. Check and replace the spark plugs
Removing the spark plugs to check for rust or corrosion can give you some warning as to more serious problems inside the engine that may have developed over the winter. If you do find rust on the spark plug, use a borescope to look inside the cylinder to verify the condition inside the engine before starting it. Chances are, however, that your engine will be fine — but your spark plugs may not be.
If you notice lots of dark fouling, you could clean and re-install your spark plugs, but they're inexpensive, so replacing them with the proper type (consult your owner's manual and read more about how to tell when they need replacing) is a cheap and easy way to ensure your equipment will start easily and run well all summer long.
6. Check your tires and all rubber components
Even if your toys have been shielded from the cold of winter, the sheer time they've spent sitting can cause rubber parts of all types to develop cracks, flat spots or other issues. This includes your tires, hoses and even handlebar grips.
Once you've made sure everything is in proper condition and replaced anything that seems dry, misshapen or otherwise bad, make sure your tires are inflated to the proper pressure — most tires will lose pressure as they sit, and all tires will vary in pressure based on ambient temperature. Don't just assume that because they were fine when you packed it away that they'll be fine when you pull them out of the garage after a few months!
7. Fire it up!
Starting the engine in your powersports toy after a long winter is one of the most satisfying activities for an enthusiast. But don't get too enthusiastic out of the gate — let the engine idle until thoroughly warm. Don't go zipping around the neighborhood or brapping the engine up to high revs right away.
For fuel-injected machines, this first cold-start after the winter will (likely) be easy. For carbureted machines, it may take some more work. Assuming your carb and choke were properly adjusted at the end of the season (and no critters have fouled the situation), it should start right up with the fuel that's in it — provided, of course, you used fuel stabilizer. You did, didn't you?
If you own a carbureted machine and, as part of the winterizing process, you drained the carb's float bowl, you'll want to follow your manufacturer's procedure for priming the carburetor (letting fuel back into the float bowl) before attempting to start the engine.
If you followed these steps (and properly winterized your hardware in the first place), you should be up and running, ready to achieve full weekend-warrior status. If you've run into some stumbling blocks, however, be sure to consult our other how-to and DIY guides for your specific problem.
Got any other tips for de-winterizing or any triumphant stories of spring's first ride? Let us know in the comments.
Share
About the Author(s)

Nelson Ireson is a reformed lawyer with a decade's experience driving, writing about, photographing, and shooting video of all kinds of cars. When he's not working with cars, he's often working on one—and it's probably Swedish.