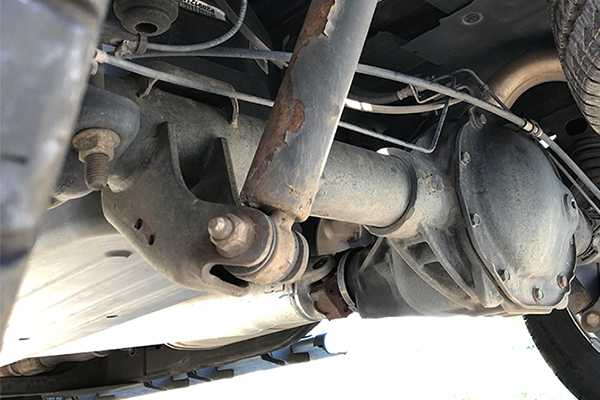
A rear axle bearing that has gone bad or is going bad announces itself by squeaking occasionally and moves on to clunking and shaking because the bearing has completely failed and fallen apart. Whether you've got a Chevy/GM 10-bolt rear-end or a 12-bolt, changing the rear axle bearings is a relatively quick and easy repair to complete at home. Let's see how.

Source | Order 242

This is an old style GM axle bearing from National Bearings. Source | Advance Auto Parts

This is a new-style axle bearing and seal assembly in one from Driveworks. These are easier to work with because the seal and bearing are integrated. Source | Advance Auto Parts
This is a good project for new DIYers
-
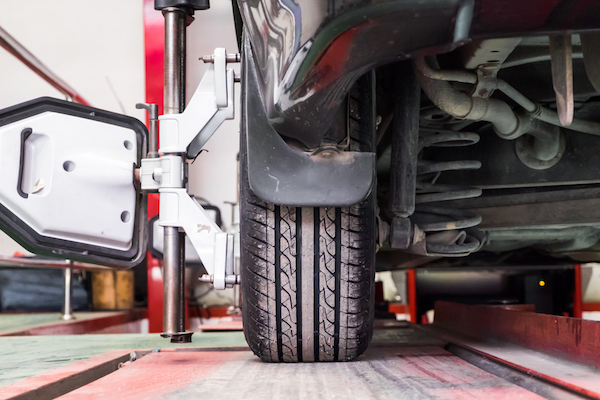
Park on a flat and level surface and leave the parking brake off. Block both the front and rear of one (or both) front wheels. Loosen the rear lug nuts one turn using the breaker bar. Slide the jack under the differential housing and raise the vehicle until the wheels are clear of the ground. Slide jack stands under the frame rails on both sides of the vehicle and carefully lower it onto the stands. Remove the rear wheels and place them under the vehicle in front of the stands. If you have an impact gun, remove the lug nuts after the wheels are in the air.
-
Shift the transmission into neutral.

Source | Mike Aguilar
-
Slide the drain pan under the differential. Remove the bolts securing the cover to the differential, but leave one at the top and bottom only loosened. Use a flat screwdriver or chisel to carefully pry the bottom of the cover open but do not bend the cover. Allow the fluid to drain. Examine the fluid for metal shavings or debris. Remove the last two bolts and the pan.
-
Remove the brake drums or rotors and calipers. You may need to “convince" the drums to come off with a hammer.

Source | Mike Aguilar
-
Rotate the driveshaft until the bolt securing the lock pin comes around and remove it. Slowly rotate until the pin is able to slide out of the carrier. Be careful not to allow the spider gears to move after the pin is out. One trick here is to reinsert the pin and loosely install the bolt.
-
Push inward on both axles. The axles are secured inside the differential by a C-clip. Look inside the carrier in the opening left by the pin removed above at the axle ends and remove the clips. If a clip is missing, check the bottom of the differential housing. It probably fell out when you pushed the axles inward. If you're only replacing one bearing, only push inward on that axle.

Source | Mike Aguilar
-
Carefully pull the axle(s) out, being careful to not damage the ends.

Source | Mike Aguilar
-
Use the end of the axle to pry out the old seal(s). The backing plate does not have to be removed. We removed the one in this photo because we also installed disc brakes.

Source | Mike Aguilar
-
Assemble the bearing puller tool per the instructions. Slide the tool into the axle tube far enough to catch the bearing. Pull firmly outward on the tool while rolling the nut down to secure the tool. Firmly and quickly slide the weighted handle toward the end of the tool repeatedly until the bearing is removed.
-
Push the new bearing into the axle tube as far as it will go. Attach the installation cup of the proper size to the installation tool. The tool must fit into the center of the bearing/seal and be just smaller than the axle tube.

Source | Mike Aguilar
-
Smack the tool with the hammer firmly until the bearing/seal is fully seated. If you have the bearing and seal that are an assembly, repeat on the other side of necessary. If your bearing and seal are separate pieces, drive the seal into place.

Source | Mike Aguilar
-
Carefully inspect the bearing race portion of the axle for abnormal or excessive wear such as scoring, spalling, or scorching from the previous bearing. Discolored metal is another sign of overheating and excessive wear.
-
If the axle passes inspection, slide it carefully into the axle tube until it bottoms out in the differential.
-
Replace the C-clip(s) on the axles and push the axles outward to seat the C-clips.
-
Slide the lock pin back into place and lock it in place with the pin bolt.

Source | Mike Aguilar
-
Make sure the differential cover and housing are free of RTV and gasket pieces. You may need to use an aerosol solvent like Brakleen and a basket scraper to clean the contact surface of the cover. Remove the fill plug and clean it. Wipe the bottom of the differential out to remove any debris
-
Apply a light bead of RTV around the housing and cover inside the bolt pattern. Line up and apply the gasket to the cover and lift into place on the housing.
-
Reinstall the bolts and torque to approximately 15-20 lb-ft.

Source | Mike Aguilar
-
Refill the differential with the appropriate fluid. You'll know it's full when fluid begins to drip out slowly.
-
Reinstall the brake drums or rotors and calipers and rehang the wheels.
-
Lift the vehicle off the stands and remove them. Slowly lower the vehicle until the wheels make contact with the ground and finish tightening the lug nuts in a star pattern. Finish lowering the vehicle and clean up your work area.
Inspect the cover to see if the bolt holes are distorted and dented inward due to being over-tightened before. If the holes are dented, carefully tap them back with the rounded portion of a ball peen hammer and a socket.


.jpg)