Is your door handle dead? Are your power locks lifeless? If you’re tired of getting in and out of your car through the passenger side, read on to discover common problems with car doors and how to fix them.
Wear and age are the usual underlying reasons for car doors not operating correctly — not wanting to lock or unlock with the button or the key or not wanting to open from inside or outside. The controls that you use to lock and unlock and open the doors are connected to the locking and latching mechanisms via rods. When lock and latch mechanisms stop working, this is because that rod or cable has fallen out, been broken or bent or the bushings that allow it to move are worn out and allowing too much movement.
This article will address four problems on both mechanical and electronic door lock systems. We'll cover diagnosing the malfunction as well as the repair, but first let's get that door panel out of the way.
This is a project that needs some know-how
- A careful visual inspection, paying attention to trim pieces that look like they might be removable
- Using plastic pry tools designed for interior work
- Gently pulling out on the door panel when you think you've removed all of the screws. If there's one spot that seems to stick, you're likely overlooking a screw. Instead of yanking on the panel like the Hulk, take a moment to step back and look again for hidden screws.
-
Attach the alligator clip on the test light to a solid ground.
-
Locate the lock solenoid and its wiring connector. You may need a flashlight to see inside the door.
-
Push the button on the remote and look for movement in the actuator rod on the solenoid. If the solenoid buzzes or clicks but doesn't move, it needs to be replaced. Skip the next step.
-
Probe the back of one of the solenoid connectors as you press the remote button several times, checking each of the wires while pressing the button twice. The solenoid is defective if the test light lights while probing. If this probing does not show these signals, the problem is either in the interior wiring or the control module.
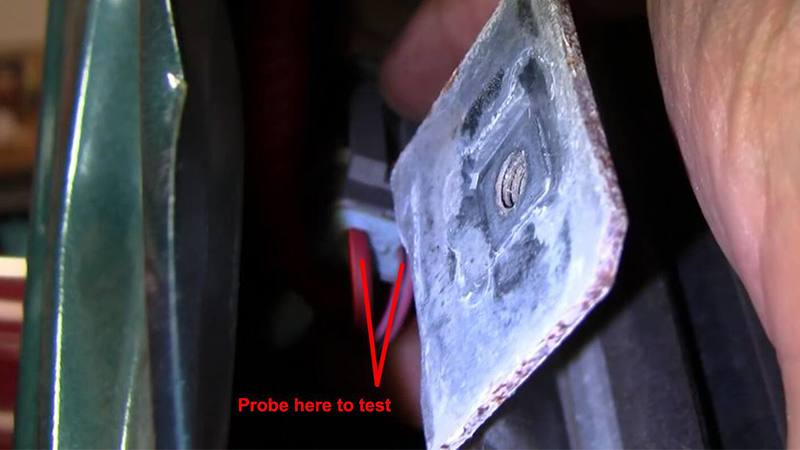
Source | Mike Aguilar
-
The lock solenoid is secured to a bracket and/or the door panel with two or three small screws or bolts that are easiest to access with a ¼-inch drive ratchet with a socket and/or Phillips screwdriver bit. Remove them.
-
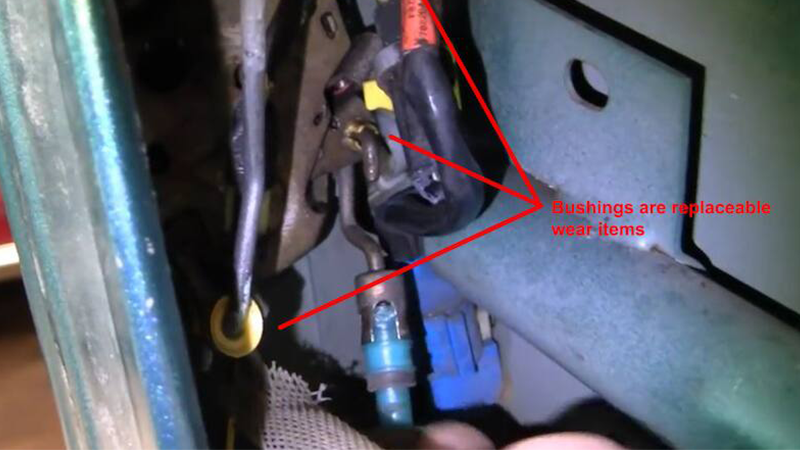
Disconnect the solenoid actuator from the lock actuator rod. These are usually attached by means of a rotating bushing with a clip that latches onto the lock actuator rod. There may, however, be a dimple on the “tab" bushing inserted into the bushing that locks it in place or the end of the actuator rod may end in a U-shape that loops through the solenoid actuator.
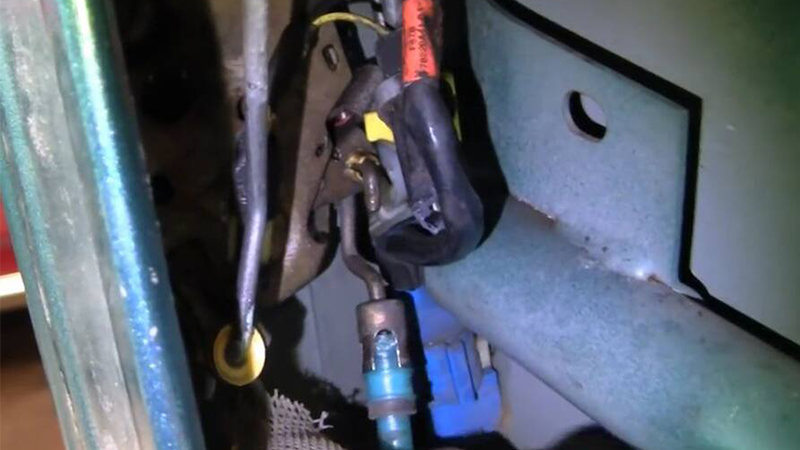
Source | Mike Aguilar
-
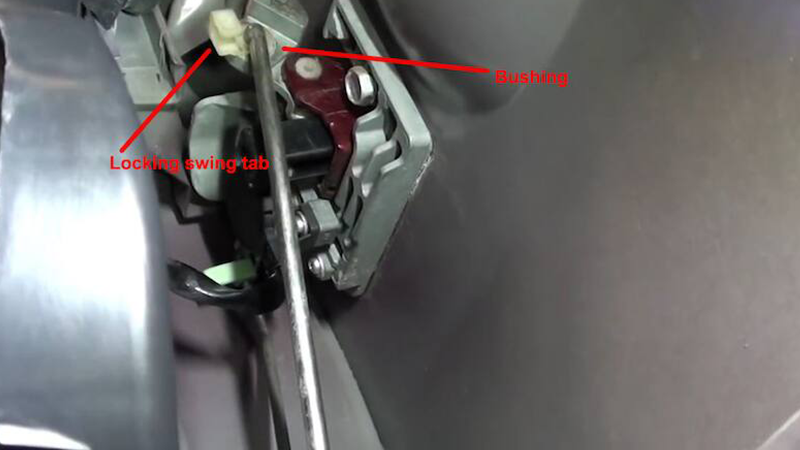
Lift or depress the locking latch on the solenoid wiring connector and pull the two connectors apart.
-
Install and reconnect the new solenoid.
-
Disconnect the rod from the locking arm and/or solenoid actuator.
Source | Mike Aguilar
-
Pop the worn bushings from the arm or actuator.
Source | Mike Aguilar
-
Insert the new bushings and reconnect the actuator rod at both ends.
-
Push and pull on the button (or door handle) to lock and unlock the door while watching for movement in the whole mechanism. Pay attention to where rods connect to each other or actuators. Also look for missing rods between parts.
-
Remove and replace any bushings that are allowing excessive movement, or “slop", between the rods and other moving parts.
-
Pull the inner and outer handles individually while watching the mechanism for motion between parts.
-
In some rare instances, a rod will pop out of its bushing due to excessive vibration such as hitting a pothole. Reconnect the parts when this happens and look again for excessive wear while pulling the handles.
-
Even though the metal frequently used in door handles is often of low quality, it is rare for them to break unless abused. If the door handle rod tab has broken, the handle can be replaced by removing the screws/bolts that secure it to the door panel. Outer handles attach between the inner and outer panels while the inner handle is usually bolted/screwed from inside.
-
Bushing wear is again the likely culprit. You're seeing the rod(s) between the handle and the latching mechanism moving, but not enough to unlatch the door. Disconnect the rods and replace the bushings.
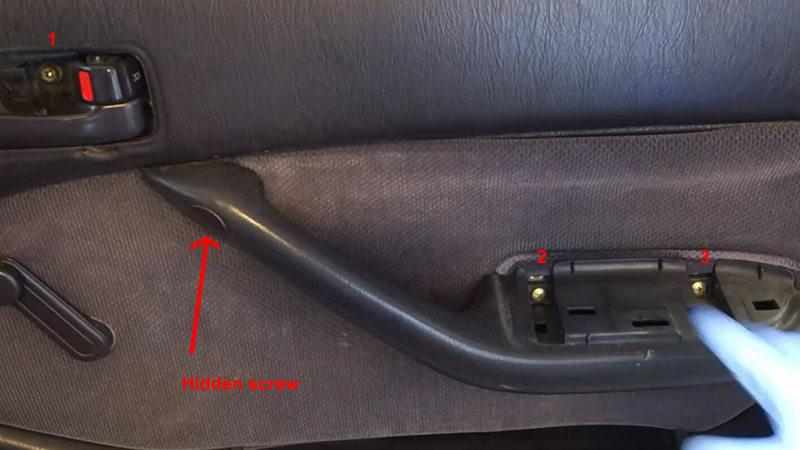
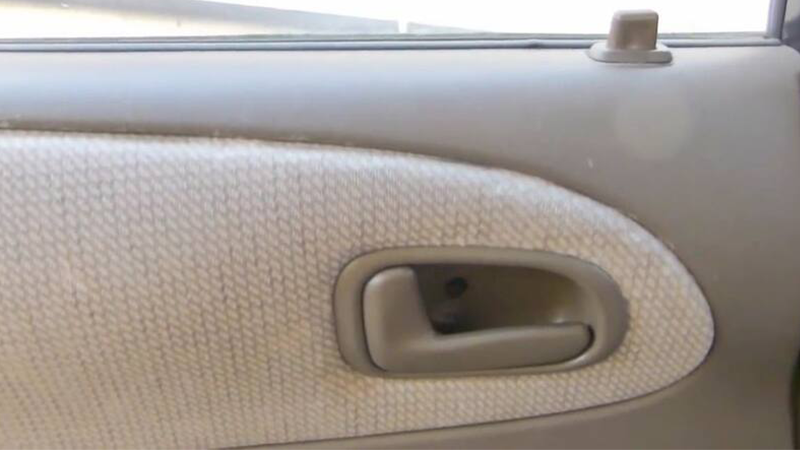
The only universal truth about door panels across manufacturers is that there are going to be some hidden screws. The image below identifies some common hiding spots, such as behind removable door latch cover plates (#1) and under armrest cushions and covers (#2). The best process to follow to avoid damage includes:
Source | Mike Aguilar

You'll also have to remove the window crank if you have manual windows. These are secured to the window mechanism with a locking clip that can be removed with a paper clip bent in a short hook while carefully pressing against the door panel or pushed out with a small screwdriver.
When you pull out on the door panel, some clips that secure the perimeter of the panel to the door may be left behind. Pop those clips out of the door and place them back in the panel. You can do this with a flat screwdriver or by hand, but the trim panel clip puller will make the job a little easier and help prevent clip or door-panel damage during removal. This can be especially dicey on older vehicles where the clips may have degraded and become brittle with age.
Lift the panel up and off the door, but don't yank too hard because there are likely still wires and cables connected. Free any wires and/or connectors and switches from the door panel. Speaker wires will have to be unplugged from the speaker (pay attention to speaker and wire polarity) if they're mounted to the panel instead of the door. Set the door panel aside and carefully remove the plastic water barrier if present. The water barrier is important for preventing rust and corrosion, which ultimately can lead to premature failure of parts.
Now that you’ve removed your door panel, let’s consider four problems that you could be experiencing.
If all of your doors will lock/unlock with the interior buttons but not the remote, the problem is most likely in the “brains" controlling the electric door locks. If the doors don't work at all, the problem is most likely a blown fuse or relay or a bad control module. Here, we'll eliminate or highlight the locking solenoid as the culprit and change it if it's defective.
What might the problem be if the solenoid seems to be working because the actuator is moving in and out, but you can only lock/unlock the car manually? This is caused by the bushing that locks the solenoid actuator to the lock actuator rod and/or the bushing locking the rod to the lock mechanism has either broken or worn to the extent that it is not allowing the actuator rod to move far enough. Either way, it has to be replaced.
These bushings are cheap enough that it's recommended to replace all of them when one or two fail to prevent future failure.
Source | Mike Aguilar
This is often another case of bushing wear. Wear may be so bad that the rods connecting everything have fallen out and are sitting at the bottom of the door.
Source | Mike Aguilar
Wear is also likely the culprit when the door won't open from one or both sides, but you have no problem with locking and unlocking.
Once your repair is complete, secure the plastic moisture barrier back in place and reconnect all cables and wiring. Hang the door panel on the window run channel and pop the clips in around the perimeter. After confirming proper operation, secure all screws and trim pieces that were removed.