Popular YouTube mechanic Scotty Kilmer is yelling at me for this one. "Toyotas are the most reliable cars ever made!" shouted at 280 words a minute. The truth is, while the Toyota Camry is an excellent car with an impressive reputation for reliability, it still requires maintenance and even occasionally breaks down. Here's a look at what you need to know before buying a used Camry.

2008 Camry | Toyota
Before the crossover, the midsize car was a huge seller. Toyota figured out the recipe better than most and was rewarded with huge sales numbers, often well above 400,000 Camrys per year. While sometimes derided as a dull “vanilla" car, the Camry found critical acclaim too, with several Car & Driver 10 Best List recommendations and Motor Trend's Car of the Year award in 2007. It's a tough task to make a car with broad mainstream appeal. Everyone can appreciate a 911, but a daily driver needs efficiency, tech, power, roominess, and reliability in one package and all at a great price. The Camry has that last one in spades, but parts wear as it ages. Generally speaking, the Camry's most common problem areas are:
Starter
Starters often wear out on an older car simply due to the large work requirement of starting an engine, and their constant proximity to engine heat. Camry owners report that the most common symptoms of a failing starter are slow-starting and a failure to start. One free diagnosis trick is to (lightly) tap the starter with a hammer, unsticking the internal parts long enough for you to get to your local Advance to buy a replacement.

A starter from a Toyota Camry | Andy Jensen
Despite being buried in the engine bay, replacing a Camry starter is an easy enough task for a beginner, with no special tools needed, and the steps are nearly identical for I4 and V6 engines. Let's get started.
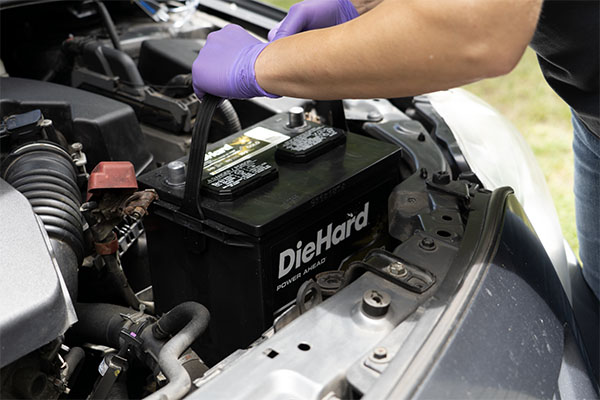
- Locate the starter on the driver's side of the engine, below the battery and air intake areas. Start by disconnecting the battery cables and removing the battery and battery tray.
- Remove the air filter (a good time to replace it if it's dirty) and use a 10mm socket to remove the three bolts in the bottom of the air box housing. Then remove the air box bracket and air intake ducting using that same socket.
- Press the tab and pull the plug to disconnect the electrical connection from the starter, then use a 12mm socket on the solenoid wiring.
- Remove the two 14mm starter motor mounting bolts. The starter might need some “encouragement" to come off, but shouldn't need a mallet.
- Installation of the new starter is simple, as it only goes in one way. Torque the starter bolts to 29 ft-lb. Everything else is hand tight, but be sure you reassemble the air intake properly or you'll throw a code.
Alternator

An alternator installed in a Toyota Camry | Andy Jensen
Older mechanics consider an alternator as a wear part to rebuild. As the internal bearings and brushes lose efficiency, there is a temptation to save money and rebuild it yourself. Most owners opt to save time and swap out the alternator. The most obvious sign of a failing Camry alternator is dimming headlights. Other symptoms of a failing alternator include a battery light on the gauge cluster, or a completely drained battery. For task difficulty, this one is actually faster and easier than changing your own oil. Here's how to get it done.
- First, since it's an electrical component, disconnect the negative battery cable.
- Then remove the drive belt (or serpentine belt) at the tensioner. Have a look at the drive belt to see if it's cracked, burned, or for other signs that it's time to replace the belt.
- Detach the electrical plugs on the back of the alternator and pull the wiring harness aside.
- Remove the two bolts, and pull the alternator free. Reinstalling is just as easy, making sure the two alternator bracket bolts get 32 ft-lb.
Radiator
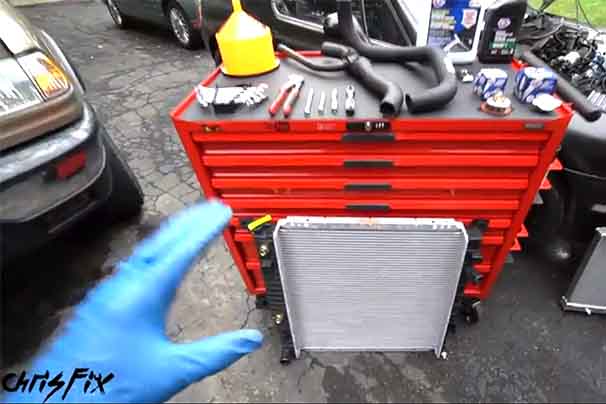
The Camry manual recommends checking your coolant every 5,000 miles, and replacing the coolant at 30,000 miles or three years. If you waited 100,000 miles too long, your cooling system is shot and it's time to replace the radiator. More likely, road debris or a front end collision damaged the radiator. Radiators are often difficult and/or expensive to repair, so it's usually easier and cheaper to swap them out. This is not a beginner's task, but can be done if you have some mechanical experience and a few hours free.
- If you've got debris and buildup in your cooling system, it's best to flush the system before swapping in a new radiator, as you don't want contaminants getting into your new parts.
- You've heard this before, but start by disconnecting the negative battery terminal. Drain the coolant, and properly dispose of it.
- Remove the upper and lower radiator hoses from the radiator. Then remove the cooling fans, and the horns and hood latch. Remove the four bolts securing the radiator support to the body.
- If an automatic car (most likely), disconnect the transmission cooler lines from the radiator. Carefully lift out the radiator, watching for sharp cooling fins and leaking fluid.
Use a couple of old spark plugs to stop drips from the disconnected transmission cooler lines.
5. Assembly is the reverse of the above, with no specific torque specs recommended in the Camry manual. Be sure to bleed the air out of the cooling system as a final step.
3.3L Water Pump
Replacing a Camry water pump is a more complex task. You should be comfortable handling a timing belt replacement, then follow the general guide for replacing a water pump. Toyota's severe service schedule recommends changing the timing belt and water pump at 90,000 miles. The most common sign of a failing Camry water pump is a coolant leak making a puddle under the car. Other signs include a distinctive growl/groan from the engine bay, an engine running hot, and a check engine light or coolant light.
- Start with a cold engine, and disconnect battery. Then drain cooling system, and remove the passenger side fender liner.
- You'll need a pulley puller to remove the crank pulley, then remove the bolts over the lower timing belt cover. Remove the passenger side motor mount, gaining access to remove the upper timing cover.
- Align the engine to Top Dead Center by finding the circle on the crankshaft gear and rotating the crank until the circle lines up with the dimple at the 12 o'clock position. The camshafts should also be in alignment at this time.
- Unbolt the tensioner, remove the timing belt, then the camshaft sprockets. A “cheater bar" helps here, then remove the protective plate.
- Set a drain pan under the engine, then remove the six bolts securing the water pump. Break the seal and watch as a waterfall of coolant drains.
- Thoroughly clean the mounting surface before applying new sealant. Hand tighten the water pump bolts, then torque to 71 inch-lbs (80 in-lb if you have the four cylinder). Then follow the basic water pump replacement steps for reassembly.
Catalytic Converter
Maybe your Camry failed an emissions test, or you're just not getting the gas mileage you used to. This isn't something you just have to put up with, and a 20-year-old car can still pass emissions and retain the horsepower and MPGs of when it was new, it just maybe means your Camry needs a new catalytic converter. Cats don't usually “break" in the traditional sense, unless it takes a direct strike from road debris. Due to age and how they work, hundreds of thousands of miles mean a cat gets clogged when the internal catalyst elements are worn out. A misfire condition, caused by anything from a failed spark plug to a burned valve, will accelerate catalytic converter failure, so be sure the vehicle has no underlying conditions that will damage a new cat. Camry owners say the most common sign of a failed cat is when the check engine light is illuminated, and the PCM gives a P0420 code.

A catalytic converter on a Toyota Camry | Andy Jensen
If you're looking for a new catalytic converter, swapping it out is pretty simple. Note that starting with the 2000 model year, the Camry has two catalytic converters, but it's usually only the first one failing that sets off a check engine light.
- To get started, make sure the engine is completely cold. Raise the car and support it on jack stands, and spray the exhaust flange nuts with a penetrating spray.
- While that's soaking, pull the oxygen sensor. Grab your longest ratchet and remove the 14mm nuts at both ends to separate the cat from the exhaust system. If they're rusty, you might want a breaker bar. If several Midwest winters rusty, a cutoff wheel is nice and fast here.
- When reinstalling, spend some time cleaning up the flange, as there is a crush sleeve that needs a clean-ish surface to prevent leaks, and use new exhaust gaskets. There are no torque specs in the manual for the flange nuts, but do the nice thing and throw some anti-seize on there for the next owner.
Door Lock Actuators
Join any Toyota owner's forum and visit the Camry section to see owner complaints on the door lock actuators. This one is minor, but still annoying. Common symptoms are when the lock/unlock button works for most doors, but not the passenger door, requiring you to reach over for a manual unlock. Owners on Toyota Nation have a theory that Toyota switched to a cheapo supplier at one point, which sounds logical as it explains the short-lived actuators in some cars and why others last forever.

With the door panel removed and moisture barrier pulled back, access to the door lock actuator is simple. | Andy Jensen
Before you start, check the circuit protection first, as you may have just blown a fuse. For just a couple bucks and a minute or two, it's worth a try. If a new fuse didn't solve it, operate the door lock/unlock and listen for the movement of the actuators. If you don't hear one, that specific unit has a power problem. Check for voltage at the actuator when pushing the lock/unlock button. If it's getting power, then the wiring is fine and it's time to replace the lock actuator.
The steps here are fairly easy, but this takes a couple hours and looks complicated.
- On the inside door handle, use a small screwdriver or trim tool to remove the decorative cover, then remove the setscrew holding the bezel in place. Pry up the window switch plate in the armrest, and remove another screw. At this point, unplug the window and door lock switches from the back of the plate.
- There's one more screw by the door hinge, and another two near the bottom lip.
- Then use a trim tool to carefully pry the trim panel off the door. A flat screwdriver works too, but increases the chance of breaking the delicate plastic pins.
- Check your weather seal (the clear plastic) for signs of moisture entry, another issue that can damage the electronics in an actuator. Carefully remove the clear plastic and set it aside.
- Next, reach in the access hole and detach the actuating rod at the green clip.
- Then remove the power plug to the actuator. Use a T30 Torx to remove the door latch, and the whole assembly should fall out.
Have you got a Toyota Camry? Let us know in the comments below what Camry problems you've seen.


