The cabin air filter is a must for clean, fresh air in your car's interior. It's what traps pollen, spores, dust, allergens, and other particulates before they can circulate through your car's HVAC system. The cabin air filter needs to be changed at about a 10,000-mile interval; if it goes too long without being changed, it can impair the performance of your AC system. This timing will depend on many factors and we always recommend checking your owner's manual for your vehicle's maintenance schedule before starting the job.
Source | Ryan Gsell/Flickr
This is a good project for new DIYers
-
Open the glove box and remove the contents. Glove boxes are secured to the dashboard in different ways. Some will have a strap or wire that supports the glove box on one side, while others will have a limiting arm on the right side that prevents it from falling all the way open. Either remove the strap that supports the glove box or slide the stop arm off its pin. A quick visual inspection of your glove box should allow you to see how yours is secured.
-
You should be able to release the plastic glove box by squeezing the sides in until its side clamps pop free. The entire glove box should drop down, giving you access to the cover for the air filter box. Sometimes the whole glove box might fall onto the floor of the passenger compartment, and if it does, don't panic! Nothing's broken. When you put the box back in, note that there is a simple hinge along the bottom that needs to be aligned before pushing the side tabs back into place.

-
Usually, the cabin air filter box's cover is held in place with plastic latches on the left and right sides. Push them in to release the cover.

-
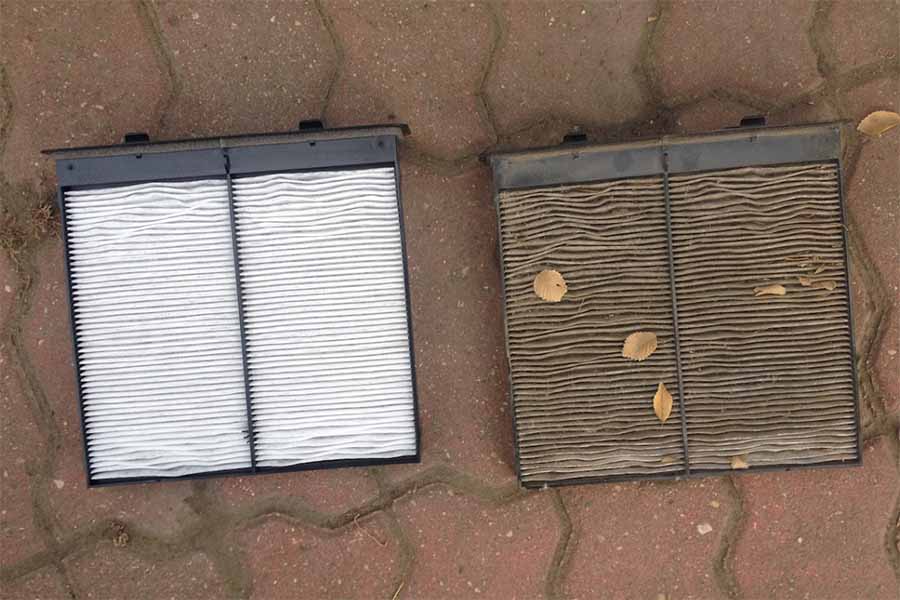
Remove the cover and the air filter itself, being careful not to scatter dust, leaves or other debris. Note the direction of the arrow on the filter; this denotes the direction in which air flows through it.

-
Vacuum the housing for the filter if necessary, and wipe it out with a wet wipe if it's especially nasty. Install the new filter and check the condition of any gaskets in the assembly.

-
Replace the cover and reverse the steps you used to remove the glove box.
How to change a cabin air filter
Some vehicles have the cabin air filter under the hood, with access through a cover. Most vehicles, however, mount the cabin air filter box behind the glove compartment for ease of access. Be sure to check your owner’s manual before starting the job so you know exactly where the to make sure where your cabin air filter is located.
Watch Gears and Gasoline's video on How to Change a Cabin Air Filter
These steps are for cabin air filters located behind the glove box. Others might be located under the dash, on the passenger side and can be accessed through a door or cover. Under-hood cabin air filters might require removing the cowl vent, the windshield washer bottle, wiper arms, or other parts to be able to access the filter box. Check your owner's manual for details.


