The question of how to change an oil filter can be important if you don't want to run to an auto mechanic with every little problem you encounter. Aside from convenience, it also presents the opportunity of saving time and money, since it will take a while to get your car to a mechanic, and changing the oil filter can also cost anything from a $25 minimum to up to $70 when synthetic oil is used. Fortunately, the process is simple and easy to learn.
Choosing the Right Oil Filter Wrench
The proper removal of the old oil filter is essential for a successful operation. Before you start, make sure you have a style of oil filter wrench that works well with your vehicle. For traditional, spin-on canister filters, you can try a chain wrench, sleeve-type wrench or strap wrench for the job. Or, in a pinch, you can just stab a large screwdriver right through the outer shell of the oil filter and turn.
On the other hand, if your vehicle has a paper filter inside a plastic or metal cartridge-style housing, you'll need to use a socket wrench. These vary by manufacturer, so make sure you have the right size for your vehicle. (For example, an '09 Toyota Corolla uses a 64 mm filter wrench with 14 hex points.)
The main purpose of the wrench is to ensure greater speed and efficiency, since most oil filters cannot be removed by hand because of the thin film of grease and oil that they are coated with.

The Importance of Changing the Oil
Your vehicle's oil is likened to the blood in a living organism, and regular oil changes are not only important for smooth operation, but also essential for getting the best service life out of the engine.
There are some tips that can make changing your oil easier and less messy, but follow these basic steps for draining the oil before removing your filter:
- Run the engine for several minutes before the oil change, so that any contaminants will have circulated in the hot oil before you drain it (rather than being stuck in the oil pump or the pan).
- Before removing the oil filter, you have to locate the oil drain plug and place your drain pan below it to collect the draining oil. Use your owner's or repair manual to locate and identify this component, then use a wrench to loosen it.
- Once the plug is loosened, you can easily remove it using nothing but your hand, however, be careful to position the pan correctly, knowing that the oil will drain at an angle.
- Once all the oil is drained, replace the plug. Start the threads by hand, and then snug it with the wrench. Check your repair manual for the proper torque spec, and don't overtighten because you can damage the threads.
Remove the Old Filter and Replace It
You are now ready to remove the old oil filter and put the new one in its place.
- Use the oil filter wrench to loosen the filter. Before removing it, allow the oil to drain out of it.
- After having drained all the oil out of your existing filter, use the oil filter wrench or your hand to carefully remove it. Gloves are useful here, not only to keep contaminants off of your skin but also to protect your hand from the filter and oil, which can be hot.
- Use a rag to make sure the mounting surface of the engine is clean. This is an important step that also ensures the old gasket was not left behind after removing the filter.
- Next, take the new oil filter, lubricate it by coating the seal with fresh oil. Fill the new filter with about ½ quart of oil so it will be pre-loaded when the engine starts.
- Screw the new filter on hand-tight, then no more than another ¼ or ½ turn. It's important NOT to overtighten the new filter; its thick gasket is soft rubber that can easily deform if tightened too much and can cause a leak.
Pour in New Oil and Start It Up
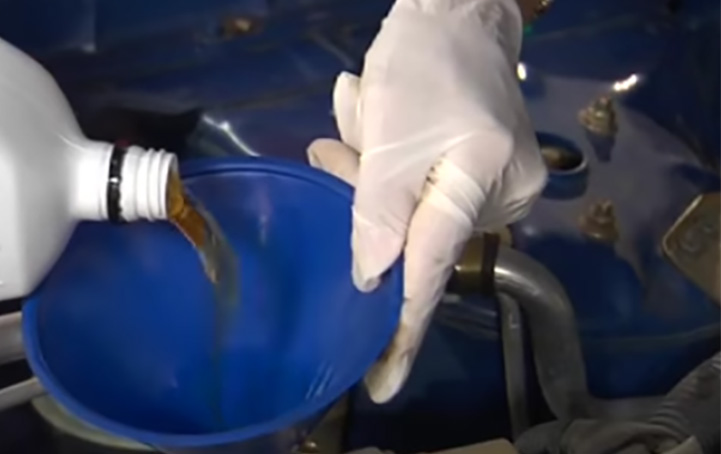
- Using a clean funnel, pour new oil in, then remember to replace the cap after completing the process. Consult your repair or owner's manual for the correct grade and amount of oil.
- Next, run the engine for a few minutes, and check for leaks. If you identify a leak, turn the engine off immediately, and try to identify where the leak is coming from. If all goes well, the filter will be securely in place, and there will be no leakage.
- Simply check the oil level one more time to make sure it's in the green. Now that you know how to change an oil filter, make sure you replace the oil and filter in your vehicle on a regular basis, to avoid malfunctions and high service costs in the future.


