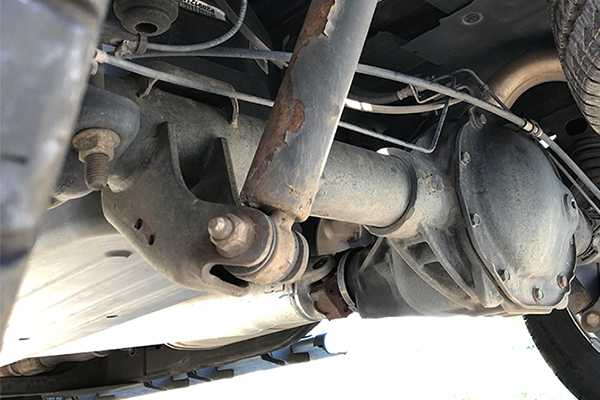
The upper and lower ball joints are a critical part of any vehicle's front suspension. They are a large bearing that's like a ball-and-socket joint and allow for suspension travel while steering. Ball joints support the vehicle's weight, and without them, the suspension would literally collapse and drop to the pavement.

Source | Craig Howell/Flickr
Signs of worn ball joints can include:
- Squeaking or popping while going over bumps
- Excessive wander and play in the steering. As it gets worse, the vehicle may suddenly wander right or left on its own, with no steering input
- Uneven tire wear
Ball joints can wear to a point where they fail completely, resulting in a sudden loss of control. You'll want to replace them before then, though, because as they wear, the vehicle will become a real handful to drive. You can replace ball joints at home in an afternoon's time, with the right tools and the right know-how.
This is a project that needs some know-how
-
Loosen the lug nuts slightly on the wheel you'll be working on.
-
Set the parking brake, chock the rear wheels, raise the truck, and set it securely on jackstands.
-
Remove the lug nuts and wheel.
-
Use a flathead screwdriver to carefully remove the dust cap for the wheel bearing (4WD).
-
Remove the full assembly of the brake caliper bracket and remove the caliper. Place the caliper on an inverted bucket or box, or hang from a bungee cord so it won't dangle by its brake hose.
-
Slide the brake rotor off the spindle—at this point, you should have access to the lower ball joint nut, at the bottom of the wheel knuckle assembly.
-
Place a jack under the control arm and remove the 24mm nut at the bottom of the lower ball joint - you may need a breaker bar or length of pipe for leverage.
-
Next, you should be able to separate the upper wishbone control arm. It's held in place with a 21mm bolt at the bottom of the upper ball joint. The upper ball joint will be replaced with the control arm as one assembly.
-
The tie rod end is attached to the wheel knuckle assembly. Remove it from the knuckle with an 18mm socket and breaker bar.
-
Use the front end service set and lightly hammer the knuckle to separate the lower ball joint from the wheel knuckle assembly. The heat gun may come in handy for this task, as it can be difficult.
-
Using a 13mm socket and impact wrench, remove the bolts that connect the wheel hub assembly to the knuckle.
-
The ABS harness and sensor can be found on the back of the hub assembly, after the caliper and pads have been removed. The harness is held in with a pair of 5mm Allen bolts. Just remove these bolts and the sensor and harness will pull right out. You should now be able to remove the control arm and wheel hub assembly. To avoid stress on any lines or wiring, place it on the same box as the caliper.
-
Using needle-nose pliers, remove the snap ring that's on the upper side of the lower ball joint.
-
Use the ball joint press (with the proper collets) to push the old ball joint down, through the lower control arm.
-
Use the ball joint press to push the new ball joint up into its place in the lower control arm.
-
Use the needle-nose pliers to install the snap ring on the new ball joint.
-
Find the bolt that connects the lower part of the shock and remove it - this requires a 30mm socket.
-
Find the upper control arm nuts, at the top of the shock tower, and remove them. There should be two at the front and one at the rear, and should require a 15mm socket and possibly a breaker bar.
-
Locate the last control arm bolt at the top of the shock tower. You might find this one easier to access from inside the engine compartment.
-
Lower the shock absorber out of position. It may require a few raps with a hammer or mallet. Don't let the shock drop to the floor.
-
Locate the control arm's two mounting bolts and remove them (requires a 21mm socket).
-
Reverse these steps to install the new upper control arm. Be sure to grease any parts that have Zerk grease fittings.
Like with any big job, prepare you workspace and make sure you have plenty of room to move around. A creeper seat with a tool tray is a good idea, as is a magnetic parts bowl and maybe some small containers to keep parts and connectors where you need them.
You will probably have to stop and add an additional collet spacer on top to complete this step.
When you're reassembling your F150's front end, remember to refer to a shop manual (such as a Haynes book) for factory torque specs on all connectors, and use your torque wrench accordingly.
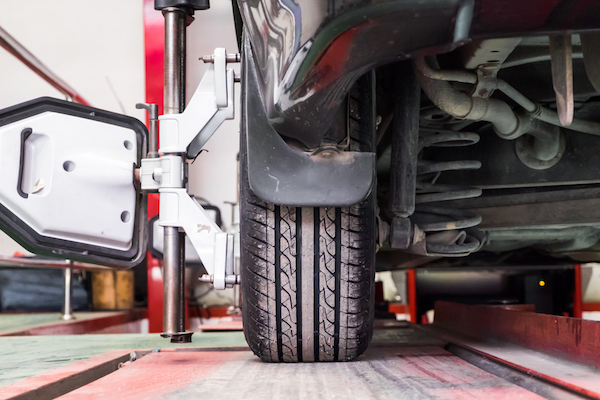
For your truck to be fully roadworthy again, you'll need to get an alignment done ASAP.