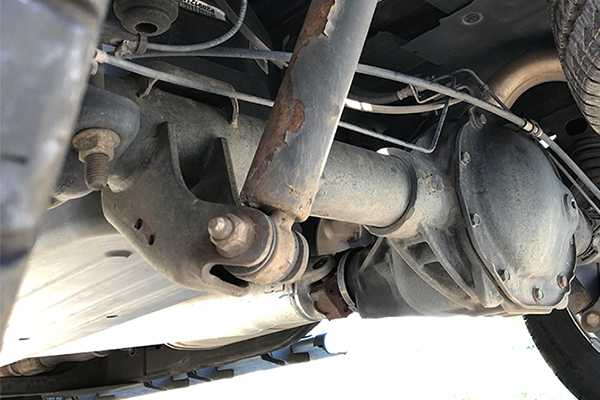
Sway bars contain body roll by twisting. To do this, they attach to the vehicle in four places: two frame attachment points and through two end links to the wheel. When you make a hard left turn, for instance, your car's body is thrown to the right because the left side of the vehicle is trying to come off the ground. This pushes up on the right lower control arm which, because it's connected to the sway bar through the end link, pushes up on the end of the bar. This twisting motion in the sway bar is translated to the left side of the vehicle, pulling it down and holding the wheel to the ground through the corner.
 All images by author, except Advance Auto Parts product images.
This is a good project for new DIYers
-
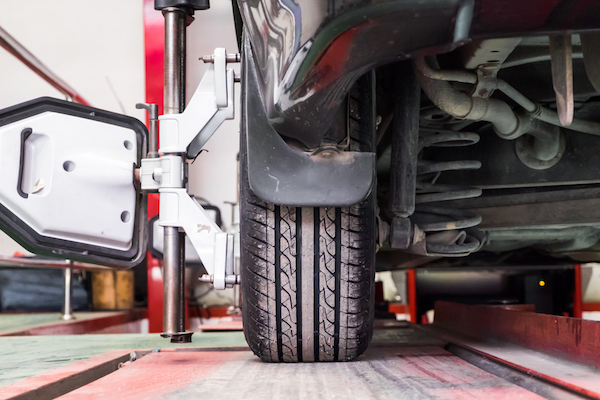
Raise and support the front of the vehicle. Although doing so will give somewhat easier access to the end links (and frame bushings in some front-wheel-drive vehicles) removing the front wheels isn't necessary.

This Saturn Ion is an example of a front-wheel-drive car in which you have to remove the wheels to get to the frame bushings.
-
Remove the nuts or bolts that secure the frame mounts to the frame. On some front-wheel-drive vehicles, the frame mount is secured with only a single nut or bolt on one side of the mount and a tab or clip on the other. Remove the mounts and slide the bushings off the bar. They are split for this purpose.

Some vehicles, especially trucks, have mudguards or skid plates that have to be removed before you can get to the sway bar frame bushings.
-
Clean and inspect the bar and mounts. Sandpaper or wire brush as needed to get them as clean as possible.
-
Lightly grease the bar, bushings, and mounts. Slide the bushing over the bar and cover it with the mount. Position and reattach the mount. Torque the nuts/bolts to specification. Grease as required.

This shows the new passenger side frame bushing on a 2001 GMC Jimmy.
-
Lightly grease the bar, bushings, and mounts. Slide the bushing over the bar and cover it with the mount. Position and reattach the mount. Torque the nuts/bolts to specification. Grease as required.

-
Old-style end links that haven't been changed in a number of years will probably be rusty. To make removal of the links easier, cut them in the middle of the link with a grinding wheel, often called a “whizzer wheel". If you don't have one, use a wrench on the bolt head on top of the control arm and a socket and ratchet on the nut under the control arm.

-
Place a washer or cup on the link bolt with the cup facing the threads. Next, place a new link bushing on the bolt with the lip also facing the threads.
-
Slide the bolt down through the end of the sway bar. Slide a bushing and cup pair up the bolt with the bushing's lip toward the bar.

-
Slide the spacer onto the bolt. Place a bushing, and then a cup, on the lower control arm where the link goes through it and slide the bolt through it. The lip on the bushing faces the lower control arm.
-
Slide the last bushing and cup onto the bolt under the control arm with the lip to the control arm. Thread the nut onto the bolt after applying blue Threadlocker.
-
With the wrench up top and the ratchet below, tighten the end link until the bushings just begin to compress.

-
Remove the nuts holding the sway bar link to the bar and control arm. Remove the link.

Link removal on some front-wheel-drive cars will require a ¼-inch Allen wrench to keep the bolt from spinning.
-
Install the new link and thread the nuts onto the ball joint studs by hand.

Sway bar frame bushings are used between the frame mounts, the frame, and the bar itself. They allow the bar to twist when cornering. They also help absorb some of the hard impacts from potholes and speed bumps.

Image on the left shows OEM style sway bar frame bushings. The image on the right shows performance polyurethane bushings from Energy Suspension, which Advance Auto Parts carries.
Original-equipment sway bar frame bushings on most cars are made of a grade of rubber that degrades and softens quickly. Your first sign that they're in need of replacement may be a slight clunking felt in your feet or seat when going over potholes and speed bumps. Another audible sign is squeaking, especially if the bushings require periodic lubrication.
Sway bar frame bushings also show wear visually, even if they don't display audible symptoms. On first examination, they will probably look dried out and cracked. Looking closer, the opening around the bar may not be perfectly round, or it may be worn on just one inner edge.
The response of stiffer, harder polyurethane bushings is akin to changing spring rates in your suspension, without a sacrifice in ride quality. It will mean tighter, more responsive handling, better cornering, and better road manners for just about any vehicle.

End link types. The top left is mainly found on older vehicles. The top right is its performance cousin in polyurethane. The lower image shows a type mainly found on vehicles equipped with MacPherson struts.
Sway bar end links have undergone a design change as front suspension design has transformed. The switch to MacPherson struts required a change in how and where sway bar end links were connected. Confusing the matter even more, they connect upward to the MacPherson strut and are longer, or they connect to the lower control arm and are shorter. This suspension type also saw the switch from end link bushings to the use of small ball joints to allow for suspension movement.
Measure the sway bar size prior to beginning this project, as manufacturers sometimes install different sizes during the same model year.
Petroleum-based grease will accelerate the degradation of OEM rubber bushings, while aftermarket polyurethane bushings are more resistant. Use silicone grease. Ungreased frame bushings can begin squeaking prematurely.
Lifting the lower control arm slightly with the jack near the ball joint can help make connecting both types of links easier.