The clutch in your transmission is used to decouple the engine from the transmission while you're either shifting or stopped at a light or sign. The clutch in a manual transmission is an assembly comprised of three parts: the pressure plate, clutch disc, and a throwout bearing. The pressure plate squeezes the clutch disc(s) against the friction surface of a flywheel attached to the engine's crankshaft.

Source | Mike Aguilar
What is the Purpose of a Clutch Replacement?
The action of pushing the clutch pedal is transferred either through mechanical linkage or hydraulic lines to a part inside the transmission called a “throwout bearing." This pushes the throwout bearing against the actuating tines/forks on the pressure plate, which causes the pressure plate to release the clutch disc. This removes engine torque from the transmission, allowing the gears inside the transmission to synchronize (line up) so you can shift without that horrendous gear-grinding noise. Note that every vehicle will differ on this repair and you should always consult your repair manual first before attempting a clutch replacement.

CARQUEST New Clutch Set, Omix-Ada Master Clutch Kit, Mopar Clutch Kit, Genuine Clutch Kit. Source | Advance Auto Parts

Source | Mike Aguilar
This is a challenging and technical project
-
Disconnect the battery negative cable. Remove the shifter boot and lever inside the vehicle. Raise and safely support the vehicle. While it is not necessary to raise the rear wheels off the ground, doing so will make working under the vehicle easier and more comfortable when using a jack and jackstands.
Source | Mike Aguilar
-
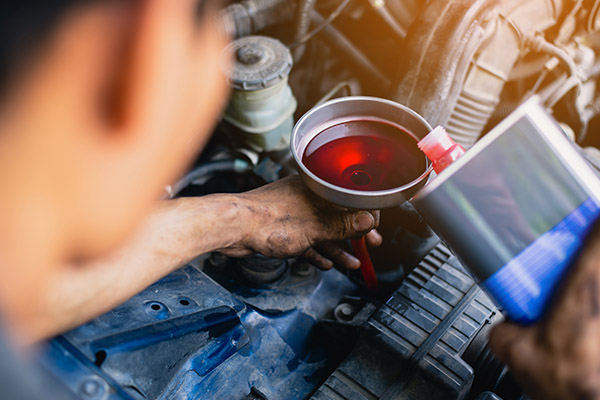
Place a drain pan under the transmission. Remove the drain plug and drain transmission fluid so that it will not leak out tail shaft when removing transmission. Slide under the rear of the vehicle and remove the bolts securing the driveshaft to the differential. Some vehicles such as trucks and newer Mustangs will have a support in the middle of the driveshaft that has to come out before the driveshaft can be removed.
-
Remove the driveshaft from the transmission and lower out of the car. On some vehicles, this is accomplished simply by pulling the driveshaft to the rear of the vehicle. On other vehicles, especially larger pickups and performance cars, there are four bolts that must be removed to accomplish this. Handle the driveshaft very carefully—even a tiny dent can put it out of balance.

Source | Mike Aguilar
-
Disconnect all hoses, pipes, and wiring connectors from the transmission (and transfer case if so equipped). This will include cooling lines on some newer Mustangs.

Source | Mike Aguilar
-
Disconnect the clutch linkage on vehicles equipped with mechanical linkage. On vehicles with hydraulic clutches, unbolt the slave cylinder from the back of the block or the transmission, depending where it's mounted. Disconnect the clutch fork from the slave cylinder piston. You may be able to simply pull the two apart on some vehicles, while others will have a spring clip that must be pulled apart by hand prior to separating the fork from the piston.
-
The next two steps are unique to four-wheel- (4WD) and all-wheel-drive (AWD) vehicles only. If your vehicle is only rear-wheel-drive (RWD), skip to Step 7. Remove the front driveshaft between the transfer case and front differential. This is a good time to check the U-joints for wear and sticking.

Source | Mike Aguilar
-
Using a transmission jack or jack adapter and the appropriate sockets and wrenches, separate the transfer case from the transmission and lower it out of the vehicle. Next, remove the mounting bolts from the transfer case and separate it from the back of the transmission and lower it out of the vehicle.

Source | Mike Aguilar
-
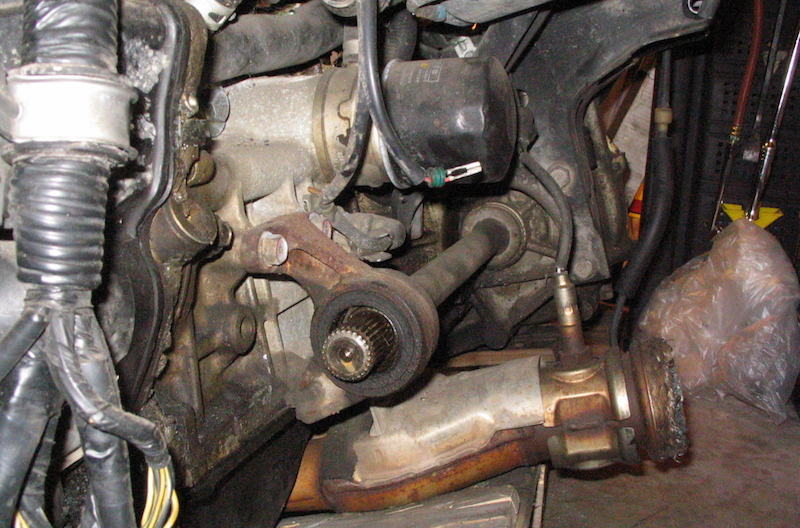
Place the jack under the transmission and raise the jack until it just picks up the transmission's load without raising it. Secure the jack to the transmission using tie-down straps. Remove the transmission support. On most vehicles, this will be a crossmember while on cars such as my friend's Mazda Miata, it will be a torque strut running from the transmission along the frame to the differential (See image above). Some people say this can be done after the bolts holding the transmission to the engine are removed. Don't. Just don't.

Source | Mike Aguilar
-
Go around the transmission one more time to make sure all wires, hoses, linkages, etc. are removed/disconnected and free of the transmission.

Source | Mike Aguilar
-
Jack the transmission up an inch or two and slide a block of wood between the front crossmember and the oil pan. Lower the jack until the block of wood takes the engine's weight. The rear of the engine is supported by the transmission and this will prevent the engine from rocking back and down when you remove the transmission.

Source | Mike Aguilar
-
Remove the two or three bolts securing the starter to the engine and/or transmission bellhousing. Use a piece of wire to support the starter so no weight is taken by the wires. Remove the five to nine bolts/nuts securing the transmission to the engine.

Source | Mike Aguilar
-
Here's where it gets interesting. Separate the transmission from the engine by prying the two apart or by wiggling the transmission back and forth while pushing/pulling toward the rear of the vehicle. Once the two are separated, keep pushing the transmission to the rear until the input shaft clears the clutch assembly. Lower the transmission out of the car and push to the rear.
-
Using a wrench or ratchet and socket (usually 1/2-inch to 5/8-inch), remove the bolts securing the pressure plate to the flywheel. Be careful here because the pressure plate can be surprisingly heavy for its size, especially on bigger vehicles. Remove the pressure plate and clutch disc.

Source | Mike Aguilar
-
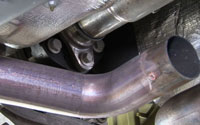
Inspect the flywheel. If the wear does not include grooves from metal-to-metal contact or bad burning/bluing (see image above), you can resurface it using a drill with a small (2-inch or so) sanding pad with 600-plus grit paper. Otherwise, you will need to have it professionally resurfaced or replace it if it is really bad. It's easy to damage the flywheel, so check your manual before undertaking this task.

Source | Mike Aguilar
-
Remove the pilot bearing from the center of the crank/flywheel using a pilot-bearing removal tool. This is available for free rental from Advance Auto Parts.
-
Lube the sides of the new pilot bearing and push it into position. Using a large socket or a driver tool and hammer, drive the bearing in until it is flush with the crank/flywheel.

Source | Mike Aguilar
-
Slide the installation tool/adapter into the splined center of the clutch disc, paying attention the “Flywheel Side" label on one side. Slide the nose of the tool into the center of the pilot bearing until it bottoms out, and slide the pressure plate into place. There will be between two and four pins on the flywheel that will help you properly position the pressure plate.
-
Install the nuts securing the pressure plate to the flywheel by hand. Using a star pattern, slowly tighten the nuts in stages while making sure the installation tool wiggles freely. If not, loosen the nuts enough to free the clutch disc and start over. Torque the nuts to the proper spec.
-
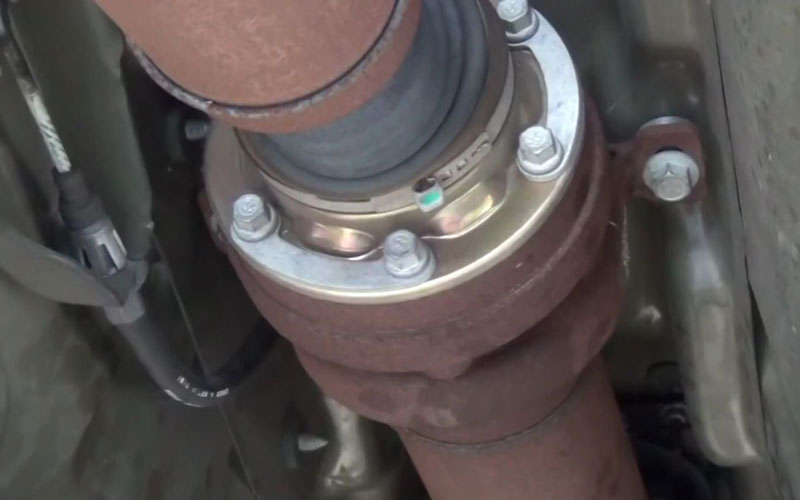
Replace the throw-out bearing. On vehicles like the 2005-2009 Mustang, this entails removing hydraulic lines from it prior to the removal of the bolts securing it to the transmission (see image above). On older cars, this simply means popping the clutch fork out of the ball stud and removing the bearing from the clutch fork (see image below). Installation is reversing the removal process.

Source | Mike Aguilar
-
Pull the clutch installation tool out and raise the transmission back into place. Don't force the transmission into place. If it doesn't easily slide in to almost contact with the engine, something isn't lined up right. You may need to put the transmission into gear and turn it a little. You may also need to roll it to line the alignment pins up.
-
Reverse the removal process, installing the transmission-to-engine bolts first and working toward the rear. Reconnect any vent tubes, cooling lines, speedometer cables, and any wiring connectors and shift linkages. Refill transmission with proper fluid. Reinstall the driveshaft(s) and transfer case.
-
Give everything a once-over and make sure everything is connected and tight. Refill the transmission with the recommended fluid.

Source | Mike Aguilar
-
Adjust the clutch. This will entail getting under the vehicle with a wrench or two on vehicles with mechanical linkage. With most hydraulically actuated clutches, adjustment is carried out by pumping and manually lifting the pedal a few times. Make sure the master gets topped-off also. What you're looking for is about an inch of pedal travel before engagement begins/resistance is felt.
-
Lower the vehicle and take it for a test drive. Don't hammer it. A new clutch needs to break in slowly over a period of about 100 miles.
Be sure to use the used-oil-recycling program at your local Advance Auto Parts store to dispose of any fluids after completing the clutch replacement.
You will have to remove part of the exhaust on vehicles with dual exhaust. This may also require you to disconnect/remove one or more O2 sensors first.

Source | Mike Aguilar

Advance Auto Parts carries a full line of motor manuals that contain all torque specifications, as well as the fluids recommended/specified by the manufacturer.
Some projects may be too challenging or time consuming to tackle at home, and that’s why we partner with trusted, professional shops that are ready to get you back on the road. Use our directory to find a qualified technician near you.