When I first started changing headlight assemblies, they really weren't assemblies but big bulbs called sealed beams. The first ones were round, and a Phillips-head screwdriver was all you needed to change them. It might have been as complicated as having to remove a piece of trim before getting to the headlight ring.

Source | Mike Aguilar

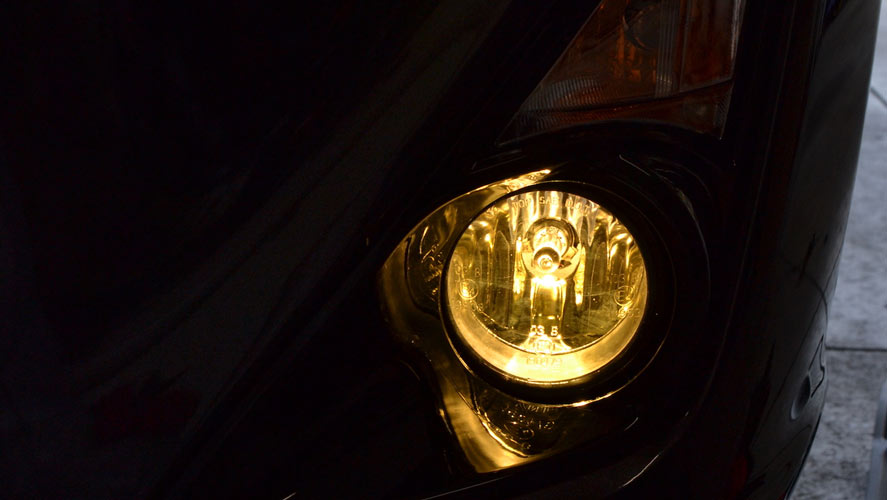
Anzo USA Headlight Assembly; Projector with Halo (Chevy Impala) | Advance Auto Parts
Starting in the '80s, sealed beams started to go the way of the dodo bird and were replaced by halogen lamps with a clear plastic lens. These designs were great for automotive stylists who could sculpt them for the sake of aerodynamics, but they came with their own set of problems.
Now they're sold as assemblies, and the lamps or bulbs can be changed if necessary, but changing the entire assembly due to damage or cloudiness often requires removing the bumper cover. We'll walk you through the process of changing a headlight assembly in a number of popular vehicles, including: a 2010 Chevy Impala, a '02-'06 Dodge Ram 1500, a '02-'07 Honda Accord and a '02-'06 Toyota Camry.
This is a good project for new DIYers
-
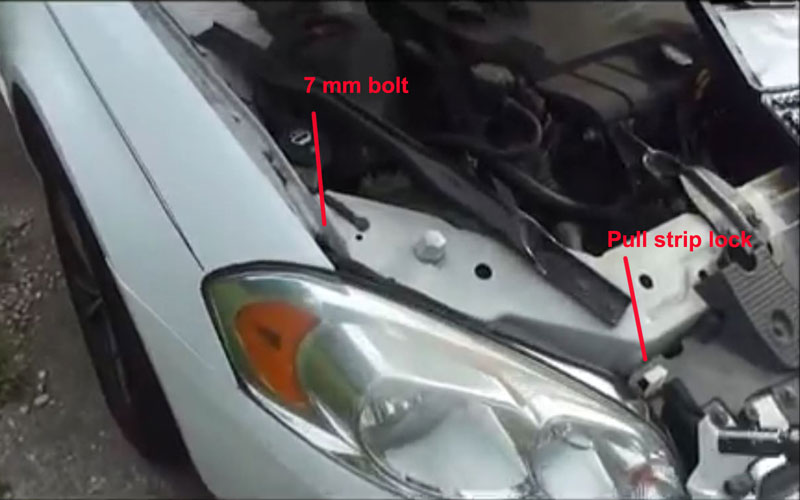
The tool list for changing the complete headlight assembly in a 2010-era Chevy Impala is a seven mm socket or nut driver. There's a bolt in the upper outside corner of the assembly where it connects with the inner fender rail. The white plastic strip on the radiator side of the assembly is all that locks that side in. Pulling it up and out removes it.
Source | Mike Aguilar
-
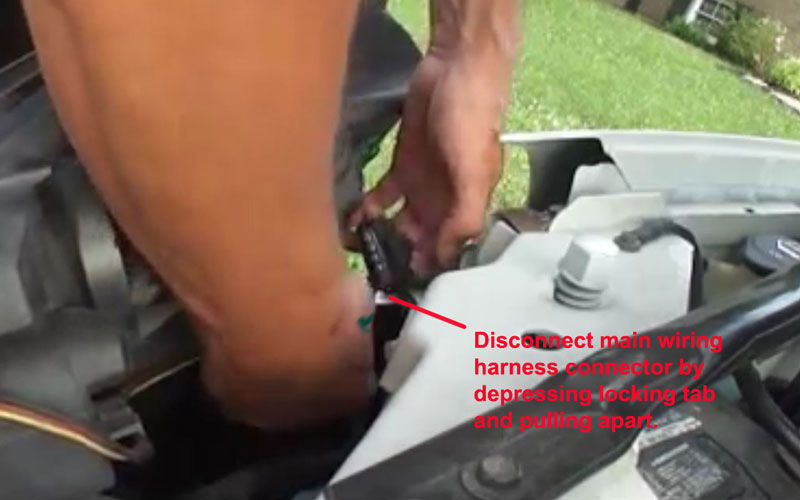
Pull the tabs the strip secured out of their holes in the radiator support. Give the fender side of the assembly a good tug to free it from the inner locking tab. Disconnect the wiring harness and install the new headlight assembly by giving it a good shove once the wiring is connected and the housing is laid in place before re-installing the bolt and white locking strip.
Source | Mike Aguilar
-
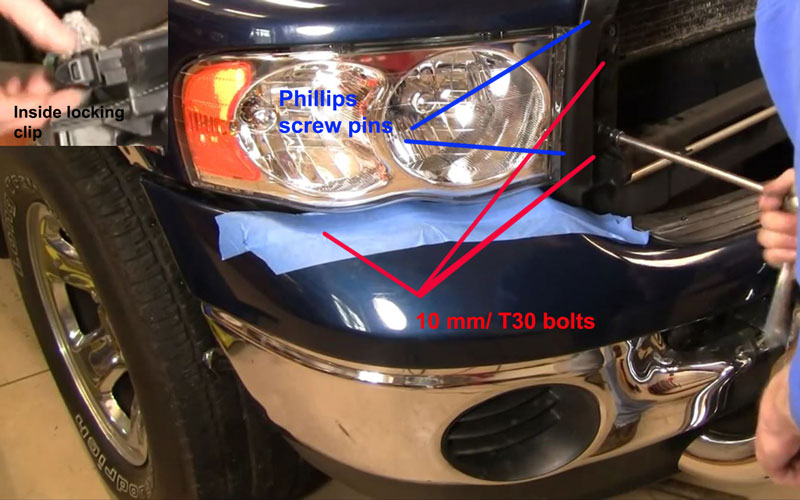
There's a gasket between the headlight assembly and the radiator support of the 2002-2006 Dodge Ram. It is secured to the radiator support with two clips that are locked in place with plastic Phillips screws.
Source | Mike Aguilar
-
Once the screws are removed, the clips can be popped out to gain access to two of the three 10 mm/T30 Torx bolts securing the headlight assembly. The third bolt is located under the outer headlight. We've used some painter's tape to protect the paint on our truck.
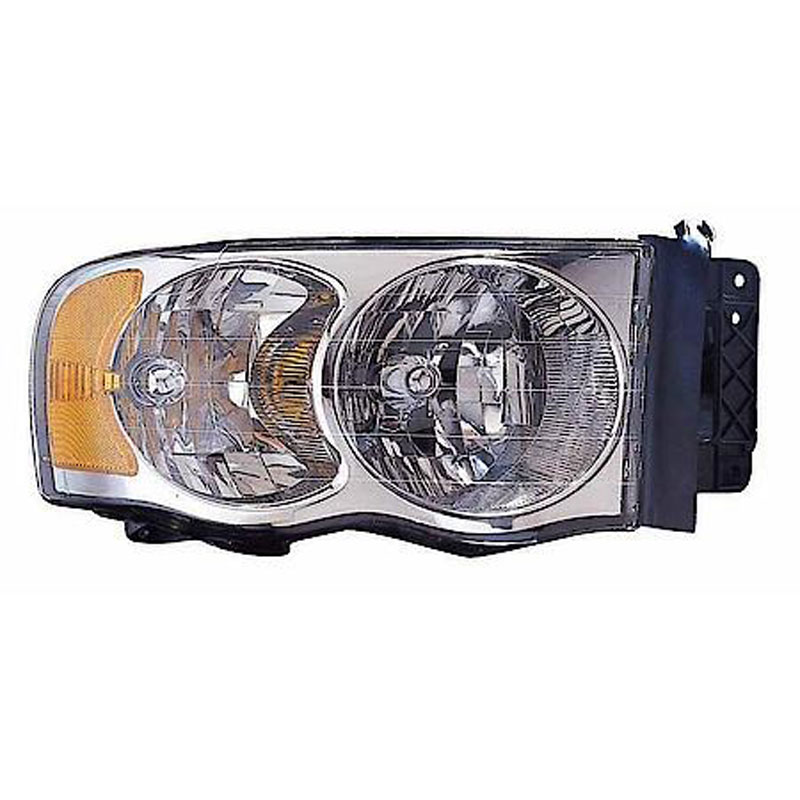
Maxzone Vehicle Lighting Headlight Assembly (Dodge Ram) | Advance Auto Parts
-
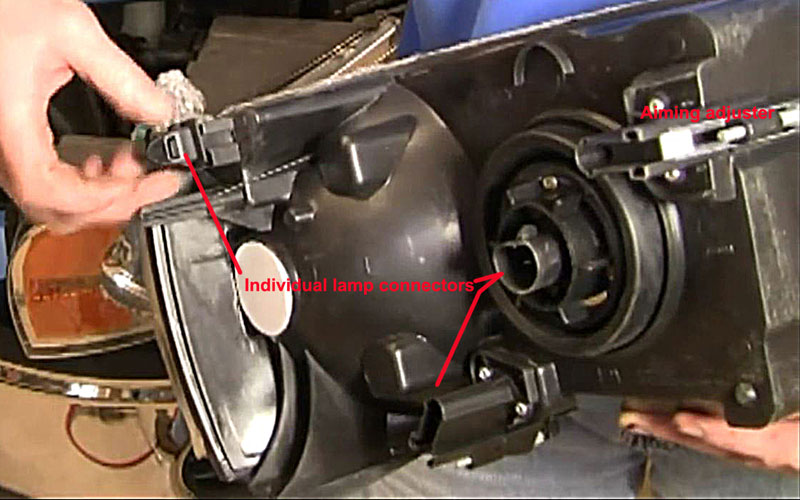
The assembly can be removed by giving it a sharp tug near the side marker light. Disconnect the wiring harness from the lamps and free it from the clamps or clips attaching it to the headlight housing. Connect the harness to the new assembly and reinstall.
Source | Mike Aguilar
-
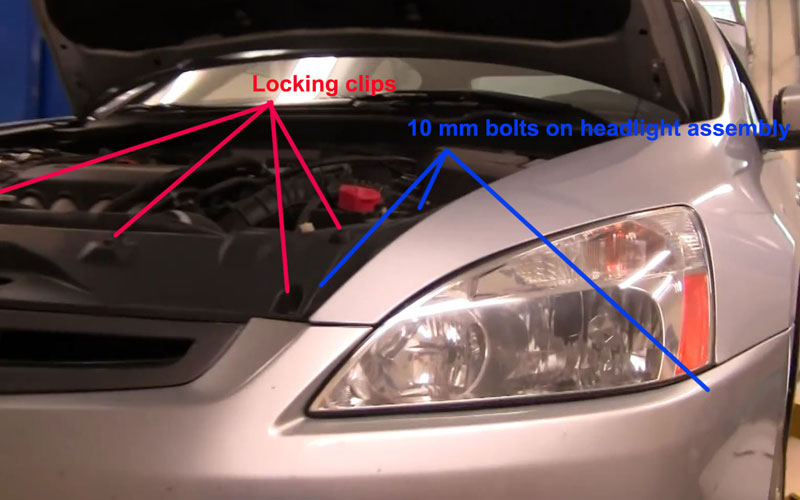
To change the headlight assembly on a 2002-2007 Honda Accord first requires the removal of the upper cover and the bumper cover—both require a small flat screwdriver to remove. Removing these covers exposes five 10-mm bolts securing the headlight assembly. The headlight assembly can be popped out once these bolts are removed.
Source | Mike Aguilar
-
The locking clips that secure the bumper cover can be removed after popping the pin in the center with a small screwdriver. The Accord has several of these clips on top securing the front radiator cover to the radiator support and the bumper cover. The bumper cover also has several of these clips underneath that have to come out before the cover can come off.
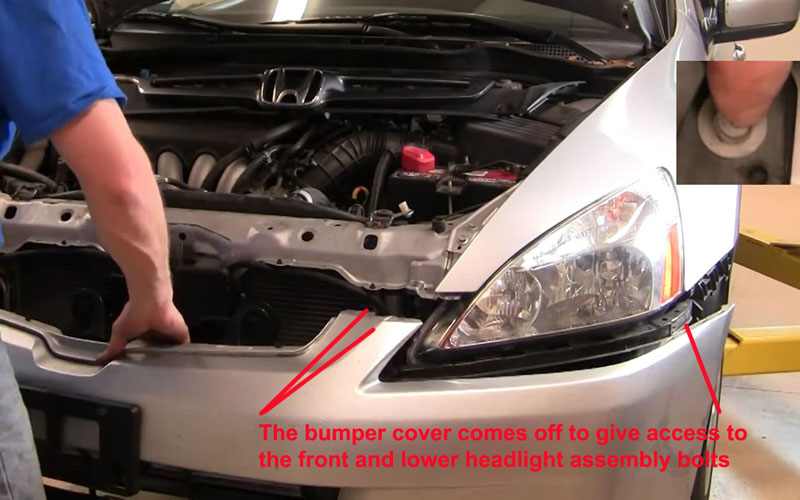
Source | Mike Aguilar
-
On the 2002-2006 Toyota Camry, there are three 10-mm bolts, two on the side being removed and the third at the lower inner corner of the opposite assembly. (this free the corner of the bumper cover enough for the next step). Now remove the clip in the center of the bumper cover by popping the locking pin out with a small flat screwdriver, then removing the clip.
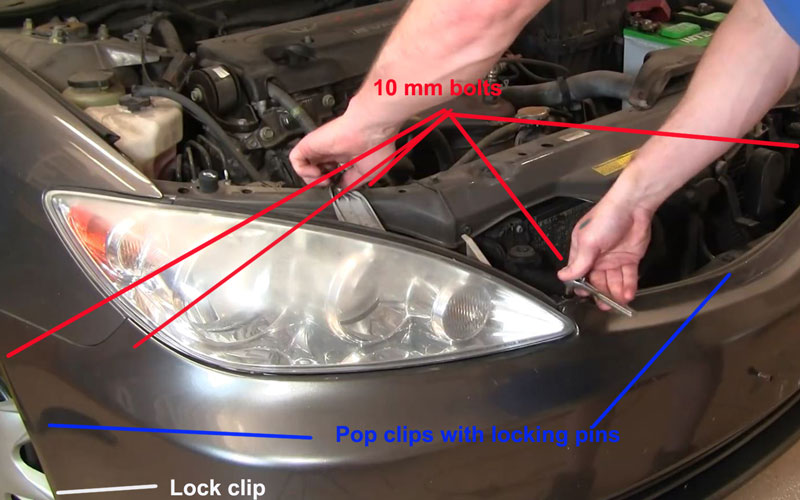
Source | Mike Aguilar
-
The bumper cover is attached to the fender by two clips: one that twists and pops out and the other locking pin that pops out with a small flat screwdriver. Pulling the inner fender out and the bumper cover down and away exposes the bolt securing the bumper cover to the fender. Pulling the bumper cover out and away exposes the third headlight housing bolt. Once this bolt is removed, pull sharply outward, disconnecting the wiring harness. You are now ready to install the new headlight assembly.
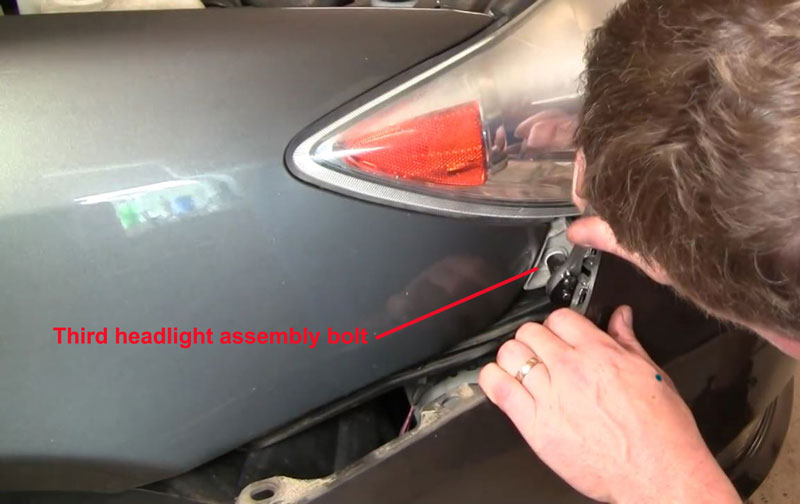
Source | Mike Aguilar
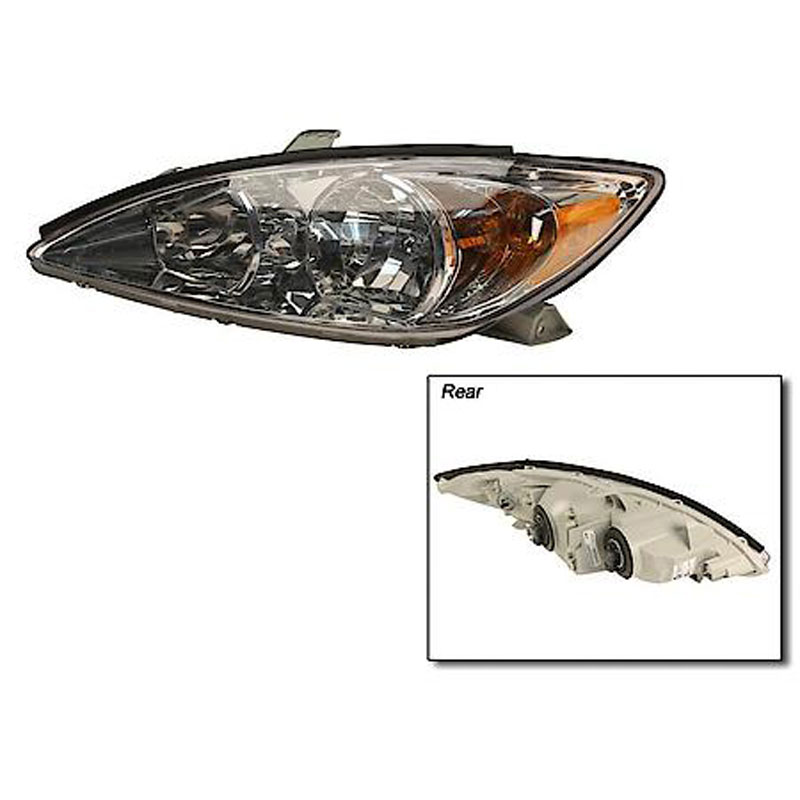
TYC Genera NSF Certified Headlight Assembly (Toyota Camry) | Advance Auto Parts

