National Bearings Dana 44 Differential for 4WD
Rear axle bearings support the outer ends of your rear-wheel-drive vehicle's axles. These bearings, one per side, will start to make noise when they begin to fail. This will usually be a squeaking noise but can also be a grumbling or groaning noise. If not changed in a timely fashion, they can cause serious damage, resulting in axle shaft replacement and maybe even the axle housing itself.
Here's a step-by-step guide on replacing worn bearings and axle seals in vehicles with third member differentials and solid axle tubes that don't have rear covers.
 Source | Mike Aguilar
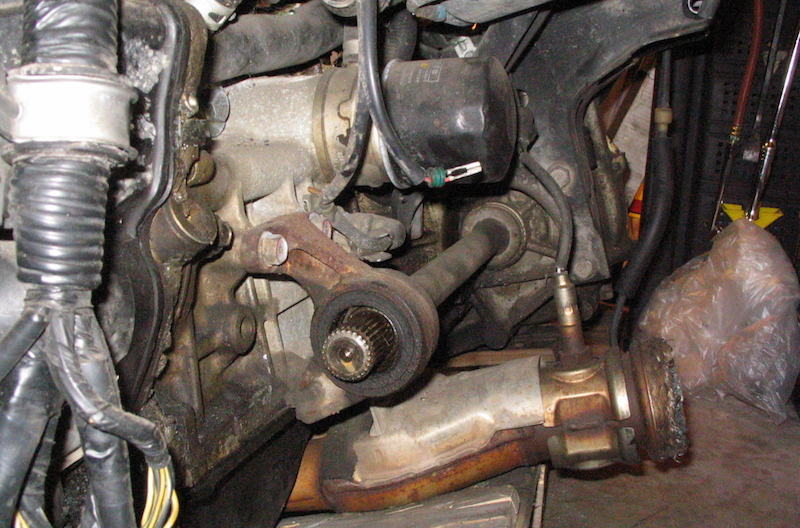
What is a third member?
 Ford 9-Inch rear end from the front showing the third member. Source | Mike Aguilar
A third member or center section is the “nose" of the differential housing that connects to the vehicle's driveshaft. It houses the differential assembly and is removable. This type of differential is often found on rear-wheel-drive vehicles from Chrysler and Ford and doesn't have a removable rear cover.
Some notes on replacing bearings
1. I've been doing this for almost five decades now. My father taught to me to pull the axles and send them to a machine shop to press the bearings and seals on and off, and then he'd reinstall the axles and send his customers home. Later in life, I found out that I could purchase a press and save that money. If you don't have the equipment or the proper training to use it, however, you will have to take the axles to a machine shop.
2. Do a quick YouTube search of this repair and you'll find some backyard/shade tree mechanics either cut these bearings off with a “whizzer wheel" or cutoff tool and a torch. I don't recommend this method unless you're either very skilled with these tools or have the money to buy a new axle if you damage it during bearing removal.

The “whizzer wheel method" Source | Mike Aguilar

This damage was caused by removing the bearing and collar with a torch. As far as I'm concerned, I'm buying a new axle. This might be able to be polished out, maybe. But the heat from the torch could also damage the metal structurally. Source | Mike Aguilar
This is a project that needs some know-how
-
Heat your oven to 400° F and place the bearings and retaining collars in it. The heat will cause them to expand, easing installation a little later.
-
Park on a flat and level surface and block a front wheel. Loosen the lug nuts on the rear wheels and raise and support the rear end using jack stands under the axle housing. Remove the rear wheels.
-
Place the drain pan under the differential housing and remove the drain plug if there is one. While the fluid is draining, remove the fill plug in the upper half of the housing.
Clean and inspect the drain plug, checking for metal flakes and excessive sludge buildup. If you find either large quantities or large pieces of metal flakes, you will need to disassemble the rear end for inspection. Loosely replace the drain plug to keep it from dripping.
-
Most vehicles that have not had the brakes serviced will have one or two keeper washers on the lug studs to keep the brake drum firmly attached. These can be removed by prying up on the edges with a small screwdriver until there's room to insert the screwdriver and twist it off. Remove the brake drum to expose the brakes and axle.
If your vehicle has rear disc brakes, instead remove the brake calipers and suspend them under the vehicle using a piece of wire or string. The calipers should be hung so as to keep slack in the rubber lines.
Put a drain pan under both sides.

Source | Mike Aguilar
-
Use the hole in the axle flange to access and remove the axle retainer nuts with a socket and extension. Once these nuts are off, remove the axle by pulling straight out. You may need to use the small screwdriver to “convince" the retainer plate to come off.

Source | Mike Aguilar
-
If your vehicle has the seal on the inboard side of the bearing, insert the working end of the bearing/seal puller into the axle tube past the bearing and secure it against the bearing. Firmly slide the weight of the tool against the outer stop until the seal comes out. The other type of setup has the seal between the bearing and retainer plate.

Source | Mike Aguilar
-
Thoroughly clean the inside of the axle tube with brake cleaner or a solvent. Coat the outside rim of the new seal with RTV and the rubber portions with either grease or axle fluid, and insert it into the axle tube by hand. Drive the seal into the axle tube using the seal installation tool. Make sure the seal is fully and evenly seated in the axle tube. In a pinch, you can use a large socket for this.

Source | Mike Aguilar
-
Assemble the bearing splitter between the retainer plate and axle flange. Tighten the splitter as much as possible to keep it from moving.
-
Place the bearing splitter on a firm surface with the lug studs facing down and unobstructed. Slide a protective collar over the end of the axle and press the axle out. This action will pull the bearing, seal, and retainer plate up until the press fit is released.
-
Clean and inspect the bearing race surface on the axle for nicks, abrasions, or extreme discoloring. If any of these are present, take them to a shop for further inspection. If the coast is clear, use a piece of fine sandpaper and brake cleaner to clean the mating surfaces.
-
Clean the backing plate thoroughly with brake cleaner. Use a fine bristle brush to remove thick sludge. Be sure to remove any traces of sealant or gasket pieces around the axle tube openings and on the retainer plates. Wipe down the inside of the axle tubes with a shop towel.
-
Clean the retainer plates thoroughly and slide them over the axle onto the flanges. Bring the new bearings from the oven and slide them into place. If your vehicle has the seal between the bearing and the flange, be sure to install it after lubricating it with grease or axle fluid.

Source | Mike Aguilar
-
Slide a pipe/post/pole the same inner diameter as the inner race of the bearing over the axle against the bearing. This pipe must be the same diameter as the inner race of the bearing so as not to damage the bearing. It must also be at least three or four inches longer than the axle.

Source | Mike Aguilar
-
Place the axle, studs down, either onto a strong brace or a block of wood to protect the studs. Repeatedly strike the end of the pipe with a good-size hammer to drive the bearing into place. Keep smacking until the bearing bottoms out. Remove the pipe and make sure the bearing spins freely.
-
Remove the pipe and drop the retaining collar onto the axle. Slide the pipe on and repeat the hammering process until the collar is firmly seated against the collar. Make sure the bearing still spins freely and the outer retaining plate is also able to move.
-
If you've brought your axle to a shop to replace the bearing, this is where you'll pick back up.
Lubricate the inside of the axle tube with grease or axle fluid and carefully slide in the axle. Be sure to support the end of the axle up until it slides into place in the carrier inside the differential. Repeat the process on the other side and make sure the axles turn freely.
-
Thread the retaining plate nuts onto the studs and hand-tighten them using a star pattern. Torque to about 20 lb-ft.

Source | Mike Aguilar
-
Reassemble the brakes and reinstall the tires.
-
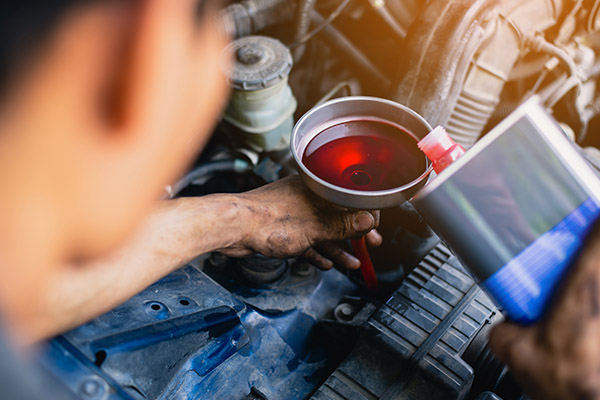
Tighten the drain plug on the differential and remove the fill plug. Fill the differential with the fluid specified by the manufacturer until it just starts to drip out of the filler opening. Reinstall the filler plug.
-
Start the engine and run the engine in reverse and drive for a few minutes to allow the fluid to circulate in the differential. Listen for any strange noises from the differential, axles, or brakes.
-
Recheck the fluid level in the differential and top off as needed. Lower the vehicle and tighten the wheels. You're done. Now it's time to put those new bearings and seals to good use!

Source | USMC/Public Domain
If the axle seal has been leaking for longer than a few hours, you will need to replace the brake shoes or pads.
Be sure to support the inner end of the axle as you pull it out to avoid damaging the splines.
The following eight steps involve the use of a hydraulic press. If you do not have a press, or are not trained to use one safely, you will instead need to bring your axle to a repair shop to have the old axle bearing pressed off and the new one pressed on.
Do not operate a press without safety glasses, and always follow proper operating procedures. Failure to do so can result in serious injury.
These axle bearings are usually tapered. The tapered end must be installed toward the differential.
If you have a press with a capacity of at least five tons, you can insert the axle into it and use the bearing splitter to press the bearings and collars on.
Don't forget to take advantage of the Advance Auto Parts free oil-recycling program for your used gear oil.