Generally, there are two reasons why you'll replace your transmission pan gasket. Either you're performing preventative maintenance that requires the pan to come off, or the gasket has failed and is leaking.
Maintenance intervals for replacing the transmission on modern automatic transmissions can vary widely, so you should follow your manufacturer's recommendation.
Note that some automatic transmissions are what manufacturers like to call "sealed-maintenance free"—something that is a misnomer because all oils degrade over time and require changing. These transmissions require different service procedures, which won't be covered here.

Source | Mike Aguilar
Regular Service – Replacing the filter and fluid
Some transmissions have an oil filter located at the bottom of the valve body that has a service schedule just like your engine oil filter. The filter is usually located at the valve body, which is accessible after removing the oil pan. Consult your vehicle manual to check the service interval. Even if you're not replacing the filter, you may be due for a transmission fluid “drain and fill”. If your transmission does not have a drain plug – as many do not – removing the pan is necessary to drain the old fluid.
Note that simply draining and filling your transmission is not the same procedure as a transmission fluid flush. Performing a full flush on a high mileage transmission may actually cause harm, and is not often recommended.
Leaking gasket
Gaskets are used on virtually every system in your car, from A/C components, to your engine, and – of course – your transmission. And the hard truth is that gaskets deteriorate over time and lose their ability to seal. Depending on the gasket, a leak can vary greatly in severity and damage caused to your vehicle. A blown head gasket in your engine, for example, is a big job and can be hard on the wallet. Compared to a head gasket, replacing a transmission oil pan gasket is a walk in the park. But before we dive in, let's consider why this is a job that shouldn't be ignored.
If left unaddressed, eventually a failed transmission oil pan gasket will allow transmission fluid to go from a seep to a drip. If you're thinking that one more drip will just add character to the mosaic of leaked fluids in your driveway, this is about more than just a mess.
Your transmission's operation is dependent on having a specific fluid level. Certain pressures must be reached in order to initiate gear shifts, and low fluid can cause problems with shift points and shift quality. Lack of proper lubrication can also damage internal transmission parts.

Carquest Trans Filters Transmission Filter, Advance Auto Parts
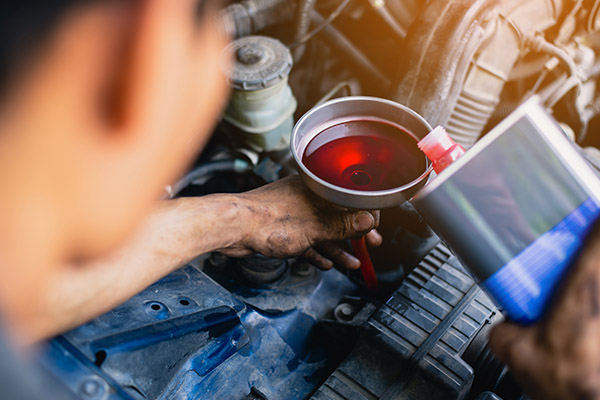
Inspect your fluid
You can learn a lot about your transmission by taking a look at your old fluid.
- Healthy fluid should be clean and red.
- Pink or milky looking fluid may be contaminated with water or coolant. This indicates a leak in the transmission cooler, located inside the radiator.
- A dark stain on the dipstick that won't wipe off is called a varnish, and this means the fluid has oxidized.
- Take a whiff. Dark fluid that has a burned-toast smell has been contaminated by burned clutch pack material. Often, burned fluid is a sign that the transmission will need to be rebuilt or replaced soon.
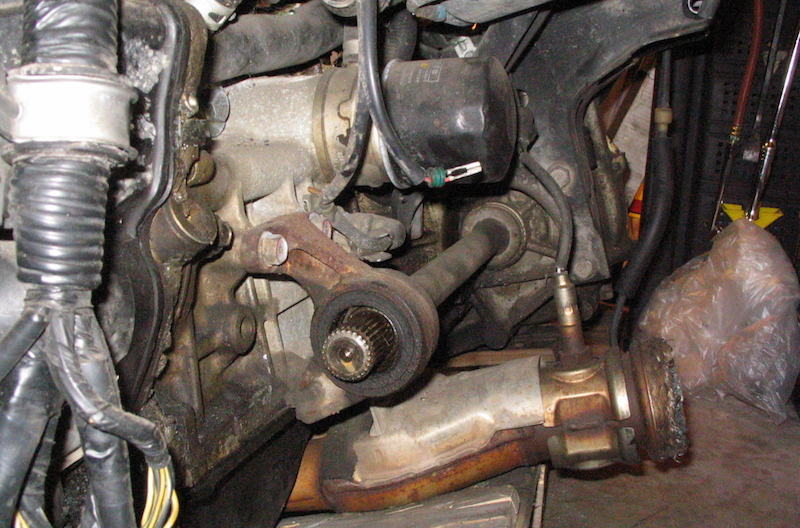
Steps to replace the transmission oil pan and filter
This is a good project for new DIYers
This is a project that needs some know-how
-
Safely raise the vehicle enough to crawl under the transmission.

Source | Mike Aguilar
-
Place the drain pan beneath the transmission oil pan. Remove the drain plug, if equipped, and allow the fluid to drain.

Source | Mike Aguilar
-
Loosen and remove the bolts around the transmission pan, except for the corner bolts—loosen those, but don't remove them. Allow the rest of the fluid to drain.
-
Use a small, flat screwdriver to separate the oil pan from the transmission case. The loosened corner bolts will allow the pan to hang, which prevents fluid splashing everywhere.

Source | Mike Aguilar
-
Not the orientation of the transmission oil filter, and then remove and replace it. Don't forget the filter gasket.

Source | Mike Aguilar
-
Use a gasket scraper to remove the old transmission oil pan gasket from the pan and the transmission.

Source | Mike Aguilar
-
Thoroughly clean the inside of the pan, paying attention to any magnet that may be present. Be on the lookout for any metal shavings or fragments adhering to the magnet. Some metal material on the magnet is normal. However, excessive shavings could indicate internal gear damage.

Source | Mike Aguilar
-
Place the new transmission pan gasket on the pan and lift the pan into place. Be aware that most transmission pans are not symmetrical, meaning that the gasket will only fit one way—the right way.
-
Replace the bolts on the transmission oil pan, working in a star pattern from the corners to keep the pan from cocking. Don't over-tighten these bolts, as the metal of the pan will distort and allow fluid to leak out. Lower the vehicle.

Source | Mike Aguilar
-
Locate and remove the transmission dipstick. Place the transmission funnel into the dipstick tube and empty two quarts of the recommended transmission fluid. Be certain to use the right brand and formulation of fluid, as recommended by the manufacturer. At one time, there were only a few varieties of ATF on the market; now there are more than a dozen, custom-blended for specific makes and models. Using the wrong fluid can quickly damage a transmission.
-
Start the engine and shift through the gears several times. As you shift, allow the transmission to go into gear before shifting into the next gear.
-
Once the engine and transmission have warmed up, check the fluid level. Remember, you need the engine running and the vehicle parked on a level surface to do this. Do not overfill the transmission.

Source | Mike Aguilar

The torque converter in your transmission can hold up to 14 quarts of fluid. None of this fluid drains out when the pan is dropped. To combat this, you can purchase a torque converter plug bolt and insert it into a hole you drill on the front (engine side) of the torque converter after removing the splash shield or inspection plate. If you choose this route, be sure to refill the transmission with sufficient fluid to completely fill it. This isn't for the fainthearted, though, as you are drilling into a vital component of your transmission, and caution must be exercised while drilling. Source | Mike Aguilar

A good spray- or paint-on gasket adhesive will keep the gasket in place and not prove problematic to the transmission later on. Don't, however, use any type of gasket sealer, since fragments of the sealer can come loose and be ingested by the transmission's internals. Also note that you may need to adjust the fit of the pan before replacing it as it may warp during removal. Source | Mike Aguilar