The gears in your vehicle's differential serve two main functions. First and foremost, they change the direction or plane of rotation from the engine/transmission to the wheels. Secondly, they act as a torque multiplier for your engine, giving you better acceleration, towing/hauling torque, highway economy, or low-end torque for off-road fun. They also need to be changed if they begin growling or groaning, or if you notice clunking and chunking coming from the differential.

Advance Auto Parts can show you how to install new gears in Integral Carrier differentials, such as those found in GM vehicles and some Jeep products. Source | Kyle Voss-The Fab Forums

There are several reasons you'd want to change gears in your differential, even if they're still in good condition. These are some of them: better acceleration, towing, fuel economy, and low-end off-road torque. Source (from left to right) | Allen Watkin/Mike Aguilar/Andrew Bossi/dave_7

Motive Gear Ring and Pinion Kit | Advance Auto Parts

Yukon Gear Pinion Install Kit for '98 & Up GM 9.5" Differential | Advance Auto Parts
This is a challenging and technical project
-
Follow the procedure to remove the axles in GM/integral carrier rear-ends. Put the new carrier and pinion bearings on a tray in an oven heated to 250-300 degrees.
-
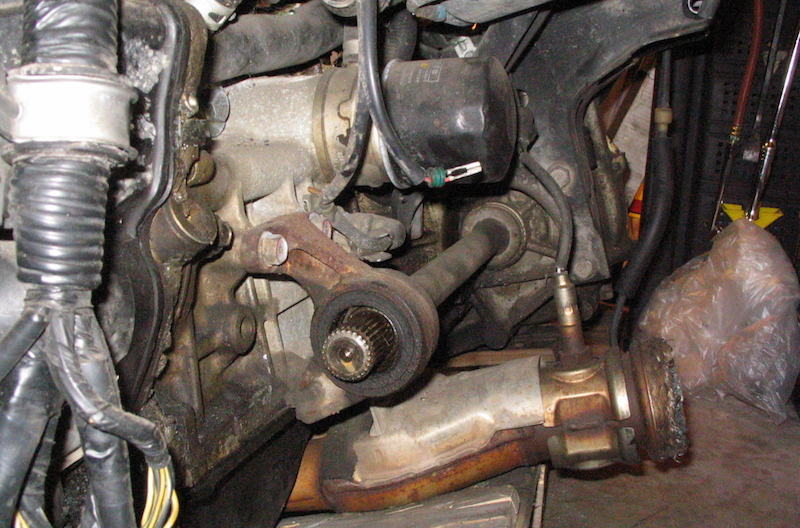
Remove the pinion nut. You may need a monkey wrench or something similar to hold the pinion if you don't have an impact gun. Remove the pinion yoke. You may need to convince it to come off with a hammer.

Source | Mike Aguilar
-
Use a punch, small chisel, or marking paint to mark the position and orientation of the carrier bearing caps. Remove the four bolts securing the two bearing caps and remove the caps. Remove the carrier, making note of the number and locations of any shims. You may need a prybar or screwdriver to help the carrier out.
-
Thread the pinion nut back onto the pinion until flush. Hit the end of the pinion and nut with the hammer to loosen and remove the pinion.

Source | Mike Aguilar
-
Remove the pinion seal with a screwdriver. Remove the old front bearing. Locate the cutouts in the housing and punch the two old pinion bearing races out.
-
Use the seal and race installation tool to install the new races. Lube the new bearing with gear oil and place it in the race. Lube the sides and rubber parts of the new pinion seal.

Source | Mike Aguilar
-
Install the bearing splitter between the pinion and bearing and tighten. Support the splitter and pinion so the pinion is two to three inches off the ground or workbench.
-
Use a press or a hammer to press/hammer the pinion bearing off the pinion. If using the hammer method, thread the pinion nut onto the pinion upside down until flush with the end of the pinion.

Unless you're lucky, adjusting pinion depth will require you to remove and reinstall the pinion bearing at least once. For this reason I recommend modifying a cheap bearing so you can install and remove it without damaging it or the new pinion while adjusting pinion depth and using a new quality pinion bearing for final assembly once all adjustments have been made. Source | Kyle Voss-The Fab Forums
-
Remove the bearing and transfer any shims to the new pinion. Slide the modified pinion bearing onto the new pinion.

Source | Kyle Voss-The Fab Forums
-
Remove the bolts securing the ring gear to the carrier. These will be tight and might be reverse thread.
-
Slide the new ring gear onto the carrier and install the new bolts that came with the ring and pinion kit. Torque the ring gear bolts according to manufacturer specifications.

Most manuals will tell you to check initial pinion depth. I skip this step because it still has to be checked later during the project. Source | Kyle Voss-The Fab Forums
-
Carefully slide the pinion into the housing. Lube the pinion yoke and install it onto the pinion. Leave any crush sleeves or spacers out for now. Torque the pinion nut and check pinion preload. Tighten the pinion nut until the desired preload is reached.
-
Place the modified carrier bearings and any shims that were removed during disassembly into the housing and install the bearing caps, keeping an eye on orientation. Torque the caps to specification.

Source | Luke Merrill-Tinman II Kustoms
-
Check pinion preload with the carrier installed and compare it to spec. Adjust as required.

Source | Mike Aguilar
-
Install the dial indicator perpendicular to the motion of the ring gear in contact with one tooth. Rock the carrier back and forth and check the ring gear backlash. If backlash is too high, move one shim from the right to the left of the carrier. If backlash is too low, move the shim left to right.
-
Paint both sides of four to six teeth on the ring gear. Hold pressure against the ring gear with your hand and rotate the yoke through four revolutions in both directions.

Source | Mike Aguilar
-
Compare the gear patterns to the photo above and adjust pinion depth as required by adding or subtracting shims between the pinion and bearing.

Source | Luke Merrill-Tinman II Kustoms
-
Once a good pattern is obtained, carefully remove the carrier and pinion and remove the modified bearings.

Source | Kyle Voss-The Fab Forums
-
Grab the pinion bearing from the oven and slide it into place. You may need to slide the modified bearing on top of it and tap it into place with the hammer. Reinstall the pinion with the crush sleeve or spacer and torque to spec and readjust preload. If you loosen the pinion nut during this process after installing the crush sleeve, you'll need to use a new crush sleeve.

Seating the carrier bearing on a Dana 44. Source | Mike Aguilar
-
Grab the carrier bearings from the oven and install them. You may need to use the modified bearings to fully seat them.
-
Install the carrier and torque the bearing caps to spec.
-
Reinstall the axles, brakes, and tires.
-
Make sure the cover and housing mating surfaces are clean and apply a thin bead of RTV Orange or Black to the housing inside the bolts. Place the gasket on the housing and apply another thin bead of RTV. Install the cap and tighten the bolts.
-
Remove the fill plug from the front side of the housing and fill the differential with the fluid specified by the manufacturer.
-
Start the engine and put the transmission in drive for a moment or two, followed by a moment or two of reverse. Check again and top off the differential as needed. Listen for any moaning or groaning coming from the differential.
Most ring and pinion manufacturers specify a break-in period of 250-500 miles for their parts. You need to follow their instructions for gear break-in. Typically, this will mean completing short trips and allowing your vehicle to cool. It's also a good idea to change the gear oil again after the first 500 miles. Pay close attention for any moaning or groaning from the rear end.

Make sure to refer to a service manual before undertaking this job, as it is fairly complex and requires specific parts.
This procedure will work on any integral carrier differential. This is a Dana 30 on a Jeep. Source | Mike Aguilar
Use a grinder or file to carefully and slowly increase the inner diameter of the cheap bearings to use during initial setup of the new gears. Enlarge the pinion bearing until it will slide onto the new pinion and come off relatively easily but not be loose. Do the same with the cheap carrier bearings.
Some projects may be too challenging or time consuming to tackle at home, and that’s why we partner with trusted, professional shops that are ready to get you back on the road. Use our directory to find a qualified technician near you.


.jpg)