There are two basic types of differentials: “integral assembly with cover" and "drop-out third-member" types. Changing the gears in the former requires removing the carrier assembly from the rear after removing a cover and disassembling the differential. The differential assembly comes out the front of the differential in the third-member type. From there, you can either change the whole third-member assembly or manually change the gears yourself. We'll describe this process here.
Read more about types of differentials.
 Source | Mike Aguilar

USA Standard Gear Ring & Pinion Gear Set For Chrysler 875 | Source: Advance Auto Parts
This is a challenging and technical project
-
Follow the steps to remove the axles in Ford 9-inch third member and Mopar 8-3/4 –inch rear-ends.
-
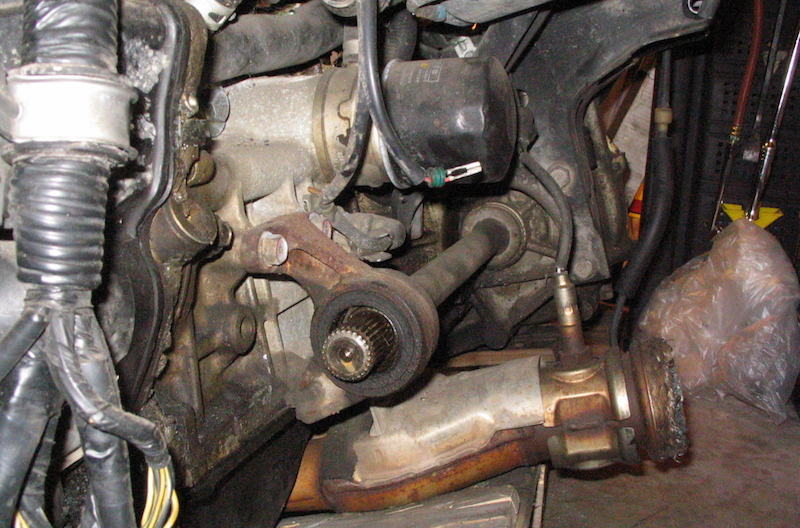
Remove the bolts securing the third member to the differential. Many vehicles, especially four-wheel drives and those with independent rear suspensions, will have third-member supports that will also have to be removed. Remove the third member. It is heavy—heavy enough that you will want to use a transmission jack to get it out of there safely.

Source | Mike Aguilar
-
Clean the axle housing and mating surface thoroughly. Apply RTV and put the gasket in place. Lift the new third-member assembly into place and run the nuts down by hand. Torque the nuts to manufacturer specification using a star pattern.
-
Follow the axle reinstallation process outlined in the linked article above.
-
Put the new pinion bearing on a tray in an oven preheated to 500 degrees F. Heating will cause expansion, easing installation a little later.
-
Ford 9-inch rears separate into pinion and carrier assemblies/housings. Remove the pinion bolt. Remove the yoke from the pinion. You may need to “convince" the yoke with a hammer.

Ford 9-inch pinion assembly. Source | Mike Aguilar
-
Remove the bearing from the pinion using a bearing splitter.
-
Put any shims from the step above on the new pinion. Grab the new bearing from the oven and slide it onto the pinion on top of the shims. Use the old bearing and a pipe to drive the new bearing into place.
-
Mark and remove the two carrier bearing caps. Mark the location of adjusters and/or make note of shims. Remove the carrier from the housing. Make note of the adjuster positions.

Source | Mike Aguilar
-
Remove the ring gear bolts and ring gear from the carrier assembly. You may need to give some love taps with a hammer.

-
Slide the new ring gear onto the carrier and secure with the new bolts from the kit. Torque the bolts to spec.
-
Install the new pinion and inner bearing and torque the yoke to spec. Check pinion depth and adjust as necessary with new shims. If a crush sleeve is used, remove the pinion once pinion depth is properly set and reinstall it with the crush sleeve.

Source | Mike Aguilar
-
Tighten the pinion nut until pinion bearing preload is set. (Preload specs can be found in the vehicle-specific manual for your vehicle.) Torque the pinion to just under spec and check preload with a torque wrench calibrated in inch-pounds. Tighten the pinion nut until the proper preload is reached.
-
Install the carrier assembly and set carrier preload by evenly tightening the adjusters.
-
Set ring gear backlash with a zeroed dial indicator perpendicular to a ring tooth. Rotate the ring gear back and forth until contact is made with the pinion. If the amount of movement is within specifications, lock it down. If backlash is too high, move the ring gear toward the pinion by loosening the adjuster on the right side and tightening the left. If backlash is insufficient, loosen the left and tighten the right. Always loosen first and then tighten.
-
Coat both sides of four to five ring-gear teeth with the grease in the kit. Rotate the yoke through several revolutions in both directions.
-
Compare the patterns in the grease to the image above and make the adjustments indicated.

-
Reinstall the third member, axles, and brakes. Refill the differential with the fluid specified by the manufacturer and reinstall the driveshaft.
-
Put the tires back on and lower the vehicle. Torque the lug nuts to spec and go for a mild test drive. Listen for any strange groaning or grinding noises to confirm your repair. Check the differential fluid level and top off if needed. Note that most ring and pinion gear manufacturers specify a 250-1,000-mile break-in period before driving hard or under heavy loads. Not allowing a proper break-in period can lead to early gear wear and - therefore - noise.
You can replace carrier bearings in much the same way as the outer pinion bearing, using the oven to heat and expand the bearings for installation. These don't have to be replaced unless they're damaged or failing.
Use Blue Loctite on all nuts and bolts during reassembly.
Preload is applied to bearings to remove excess play and is important for preventing unwanted noise and premature wear of new parts. If using a crush sleeve, consider having more than one available. If you accidentally set too much preload, you'll need to start over with a new crush sleeve.
Backlash is the amount of space, or "play" between two components. Incorrect backlash can result in unwanted noise, vibration, and damage to gear teeth.
Some projects may be too challenging or time consuming to tackle at home, and that’s why we partner with trusted, professional shops that are ready to get you back on the road. Use our directory to find a qualified technician near you.