Nowadays, many high-performance vehicles come from the factory with high-end brake systems, the likes of which had previously only been available from the aftermarket. For starters, they may have bigger rotors and pads for more contact area to slow the vehicle down. These brake systems often consist of multiple-piston, fixed calipers and brake pads made of friction material appropriate for the higher temperatures generated by high-performance driving.
Perhaps surprisingly, these systems are often easier to maintain and upgrade than standard brake systems, but due to differences in components, the process differs slightly. Let's take a look at how to change pads and rotors on these systems and discuss some easy upgrades that can be made if you plan on extensive high-performance use such as track days.
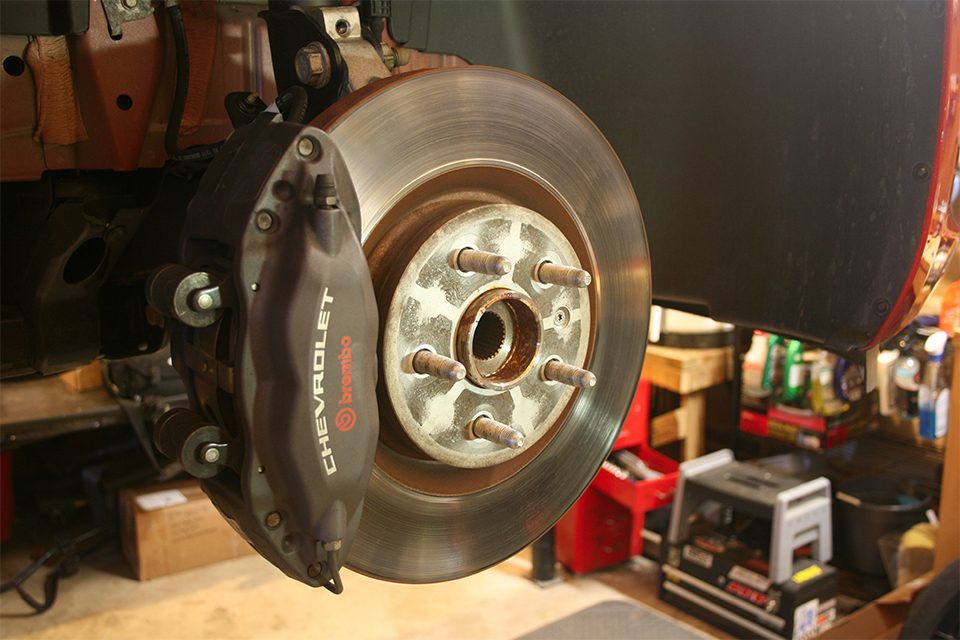
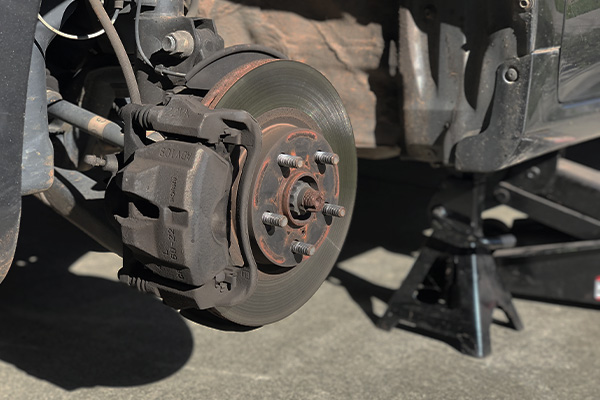
We'll be showing you the process on a 2014 Chevrolet Camaro SS equipped from the factory with four-piston fixed calipers supplied by Brembo. We're also working on a lift with the wheels already removed, so when you're getting set up at home, be sure to stay safe by chocking the rear wheels and using jack stands to support the front.
Here's what we're up against once the front right wheel is removed: a large brake caliper that has pistons on either side of the brake rotor. It is known as a "fixed" caliper because, unlike typical "sliding" or "floating" calipers, it does not have parts of the caliper that move in relation to one another. Among other things, this design provides for more even force against the brake pads via multiple pistons, in this case a total of four.
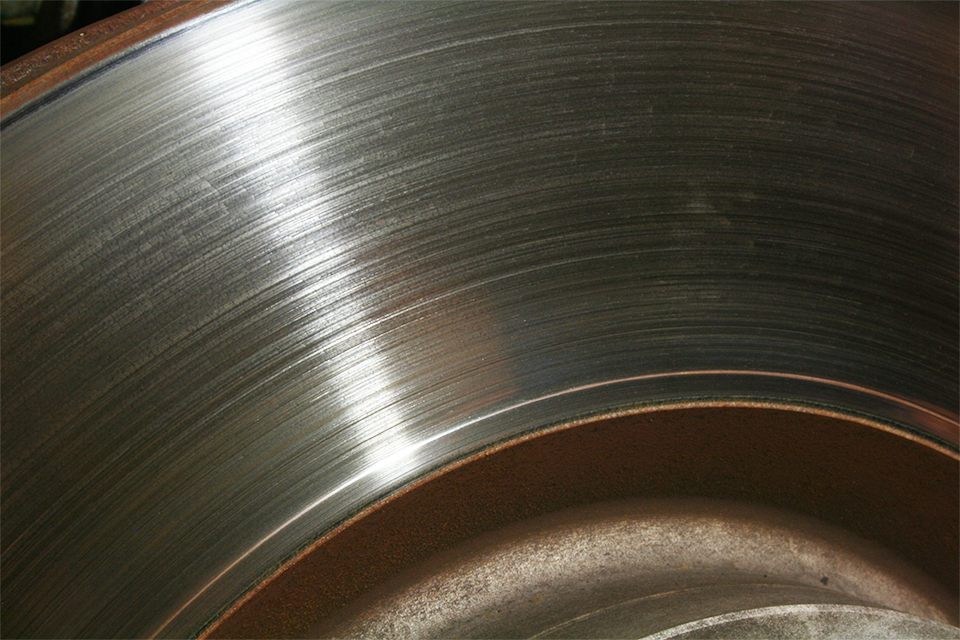
During the disassembly process, an inspection of the brake components can be indicative of any that may need replacement or upgrade. Here, we can see that the surface of the rotor has tiny imperfections indicative of so-called heat checking (they look like cracks perpendicular to the grooves). They're commonly seen in rotors that have experienced significant heating from conditions typical of track use, and could indicate the need for additional cooling via brake ducts or other aftermarket solutions.
While not hazardous in and of itself, over time and given the right conditions, these imperfections could grow and combine to create a large crack in the rotor that could be very dangerous, so we'll go ahead and buy a set of replacement rotors.
This is a project that needs some know-how
-
Removing the brake pads from fixed calipers is often quite simple. Here, the caliper can be left attached to the suspension and two pins removed via a hammer and punch. (Ignore the tiny round pucks extending from the pads on this application, these were added by the factory as an afterthought to reduce noise by increasing the mass of the pads.) The pins are pulled out from the back of the caliper by hand and the spring bracket is then free to be removed.

Source | Chris Werner
-
The brake pads then slide out from the caliper, but before this can happen, a rocking motion toward and away from the rotor may be required in order to push the pistons back into their bores in the caliper slightly. This relieves the pressure that may be preventing the pads from sliding out. Check the surface of the brake pads for any significant cracking, which could indicate the pad was not suitable for the temperatures experienced and that an upgrade is needed.

Source | Chris Werner
-
Since we need to remove the rotor we need to get the caliper out of the way. This requires removing two bolts at the back that secure it to the suspension.

Source | Chris Werner
-
Once it's loose from the suspension, the caliper can be moved out of the way. A bungee cord works well for this. Don't let the caliper hang from the rubber brake hose, and also be careful not to kink or twist the hose, which can cause internal damage.

Source | Chris Werner
-
Sometimes, brake rotors are held in place by a small bolt. While it doesn't have a function while the car is operating (since the wheel is holding the rotor from moving laterally), this bolt does come in handy to keep the rotor in the right place during brake work. Its removal allows the brake rotor to come off.

Source | Chris Werner
-
Pull the brake rotor off of the hub. Sometimes, this will require a few taps with a rubber mallet, as corrosion between the hub and rotor can cause it to be stuck in place. We'll discuss a trick to prevent this from happening again in a few steps.

Source | Chris Werner
-
Although we're focusing this sequence on the front brakes, the rear brakes are often very similar — though this isn't the case on all cars as sometimes fixed calipers are only present in the front. In the case of this Camaro, because the rear brakes also have fixed calipers, the repair sequence is basically identical, but we should note that attention needs to be paid to the parking brake.
Unlike the designs of sliding/floating calipers, the parking brake mechanism on fixed calipers may not be integrated into the pistons and may not utilize pads at all. Here, the parking brake actually functions via a drum system with brake shoes that push against the inside surface of the rotor hat.
Don't forget to disengage the parking brake or the rotor will not come off! Also, if your vehicle has an electronic parking brake system, check to see if the system needs to be put into "maintenance mode" for this same reason.

Source | Chris Werner
-
Although new rotors come essentially ready to install, it's not a bad idea to wash them in soapy water to help remove any anti-rust coating as well as anything left over from the manufacturing process. This is in addition to the need to clean them with brake-parts cleaner. Doing this will help ensure optimal wear-in and quiet brakes.

Source | Chris Werner
-
The new brake rotor goes on and the existing brake rotor bolt is tightened in place (for this Camaro SS, 89 lb-in). Don't forget that cleanliness is critical; wipe the rotor with brake-parts cleaner and use new gloves when touching the brake rotor from this point forward! Note that although we're choosing to stick with stock-replacement vented rotors here, upgraded rotors with features like additional cooling or long-life coatings are also available from Advance Auto Parts.

Source | Chris Werner
-
It's time to move the brake caliper back into position. Be sure the rubber brake hose doesn't get twisted during this process and that its routing is the same as it was before the caliper was removed.

Source | Chris Werner
-
The new brake caliper bolts are tightened according to manufacturer specifications (here, 30 lb-ft plus 90 degrees). Marking the bolts with a marker helps with determining whether the 90-degree angle has been achieved. Don't use a torque wrench for the “angle" part of the process since a torque wrench is not designed to be used for turning a bolt once its torque setting has been reached.

Source | Chris Werner
-
Before the new brake pads can be installed, the pistons need to be pushed fully back into their bores. Unlike the case for sliding/floating calipers (which generally require a clamp), this process can often be done by hand. It's best to open a brake bleeder to ease this process rather than trying to push brake fluid back up to the reservoir (don't worry about air getting into the system as we'll be bleeding the brakes momentarily). Remember, on this four-piston system, there are two pistons per side.

Source | Chris Werner
-
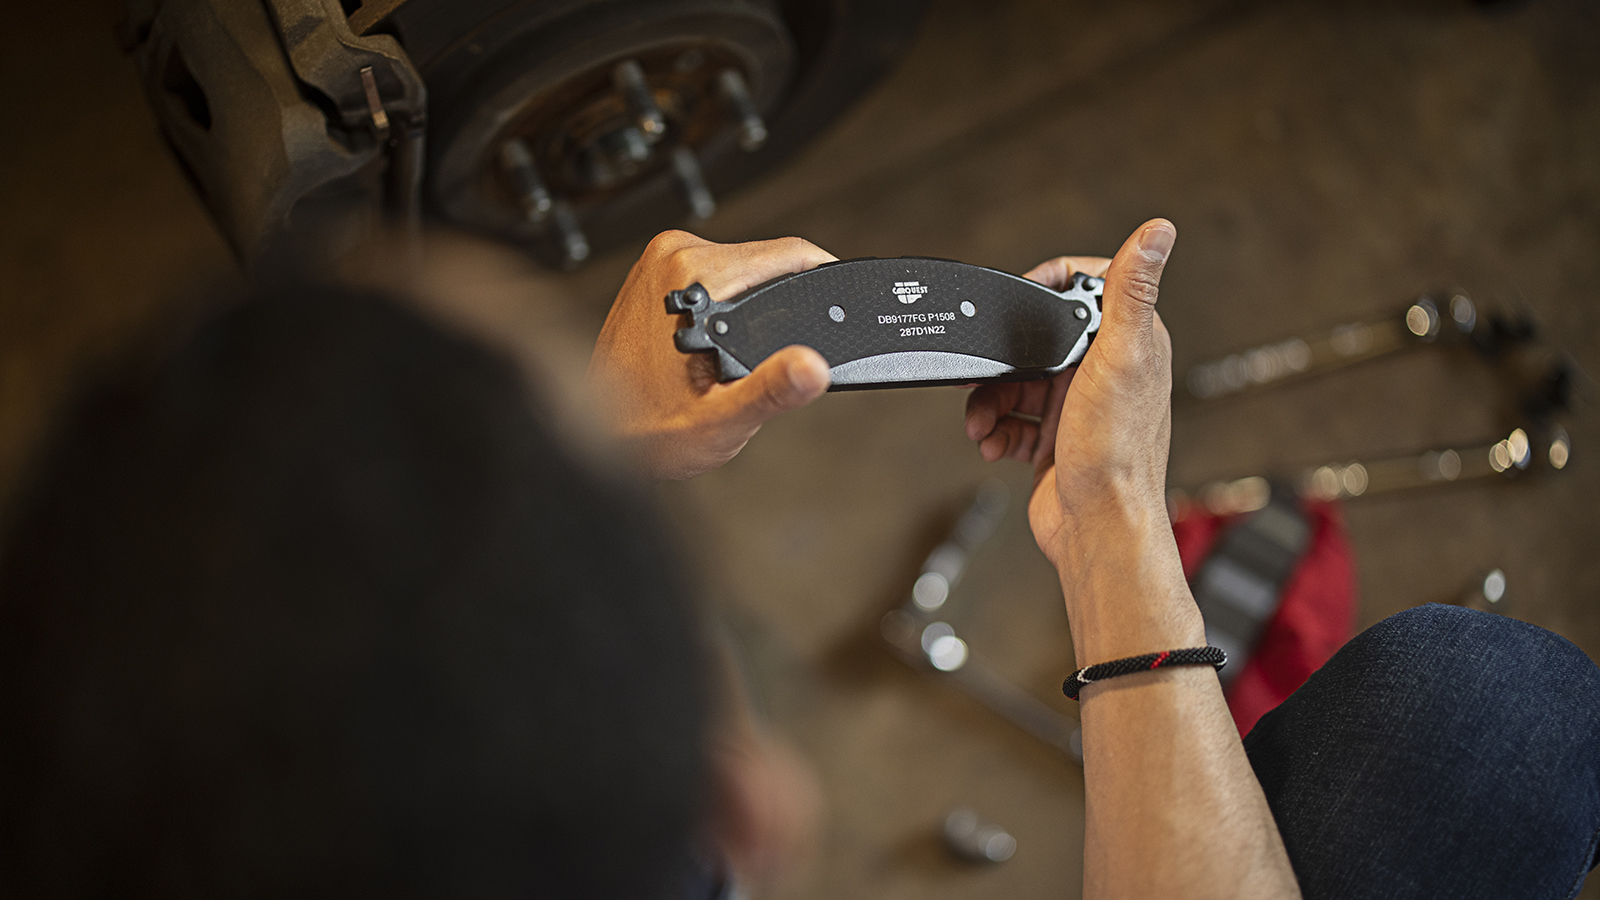
The brake pads included from the factory on high-performance braking systems are often adequate for high-performance driving, but upgraded pads (such as these semi-metallic Ferodo pads available at Advance Auto Parts) are available that will provide even better braking performance and increased resistance to heat if you're willing to live with some potential tradeoffs such as increased noise and brake dust (depending on the pad). If you're still deciding which type of pad is best for your vehicle, check out the different types of materials you can choose from.

Source | Chris Werner
-
These particular pads didn't include any lubricant, but be sure to apply whatever is specified or provided by the manufacturer in the locations the manufacturer recommends. This will help minimize any brake noise or wear problems. Here, we're applying a silicone-based lubricant to the backs of the brake pads (in the vicinity of where the pistons will make contact) as well as to the caliper pins. Be sure not to get any lubricant on the friction surface of the pads!

Source | Chris Werner
-
After wiping any dust or grime from the areas of the caliper that the pads will sit, the new brake pads slide into place. If they don't go in easily, you may need to push the pistons into their bores a little more.

Source | Chris Werner
-
The spring bracket is placed against the pads and the caliper pins reinserted to secure it and the pads. Cleaning the caliper pins of any rust or other contamination before replacement is a good idea.

Source | Chris Werner
-
A few taps with a punch and a hammer will be needed to seat the caliper pins. The brake pad installation is now complete!

Source | Chris Werner
-
The last step is bleeding the brakes in order to remove any air bubbles and circulate the new fluid through the system. If you've never bled brakes, check out our guide for the proper procedure. Once this is complete, reinstall the wheels and torque to specification.

Source | Chris Werner

A note on hardware: Some fasteners used by OEMs are designed for single use. Here we compare a used and a new caliper bolt, and find that the used item is 0.020-in longer. This is because the bolt is a “torque to yield" type that permanently stretches once tightened. Replace any such bolts during this process. We're using ACDelco bolts, but other brands are also available from Advance Auto Parts.
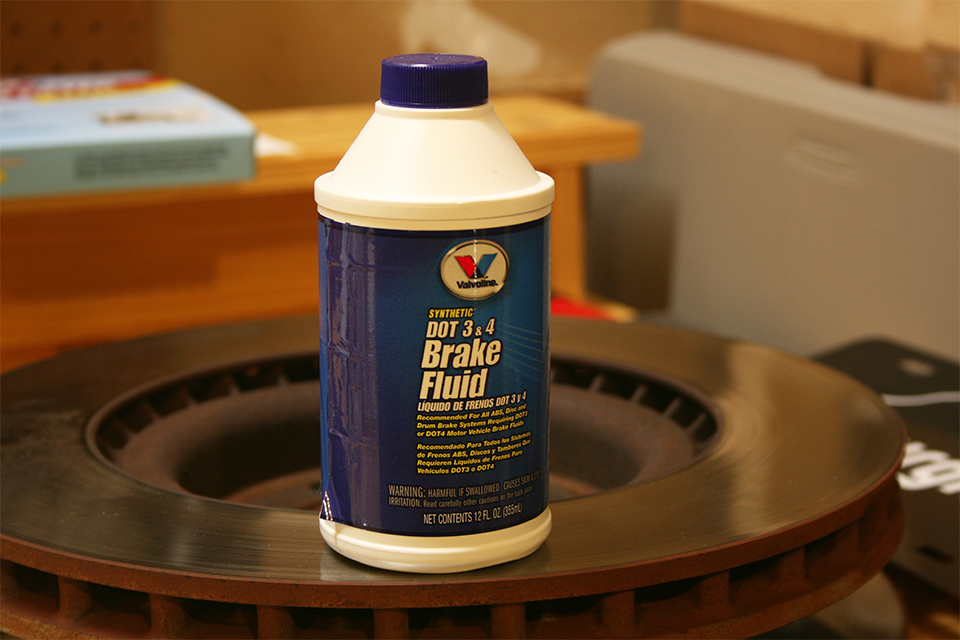
Keeping your brake fluid fresh is important for high-performance driving in particular because the fluid absorbs moisture over time, lowing its boiling point. (Fluid that boils will result in bubbles in the fluid and cause pedal travel to increase or for the brakes to fail entirely.)
DOT 4 fluid has a higher boiling point than the DOT 3 fluid installed at the factory by most manufacturers, and it's backward-compatible (although you should be sure to bleed the brakes well enough to remove all DOT 3 from the system if switching to DOT 4). A variety of brands are available from Advance Auto Parts, and both the dry and wet boiling points are generally listed on the bottles (higher is better!).
Note that most types of brake fluid attack paint and therefore you should be very careful not to get any on painted surfaces.
Note also that not all types of brake fluid are compatible with each other - DOT 5, in particular, is silicone based and therefore not compatible with DOT 3, 4, or 5.1 fluids, or with most automotive braking systems.
Be sure to follow any break-in or bedding procedure recommended by the brake pad manufacturer (this is usually listed in the paperwork in the box the pads came in), and enjoy the added performance of your freshly maintained and upgraded brake system!