Your car's clutch is what allows you to shift gears without that horrendous gear-grinding noise. When you depress the clutch, the engine's torque is decoupled from the transmission (called a transaxle in front-wheel-drive vehicles), allowing the gears to synchronize so you can shift noiselessly. As the clutch wears, it begins slipping and you lose torque. To get that torque back, you need to change the clutch. Here, we'll describe how this is done on most front-wheel-drive vehicles. Before beginning, look over a Haynes manual, as much depends on vehicle specification. Also read any instructions that come with the clutch.

Source | Mike Aguilar

Clutch Set. Source | Advance Auto Parts
This is a challenging and technical project
-
Park the car on a firm surface that is flat and level, such as in your garage or at the curb. Firmly set the parking brake and block the front and rear of one rear wheel.

Source | Mike Aguilar
-
Loosen and remove the axle spindle nut on both sides. Loosen the front lug nuts one or two turns with the lug wrench. Place the jack under the frame or front crossmember and raise the vehicle until the front wheels are clear of the ground. Place the jack stands under the frame or pinch weld and carefully lower the car onto the stands. Remove the wheels.

Source | Mike Aguilar
-
Disconnect the battery negative cable. On some vehicles, you will need to completely remove the battery and battery box in order to remove the transmission.
-
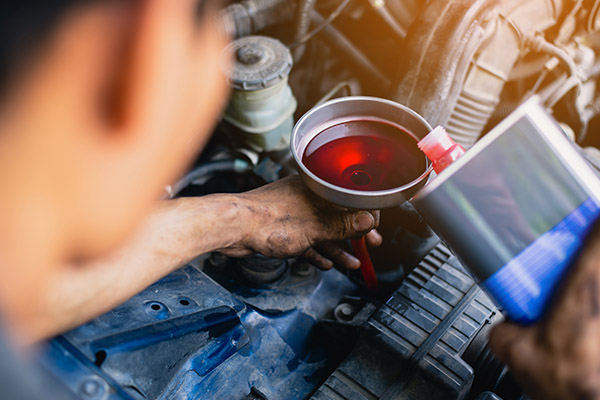
Place the drain pan under the transmission and drain the fluid.

Source | Mike Aguilar
-
Look around under the hood to see what will and won't be in your way as you perform this repair. This may include the battery and battery box, as mentioned above, the power steering reservoir, the air inlet assembly and airbox (don't forget to disconnect any sensors in the inlet tube), and heat shields around the exhaust, among others. You may also have to remove the intermediate pipe between the exhaust manifold and the muffler.
-
Thread the axle nut onto the axle until flush with the end of the axle. Tap on the axle nut until the axle moves freely. Remove the axle nut and make sure the axle is free.

Source | Mike Aguilar
-
Remove the bolt securing the ball joint to the lower control arm. Pry down on the control arm with the prybar until the ball joint stud can be removed from the lower control arm. Pull out on the rotor/MacPherson strut and push the spindle out completely.
-
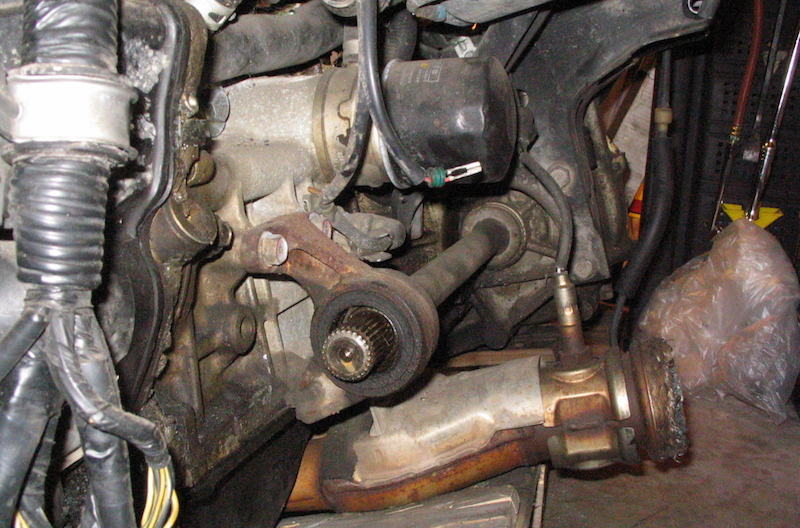
Use the prybar to pop the inner CV joint out of the transaxle and remove the axle shaft.
-
Disconnect the clutch and shifter linkage. How this is done differs from vehicle to vehicle. Some, like the Ford Focus, have this linkage inside a box on the “front" of the transmission (Ford Focus), while on others they're up on top of the transmission and exposed. On still others, this will entail removing the slave cylinder from the transmission (without breaking the seal on the system). Refer to the Haynes/Chilton book for your vehicle for this. Secure these out of the way.

Source | Mike Aguilar
-
Remove the starter. Again, where and how these are mounted differs. On some cars, it's up top, next to the radiator, while on others it is way down in the back buried under other items. Most guides tell you to disconnect the starter and remove it completely. Just remove the bolts and secure it out of the way.
-
Support the transmission. This can be done using an engine hoist, a jack with a block of wood under the oil pan or an an engine support.

Source | Mike Aguilar
-
Remove any motor/transmission mounts securing the transaxle to the frame and/or engine. You can usually just unbolt these from the engine/transmission and leave them in the car, while on others one or more will have to be removed completely to move forward.

Source | Mike Aguilar
-
Support the transaxle with the jack (hopefully with a transmission adapter). Secure the transmission to the jack with a tie down strap. Remove the five to 10 bolts securing the transaxle to the engine. Some vehicles will make you become a human pretzel or Plastic Man to find and reach every bolt (make sure you have the right extensions and possibly a flex head or wobble extension).

Source | Mike Aguilar
-
Use the prybar to separate the engine and transaxle. Once the input shaft is clear of the clutch, lower the transaxle out of the car and move it out of the way.
-
Remove the four to six bolts securing the clutch assembly to the flywheel. Be careful here because this assembly is deceptively heavy and can fall once the last bolt is removed.

Source | Mike Aguilar
-
Inspect the flywheel. Resurface using fine sandpaper on a small rotary sanding disc with a drill if there is no abnormal or excessive wear or there was no metal-to-metal contact between the clutch disc and flywheel. If the wear is excessive or there are grooves worn into the surface, remove it and have it resurfaced or replaced. Again, be careful as the flywheel is heavy.
-
Remove and replace the pilot bearing if so equipped.

Source | Mike Aguilar
-
Replace the throw-out bearing. This procedure will vary depending on year, make, and model. Some will have you disconnecting hydraulic fluid lines, while others have the bearing in a clutch fork mounted to a pivot ball.

Source | Mike Aguilar
-
Place the clutch disc into the pressure plate and insert the clutch installation tool through the center of the disc. Hold this assembly against the flywheel, making sure the tool bottoms out. Insert the pressure plate bolts and tighten them by hand in a star pattern. Using a star pattern, torque the pressure plate bolts to manufacturer's spec.
-
Lift the transmission back into place and push it into place against the engine. Don't force it. If it doesn't go all the way, turn the engine a little and try again. Do not use the bolts to force the transmission back into place.
-
Install the transmission bolts and torque them to specification.

Source | Mike Aguilar
-
Reverse the removal process, replacing the starter, motor/transmission mounts, axle shafts, connecting shifter and clutch linkages, wheels, ball joints, spindles, etc.
-
Refill the transmission with the fluid specified by the manufacturer.
-
Run the engine and shift through the gears a few times to circulate the fluid. Check and top off the fluid as necessary.
-
Adjust the clutch per manufacturers' instructions. This is mostly on clutches actuated by cable or linkage, whereas most hydraulic clutches self-adjust.
-
Lower the vehicle off the stands and torque the wheels and spindle nuts if they were removed.
-
Enjoy the efficiency of your new clutch.
Be sure to pick up the appropriate Haynes or Chilton manual for your particular vehicle to get the torque specifications. Also be sure to take advantage of the free used oil-recycling program at Advance Auto Parts.
Now would be a good time to check your motor mounts for excessive play, as you'll be removing one or two of them to complete this repair.

On some vehicles such as Volkswagens, the axles are bolted to hubs on the transaxle and spindle. These may require a special tool to remove or a large Allen wrench/socket and don't require separating the ball joint or removal of the spindle nut.
You can stop the engine from turning as you torque these bolts by wedging a large wrench against the frame and one of the alignment pins on the flywheel.
Some projects may be too challenging or time consuming to tackle at home, and that’s why we partner with trusted, professional shops that are ready to get you back on the road. Use our directory to find a qualified technician near you.