
Remember watching Indiana Jones trying to stop a runaway mine cart by standing on its metal wheels and in the process nearly setting the soles of his boots on fire? Well, the brake shoes used in drum brakes today may be more sturdy and sophisticated, but they work the same way. Brake shoes are the curved, metal friction plates that press against the inside of the brake drums to slow the wheels. Unlike Indie's boots, however, brake shoes are lined with material that can withstand the intense friction and heat that braking generates.
Drum brakes are an older braking system (dating back to the Model T days), and were standard equipment on most vehicles up through the early 70s. They use an ingenious self-adjustment system to compensate for brake wear and are generally a pretty reliable braking technology. Although drum brakes have mostly been replaced by more efficient disc brakes, many thousands of vehicles on the road still use them, especially for rear brakes (since front brakes provide most of the braking ability on any vehicle).
How Drum Brakes Work
In a drum brake system, wheel studs protrude from the brake's backing plate. A pan-shaped drum fits over the mechanism, backing plate and studs, with a hydraulic wheel cylinder and curved brake shoes inside.
When you step on the brake pedal, hydraulic pressure from brake fluid activates a piston in the wheel cylinder. The piston causes the shoes to expand internally and drag on the lining of the brake drum, slowing the vehicle down via friction. Stiff return springs then retract the shoes when braking is done. The shoe facing the front of the vehicle is known as the primary shoe, while the other is the secondary shoe.
Drum brakes are a tried-and-true design, but are more complex and have more moving parts than disc brakes, and are less efficient than disc brakes. Interestingly, though, hybrids like the Toyota Prius and GMC Yukon Hybrid incorporate drum brakes into their regenerative braking system.
Still, it's not hard to replace and overhaul drum brakes on your vehicle if you follow the steps carefully.
Why you should inspect and replace brake shoes
Worn shoes can dramatically reduce your braking system's stopping power and lead to dangerous increased stopping distances. Ignoring worn shoes can also lead to more expensive repairs, such as grooved brake drums that will also have to be replaced. Worn rear shoes will also accelerate front disc pad wear, causing a low brake pedal and delayed braking response.
Depending on whether the drum brakes are in the front or the rear and the type of vehicle you drive, their service life may range anywhere from 30k miles up to 100k or more. This is why you should check them after each oil change to be on the safe side. Even if you don't think the shoes are worn yet, without removing the drum you can't always detect leaks from the piston or other internal problems that could cause a safety issue.
Common signs of worn brake shoes
Now that you know how brake shoes work, here are some signs they aren't working as well as they should be:
- Squealing or rubbing noises
- Pulling to one side during braking
- Reduced braking power
- Ineffective parking brake
This is a project that needs some know-how
-
Release the emergency brake before starting and consult your repair manual for instructions specific to your vehicle. Improperly installed brakes can be dangerous.
-
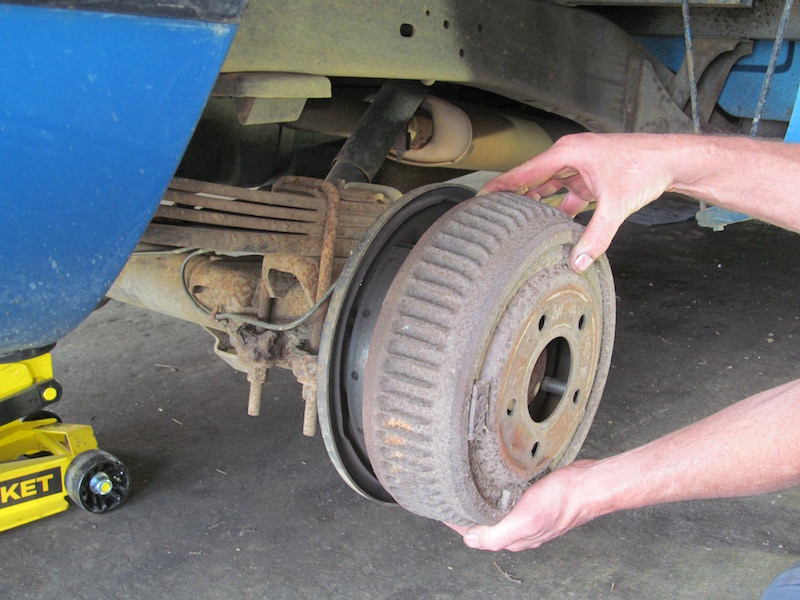
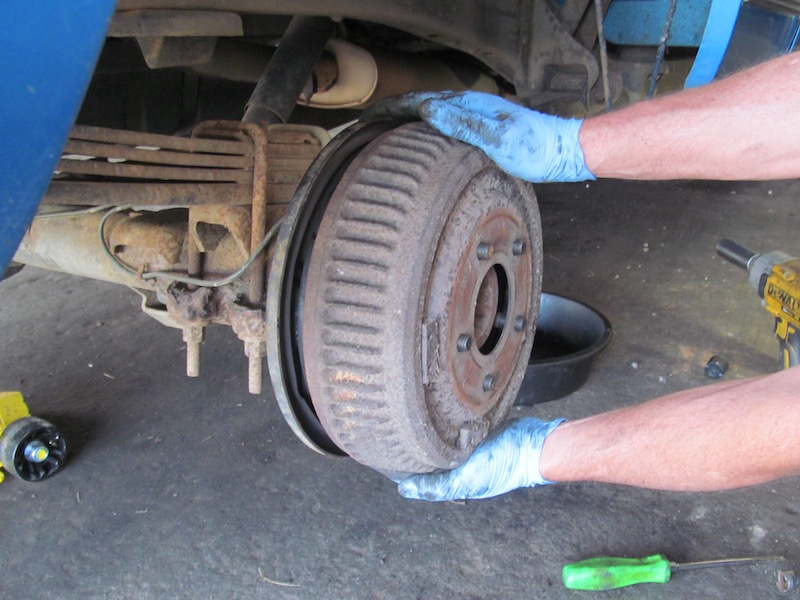
Remove the brake drum and inspect the brake assembly for signs of leakage. Leaky wheel cylinders must be replaced. Take a picture or make notes about the layout before proceeding.
-
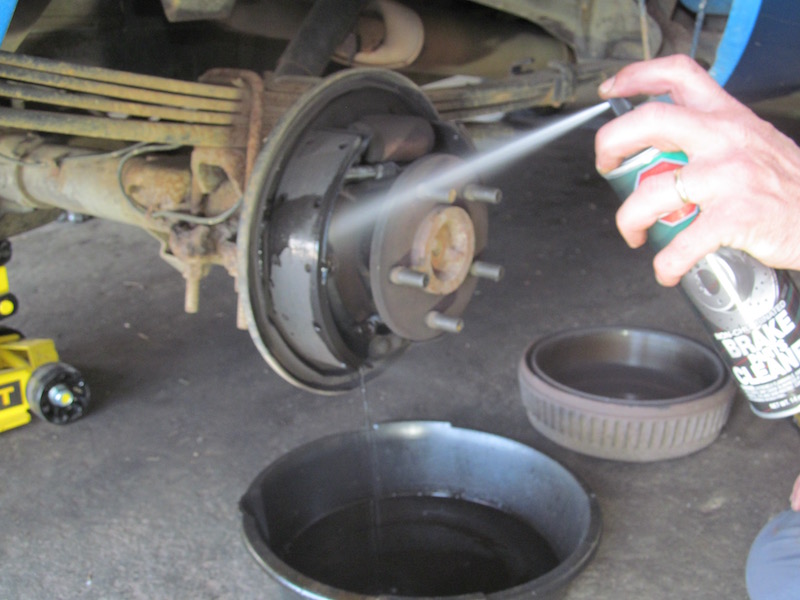
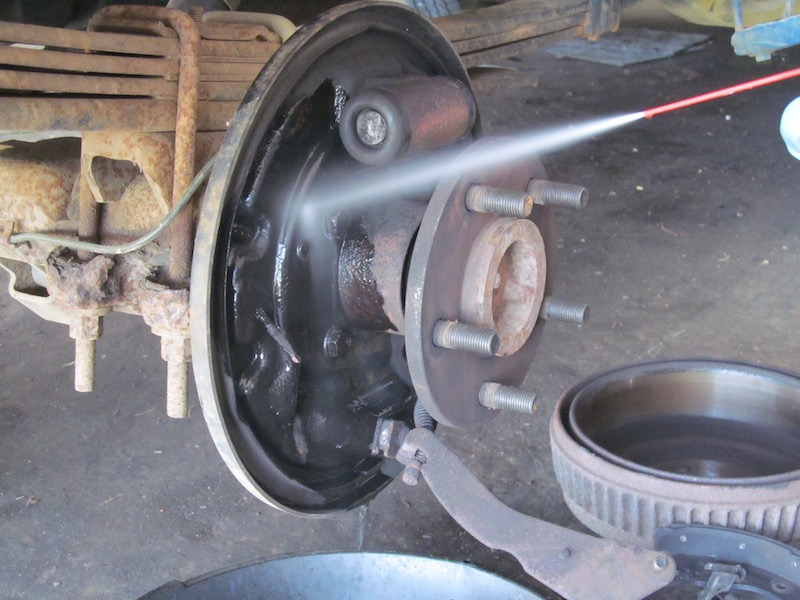
Clean everything with brake cleaner, using a drip tray beneath. Allow cleaner to dry, then remove the top return springs. Leave one set of brakes assembled for reference.
-
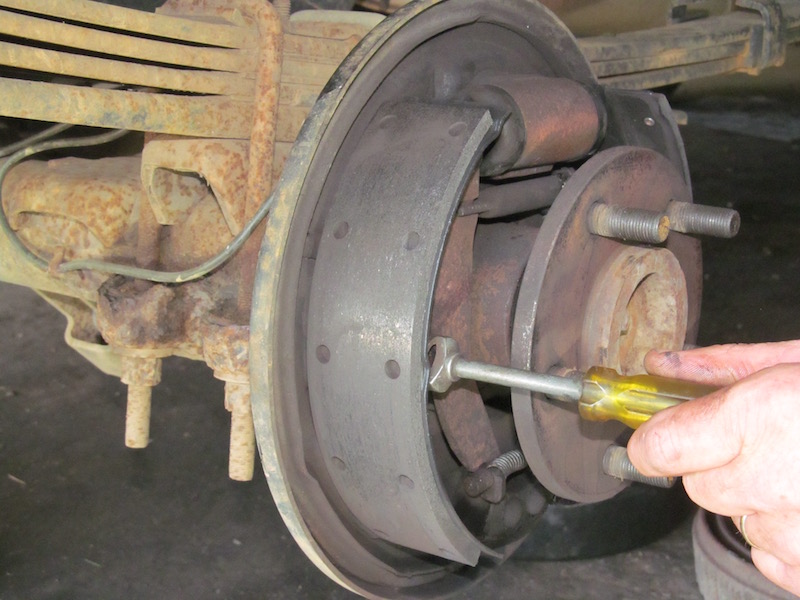
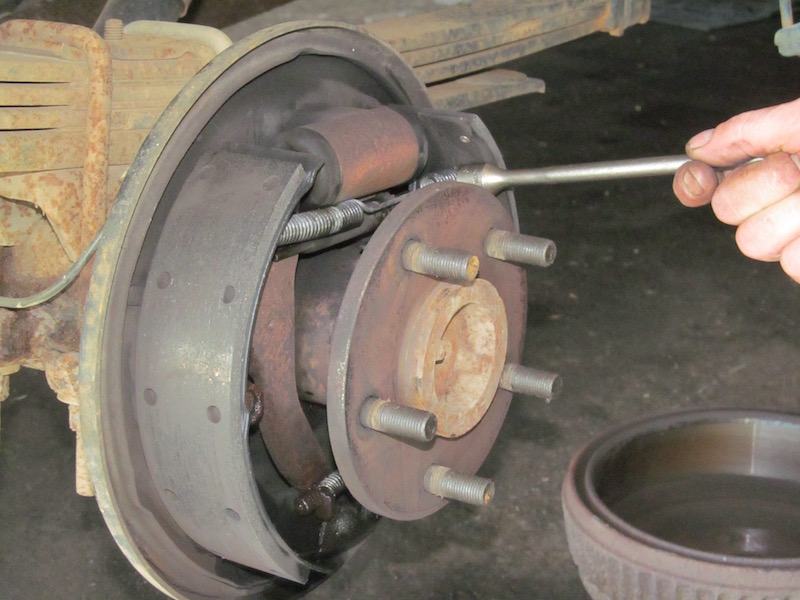
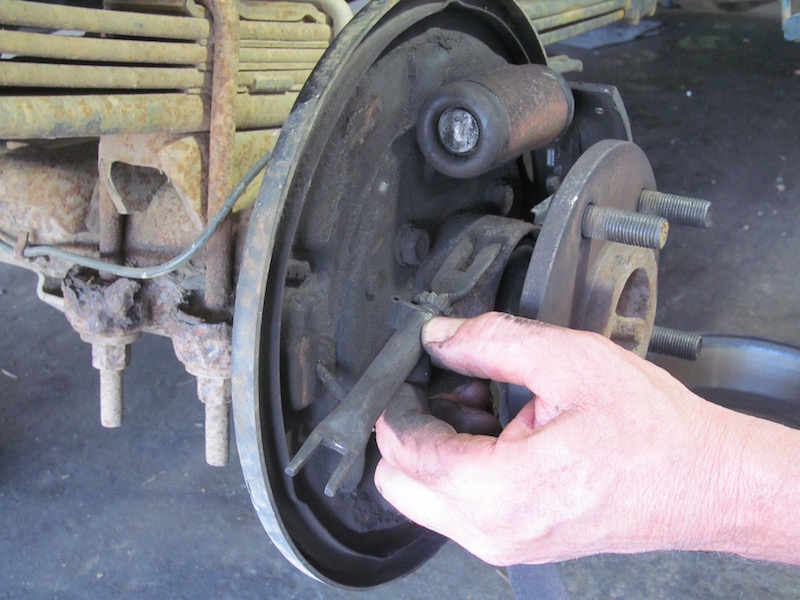
Remove the hold down spring assemblies. A special removal tool makes this job a breeze. Stop the retaining post from turning by holding it from behind with your finger.
-
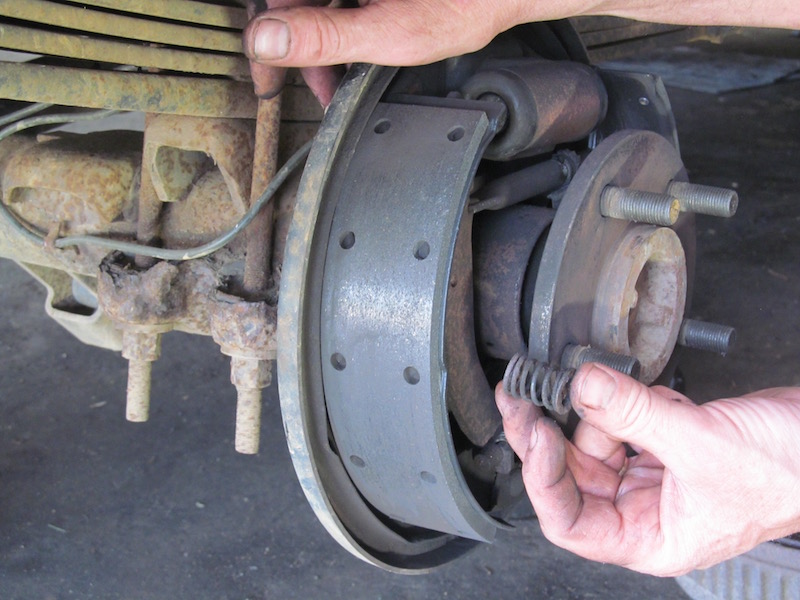
Remove the brake shoe return spring; your specially designed brake spring pliers will come in handy here.
-
Remove the assembly that captures the adjuster, then the adjuster itself. Note the adjuster direction as it will need to go back in the same way. Lightly lubricate the threads with high-temp grease.
-
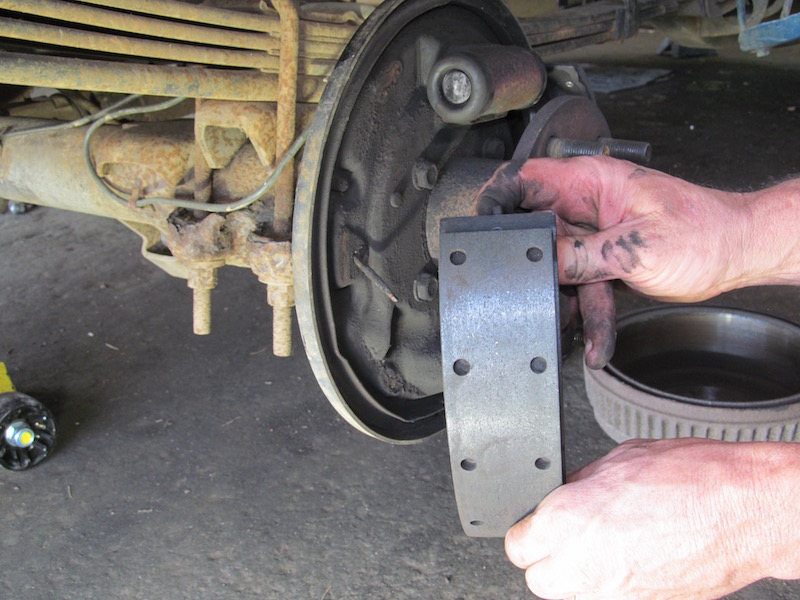
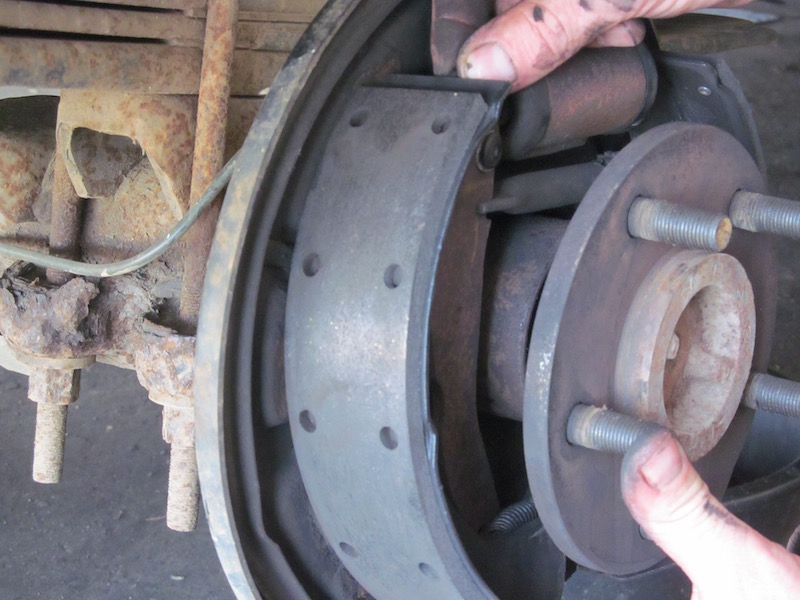
Remove the shoes and emergency brake cable clip if required. Use a screwdriver to remove clip and pliers to reinstall.
-
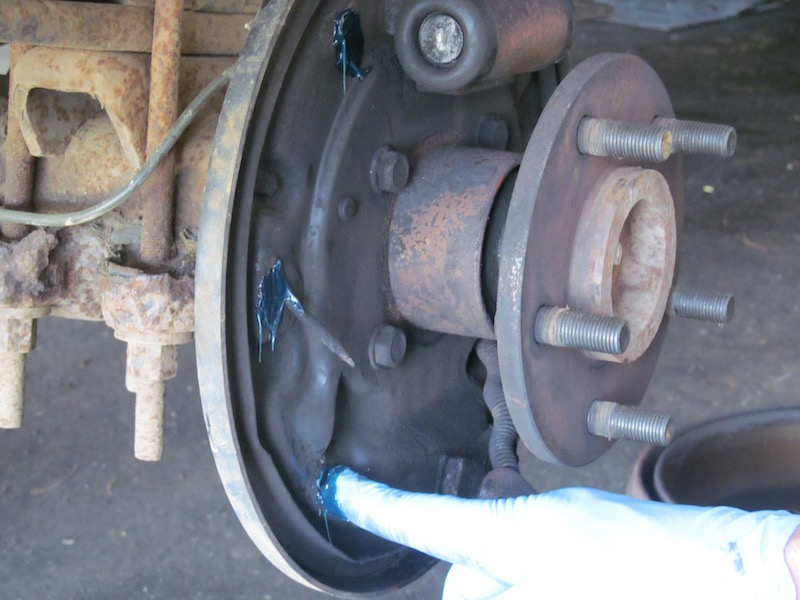
Clean the backing plate with brake cleaner. Allow to dry. Apply a light film of high-temp grease to the flat spots where the shoes contact the backing plate.
Note: If you use a penetrating oil like WD-40 or PB Blaster, remember these are not lubricating oils. You'll need a separate grease for lubrication of the brake backing plate.
-
Reverse the disassembly process using the new hardware and springs from your brake kit. Back down the adjuster so the drum will install easily. Clean the shoes one last time.
-
Reinstall the drum. Adjust the brakes by turning the adjusting star and the drum at the same time until you hear the shoes contact the drum. On some older vehicles, the final adjustment can be made by driving in reverse and hitting the brakes.
Remember to wait a couple of hours after driving to start any brake work—brake components get very hot.
Be sure your vehicle is safely on jackstands before starting, and never work on a vehicle that's only supported by a jack.
Never reinstall worn brake components of any kind. Heat and metal fatigue weaken old springs and other components. Make sure to use all parts of a drum brake rebuild kit.


