What are the symptoms of a bad CV axle?
There are several common symptoms of a CV axle that needs to be replaced.
- A click or pop when turning the wheel. You’ll hear this coming from the side that has the failing CV joint.
- Vibration while driving, especially during acceleration. Keep in mind there are many other causes of vibrations, so if this is your only symptom, further diagnosis is needed.
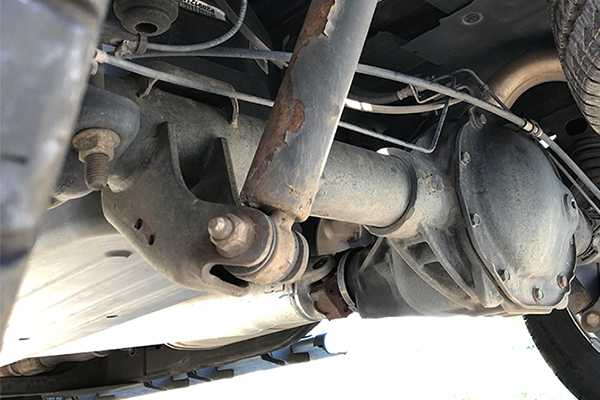
- Grease slinging on components under the vehicle. Boots enclose inner and outer CV joints to keep essential grease in and contaminants like water and road grit out. These boots wear out over time and can split or tear, causing grease to sling in a circular pattern under the vehicle.
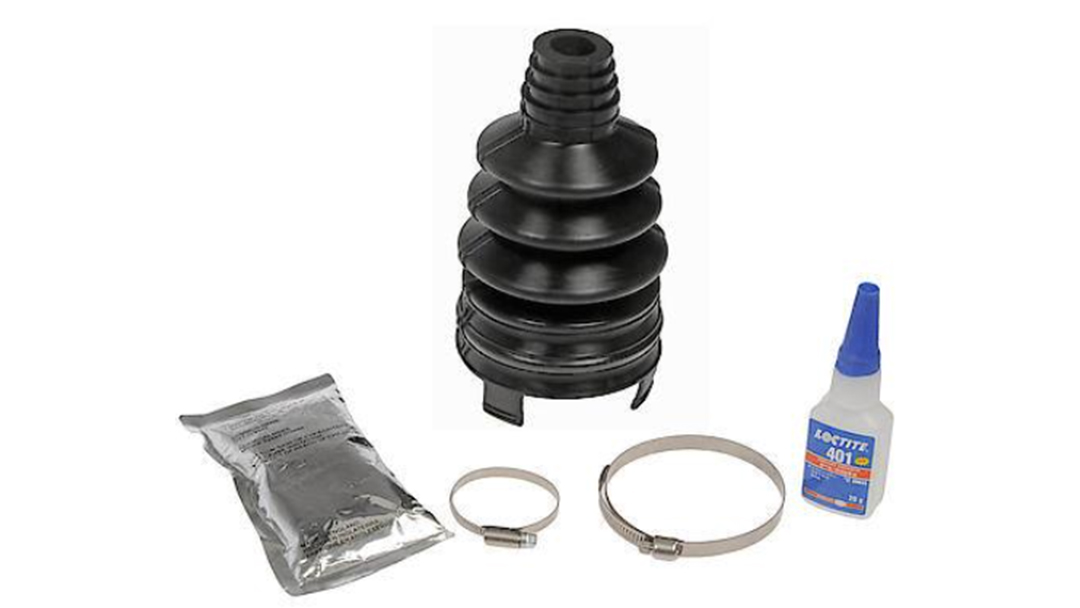
There is some good news, though. Often, the whole axle doesn’t have to be replaced. Replacing the boots is often sufficient to keep your axle going for many more miles. Enter your vehicle info at Advance Auto Parts to find a boot kit that fit your vehicle. These split boot kits are a real time saver because the axle can stay on the vehicle. All you need to do is remove the old boot and replace with the new, split boot and follow instructions for sealing and securing it in place. We’ll go through those steps below.
Keep in mind that replacing only the CV boots is not always recommended. Although it’s an appealing option because it’s cheaper and easier, you don’t want to be dealing with a failed axle in a year or two. If your axle boots are torn wide open or if you’re hearing frequent clicking or popping noises, be aware that your axle will likely need to be replaced at some point due to a loss of lubrication at the CV joints.
This is a project that needs some know-how
-
Use a lug wrench to break loose the lug nuts. Then, raise the car with a jack either under the frame or the crossmember. Support the car with a jack stand and remove the wheel.
-
Remove the damaged CV boot. CV boots are secured to the axle shaft and joint housing with clamps that are pinched tight to secure them. These clamps can be removed by cutting them where they're pinched together. Once the clamps are removed, the boot can be carefully cut away with a utility knife.

Source | Mike Aguilar
-
Once the boot is removed, you'll need to clean the old grease out of the joint and inspect it for damage. Use several shop towels to wipe as much of the grease away as possible. You'll then need to use brake cleaner spray to get the spots the towels can't reach. Rotate the wheel and carefully inspect the joint for cracks, pits and rust. Only the boot needs to be replaced if you find none.
-
Pack new grease into the CV joint.
-
Place the split boot over the CV joint and apply the sealant to both halves. Press the halves together and wait the specified time for the boot to cure, around an hour.
-
Slide on the clamps and tighten them down.
-
Reassemble any components that were disconnected or removed, torquing all fasteners to specification. Take a test drive to confirm a job well done!
Ready to tackle this project? Download our mobile app to quickly find the parts your vehicle needs. Take your time and work carefully, and you’ll be back on the road in one afternoon. You’ve got this!